This is part five of five in my Use Docker to create a local WordPress development environment tutorial.
In this article, we’re going to review what we learned and put a few final touches on our Docker Compose application to combine everything we learned.
In WordPress and Docker: Introduction to Docker and basic Docker commands, I introduced some high-level concepts around Docker images and containers, and showed you how to get started with the creation, use, and management of Docker resources on the command line.
Continue reading “WordPress and Docker: Putting it all together”
This is part four of five in my Use Docker to create a local WordPress development environment tutorial.
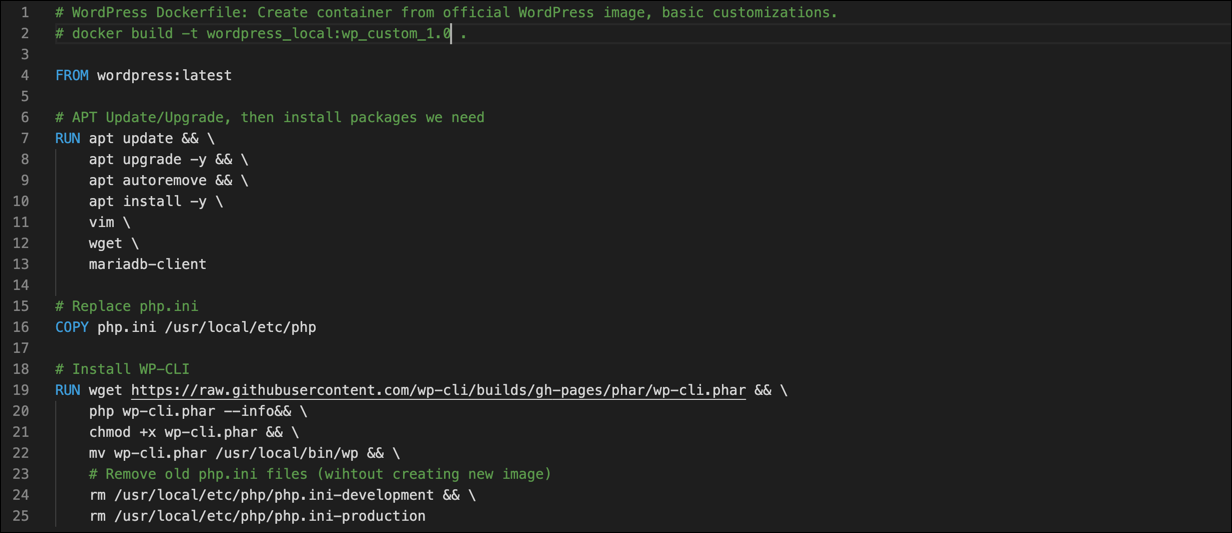
About Dockerfiles
Dockerfiles are text files that provide instructions to Docker on how to start with an existing image and build a new, customized image through a series of instructions. I was aware of Dockerfiles from my introduction to Docker on LinkedIn Learning. I did not think I would need them for a basic WordPress environment. But I wanted to learn more about them, and thought that I could use Dockerfiles to create customized WordPress and phpMyAdmin images to use with Docker Compose. That way I could avoid manually customizing the container the way I did in WordPress and Docker: Customize a Docker container.
Continue reading “WordPress and Docker: Build custom images with Dockerfiles”
This is part three of five in my Use Docker to create a local WordPress development environment tutorial.
While I am using these containers to build and improve a WordPress site, sometimes I need to make changes to the containers themselves to meet my requirements.
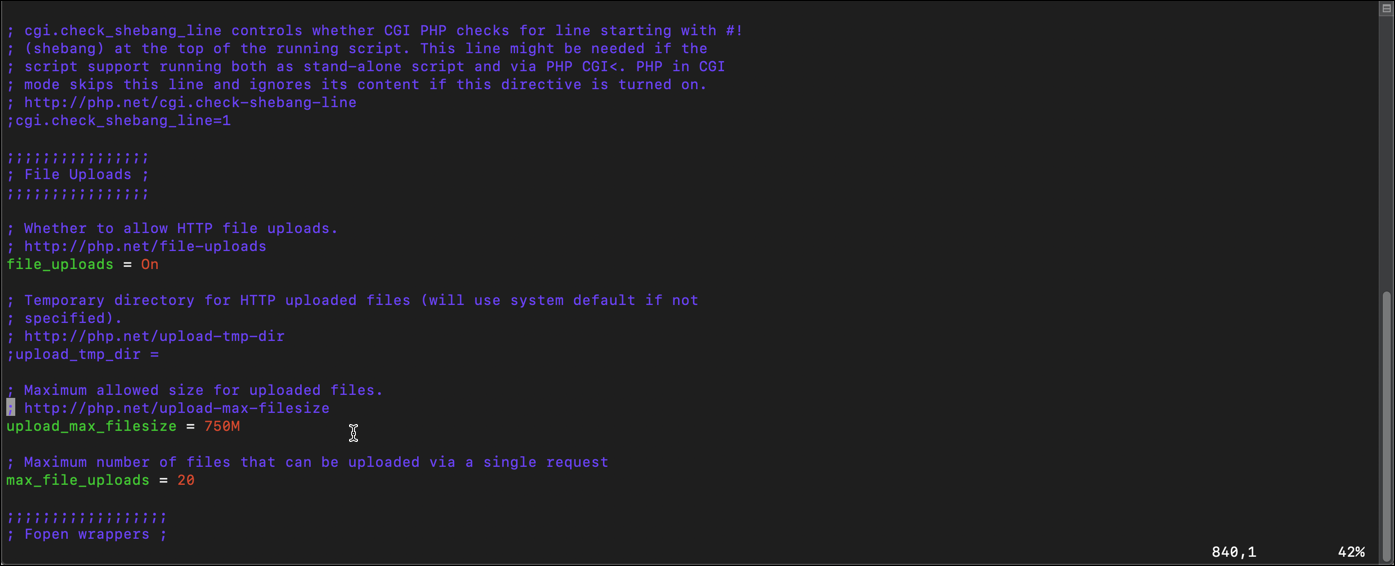
By default PHP restricts the size the files you can upload into WordPress to 2MB. This is limiting, because I may want to upload an audio file or a high-res photo. And if I want to import the database for an existing WordPress site into phpMyAdmin, that database can easily be larger than the 2MB cut off. So I need to change that value in PHP.ini. Let’s start with the container created from wordpress:latest, which I named wp in my Docker Compose file. First, I will enter the container to use Bash as root using the docker exec command. The docker exec allows you to run a command in the container. This command looks a lot like the command we used in WordPress and Docker: Introduction to Docker and basic Docker commands to create a container and enter it with a Bash shell – note the -ti and bash options, with the name of the container, wp.
$ docker exec -ti wp bash
Continue reading “WordPress and Docker: Customize a Docker container”
This is part two of five in my Use Docker to create a local WordPress development environment tutorial.
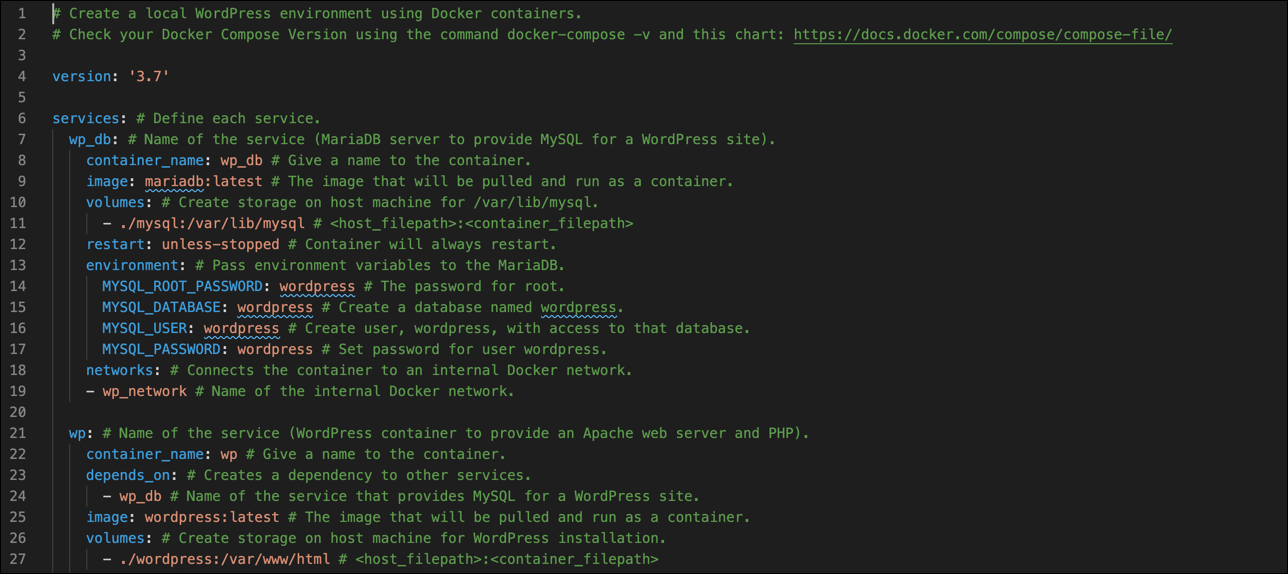
I was wondering about how one might use Docker to create a local WordPress site and quickly found a tutorial from Docker. The tutorial leverages another component of Docker, Docker Compose, which is often used for the orchestration of multiple containers that work together. That’s the way I tried to say it, but here’s how Docker explains Docker Compose:
… A tool for defining and running multi-container Docker applications. With Compose, you use a YAML file to configure your application’s services. Then, with a single command, you create and start all the services from your configuration.
Docker.com
Continue reading “WordPress and Docker: Use Docker Compose”
This is part one of five in my Use Docker to create a local WordPress development environment tutorial.
Docker Terminology
The two most important terms to understand with Docker are images and containers. Some people use the terms interchangeably, but they are not. I could try and explain it, but Docker already did a better job:
Fundamentally, a container is nothing but a running process, with some added encapsulation features applied to it in order to keep it isolated from the host and from other containers. One of the most important aspects of container isolation is that each container interacts with its own private filesystem; this filesystem is provided by a Docker image. An image includes everything needed to run an application – the code or binary, runtimes, dependencies, and any other filesystem objects required.
Docker.com
Continue reading “WordPress and Docker: Introduction to Docker and basic Docker commands”
Update: May 2020
This article was originally created in December 2018 and completely updated in June 2019. I will not be updating it going forward.
Although the instructions remain valid, if you are using the WordPress Certified by Bitnami and Automattic Amazon Machine Image to create an EC2 instance to host a WordPress site, Bitnami has more recently integrated its own Let’s Encrypt certificate client into the Bitnami Helper Tool, which you can read more about in WordPress on Amazon EC2: Connect to an Instance via SSH.
This is part of my Introduction to Installing Let’s Encrypt Certificates for WordPress on Amazon Web Services (AWS) tutorial.
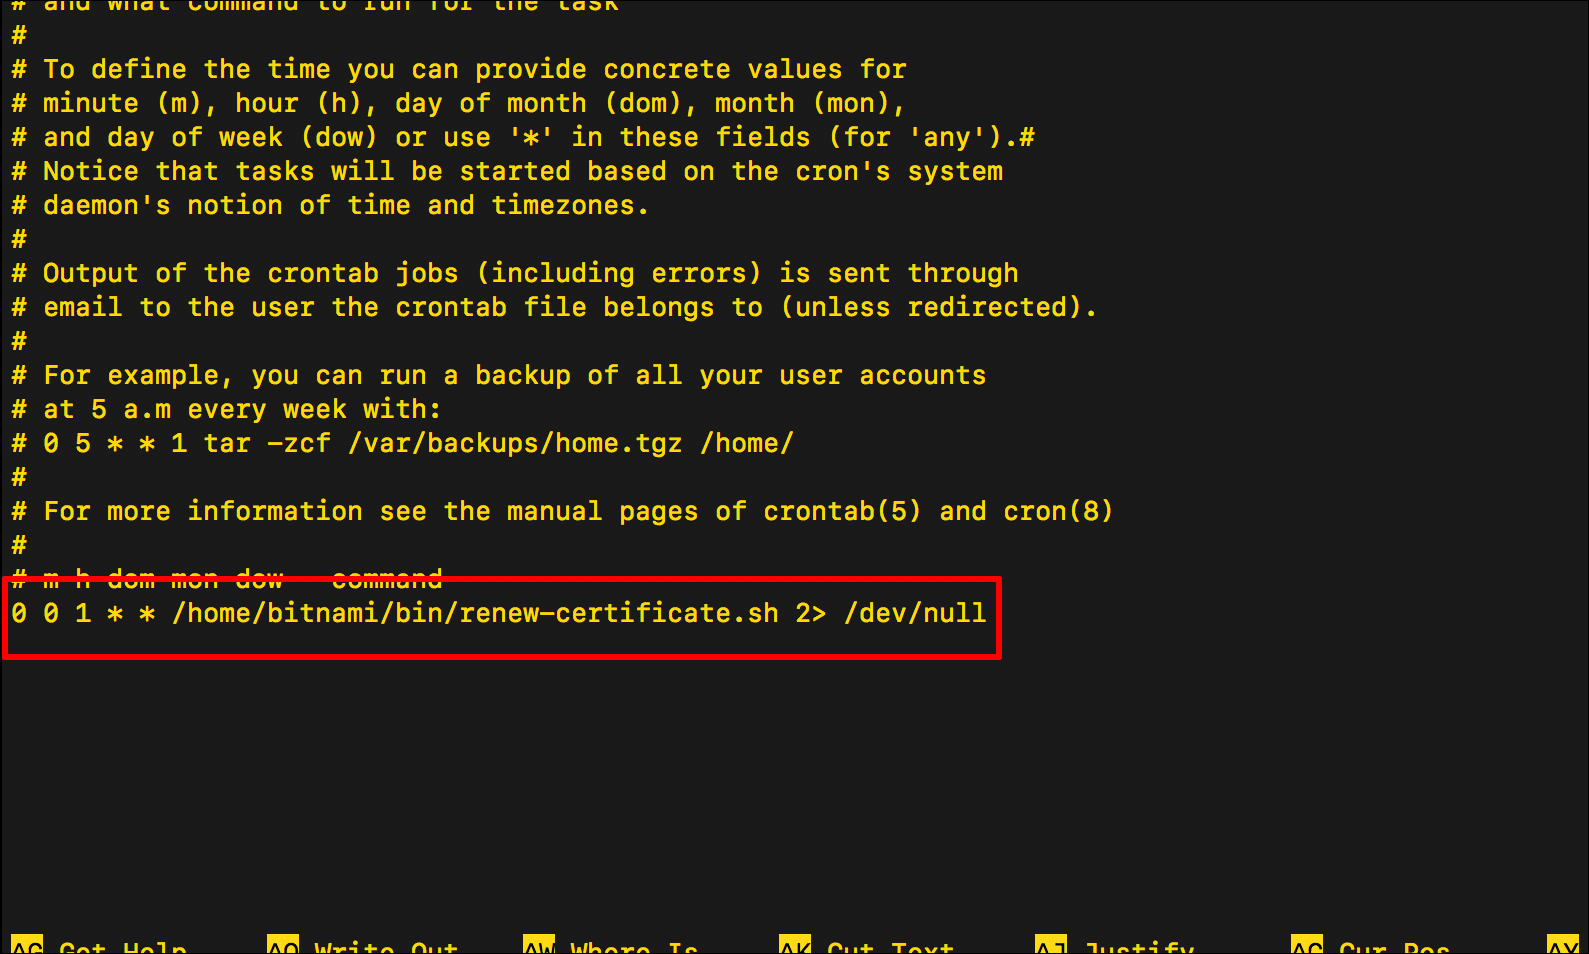
In Renew a Let’s Encrypt SSL/TLS Certificate on an AWS EC2 Instance I went over the steps to renew your Let’s Encrypt SSL/TLS certificate, which will expire every 90 days. It’s good to know how to renew the certificate yourself, but once you do you can write a bash script to automate that renewal process. Here’s a basic overview of how that works:
- Create a bash script that executes the same renew commands used in Renew a Let’s Encrypt SSL/TLS Certificate on an AWS EC2 Instance.
- Upload that bash script to your EC2 instance.
- Create a cron job. Cron is a function in Linux that allows you to schedule automated tasks, allowing you to run your bash script at a specific time and a specific interval. In this example, we will execute the bash script at midnight on the first day of every month.
Unfortunately, when I tried this, it didn’t actually work for me. So the steps below provide a description of the symptom, along with my workaround.
Continue reading “Automate the Renewal of a Let’s Encrypt SSL/TLS Certificate on an AWS EC2 Instance”
Update: May 2020
This article was originally created in December 2018. I will not be updating it going forward.
Although the instructions remain valid, if you are using the WordPress Certified by Bitnami and Automattic Amazon Machine Image to create an EC2 instance to host a WordPress site, Bitnami has more recently integrated its own Let’s Encrypt certificate client into the Bitnami Helper Tool, which you can read more about in WordPress on Amazon EC2: Connect to an Instance via SSH.
This is part of my Introduction to Installing Let’s Encrypt Certificates for WordPress on Amazon Web Services (AWS) tutorial.
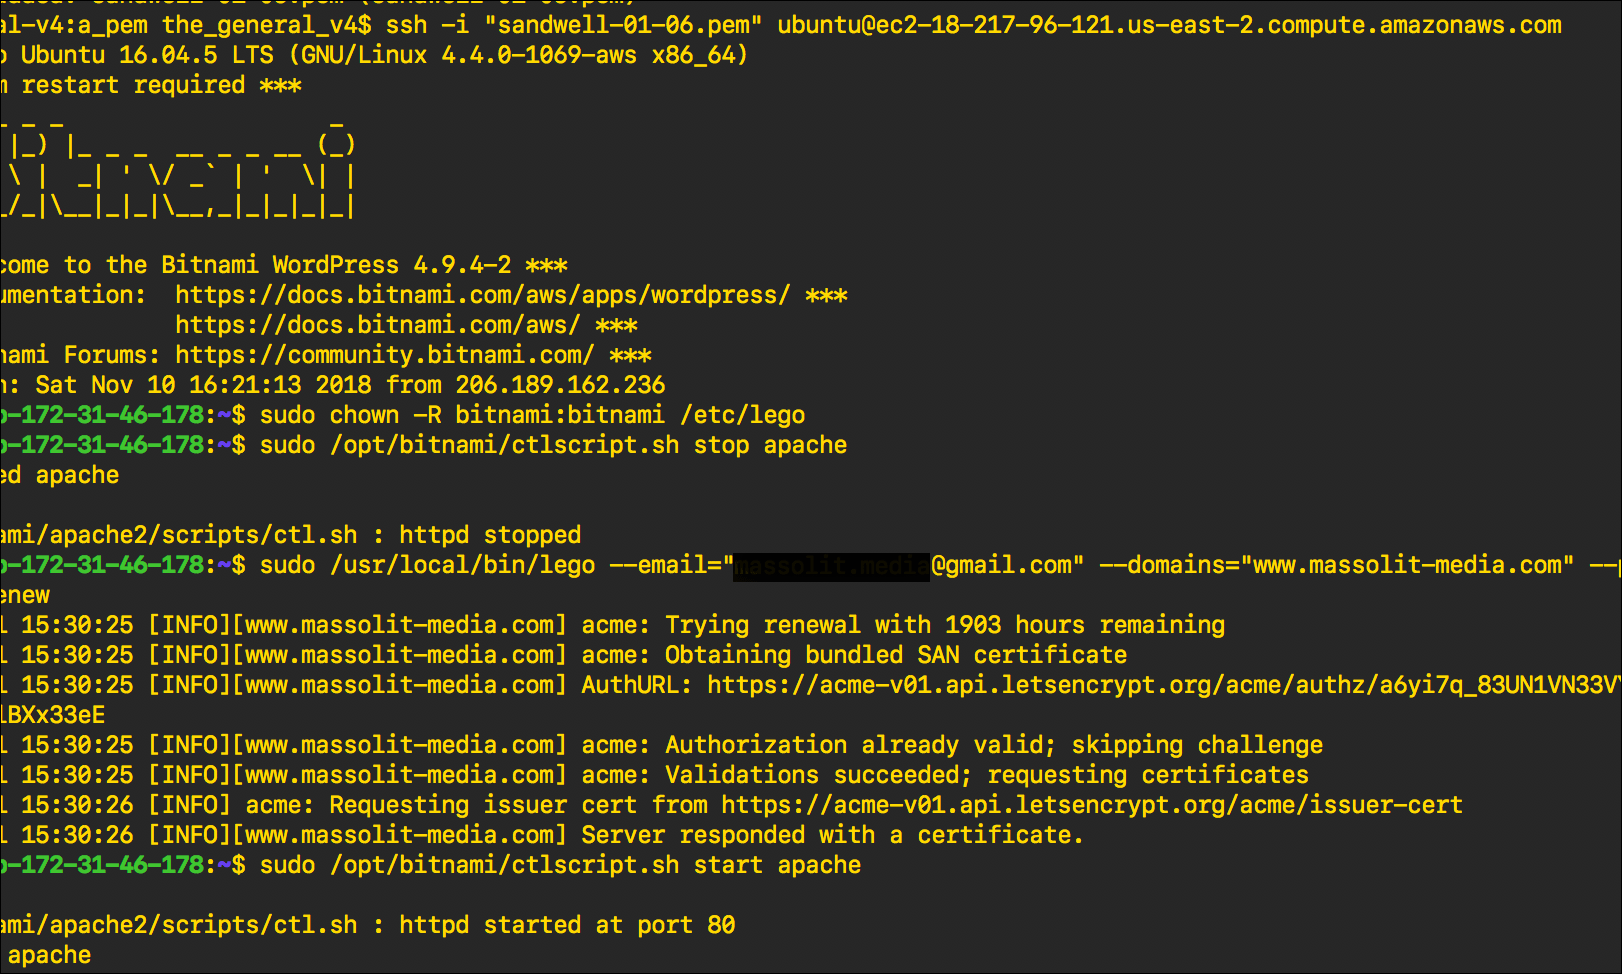
In Install a Let’s Encrypt SSL/TLS Certificate on an AWS EC2 Instance, we learned how to install the Lego client to create and manage TLS/SSL certificates provided by Let’s Encrypt. The certificates issued by Let’s Encrypt expire every 90 days, so you will need to renew them before they expire to maintain your website’s HTTPS connection. Let’s Encrypt will send you an email to notify you that your certificate is expiring soon.
Continue reading “Renew a Let’s Encrypt SSL/TLS Certificate on an AWS EC2 Instance”
Update: May 2020
This article was originally created in December 2018. I will not be updating it going forward.
Although the instructions remain valid, if you are using the WordPress Certified by Bitnami and Automattic Amazon Machine Image to create an EC2 instance to host a WordPress site, Bitnami has more recently integrated its own Let’s Encrypt certificate client into the Bitnami Helper Tool, which you can read more about in WordPress on Amazon EC2: Connect to an Instance via SSH.
This is part of my Introduction to Installing Let’s Encrypt Certificates for WordPress on Amazon Web Services (AWS) tutorial.
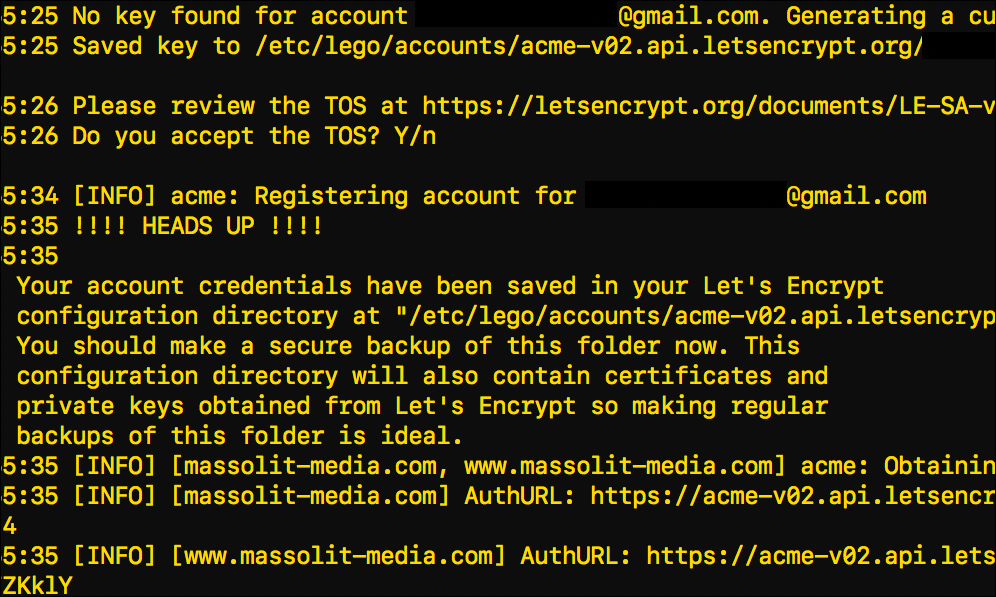
This post shows you to use your EC2 instance’s command-line interface to download and install Lego, a Let’s Encrypt client written in the Go programming language. Lego will allow you to create and manage SSL/TLS certificates from the Let’s Encrypt Certificate Authority.
In this example I am installing a Let’s Encrypt certificate on a LAMP-stack virtual server (in this case an EC2 instance from Amazon Web Services) over Secure Shell (SSH). After that, I’ll show you how to download a copy of your certificates and account information using an FTP client. I am using the macOS Terminal, which is Unix-based, but the Linux commands will be the same regardless of what command-line interface you are using. I am also using the Cyberduck FTP client, but any FTP client should work.
Continue reading “Install a Let’s Encrypt SSL/TLS Certificate on an AWS EC2 Instance”
This is part of my Introduction to Hosting WordPress on Amazon Web Services (AWS) tutorial.
- Are you new to hosting WordPress with an Amazon Web Services (AWS) EC2 instance using the WordPress Certified by Bitnami and Automattic Amazon Machine Image (AMI)?
- Are you having problems accessing the files in your WordPress installation via FTP?
- Do you see a Permission denied error message when you try to upload, edit, or delete a file from your WordPress Installation using FTP?
Read these instructions for a quick (and dirty) fix to this problem. After that, if you want, you can read on for an explanation.
Continue reading “WordPress on Amazon EC2: Permission Denied Error Message”
Update: May 2020
This article was originally created in 2018 and completely updated in May 2020. I will not be updating it going forward.
This is part of my Introduction to Hosting WordPress on Amazon Web Services (AWS) tutorial.
In this tutorial I will go over the steps needed to access your WordPress files by connecting to an Amazon Web Services (AWS) EC2 instance over FTP (or, more accurately, SFTP) using an FTP client.
Continue reading “WordPress on Amazon EC2: Connect to an Instance via FTP”

