Update: May 2020
This article was originally created in 2018 and completely updated in May 2020. I will not be updating it going forward.
This is part of my Introduction to Hosting WordPress on Amazon Web Services (AWS) tutorial.
In Launch an Amazon Web Services (AWS) EC2 Instance to Create a WordPress Site we set up an EC2 instance as a server for a WordPress site. Regardless of what your EC2 instance is a resource for, these tips can help you better manage your EC2 instances. I am using Firefox on a Mac, but these steps are platform- and browser-agnostic. In addition, you will need an AWS account and you will need to log in to that account as a root user or as an IAM user with admin privileges.
Naming EC2 Instances and Volumes
- Log in to your AWS account.
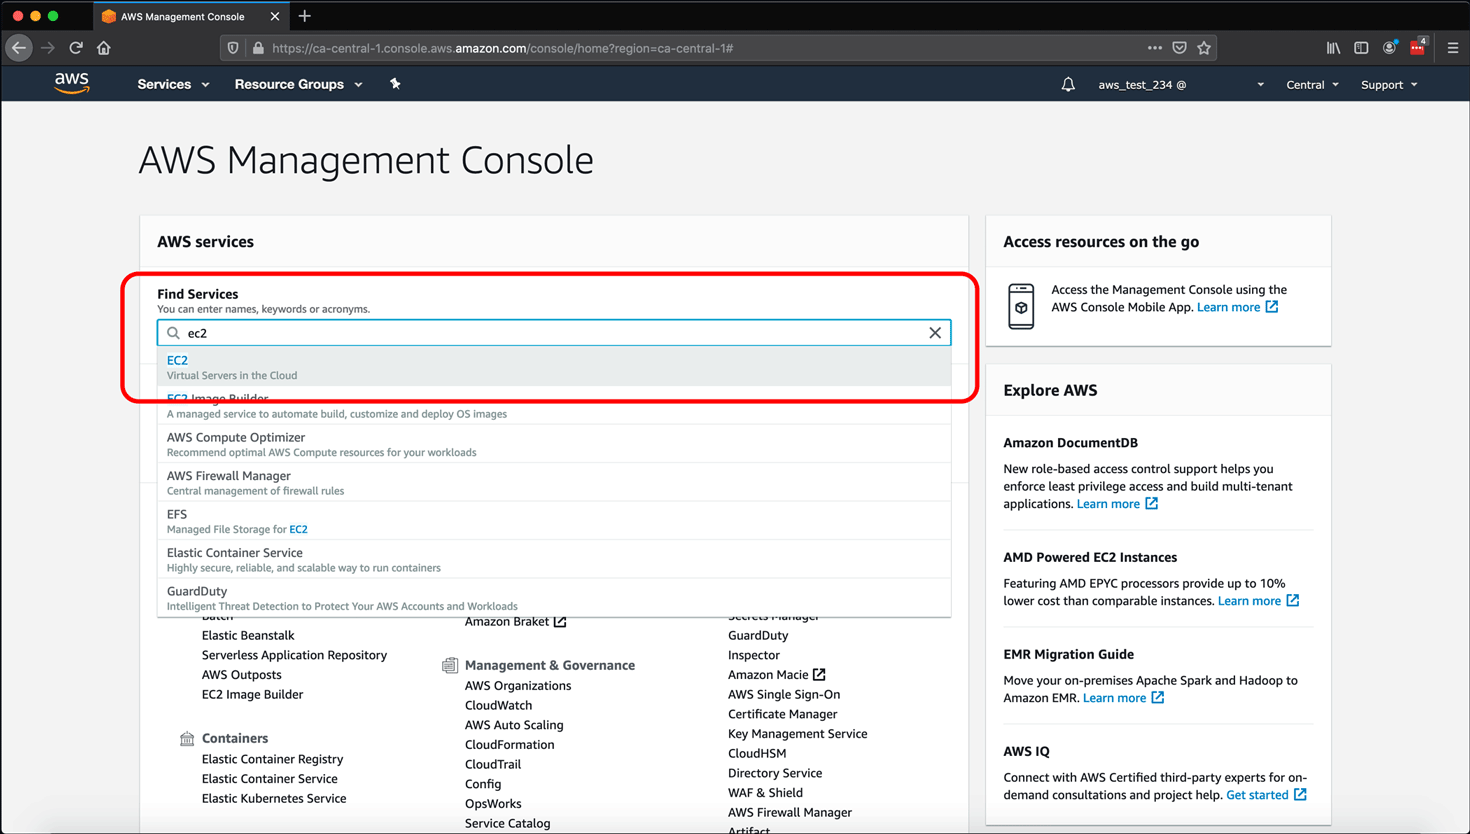
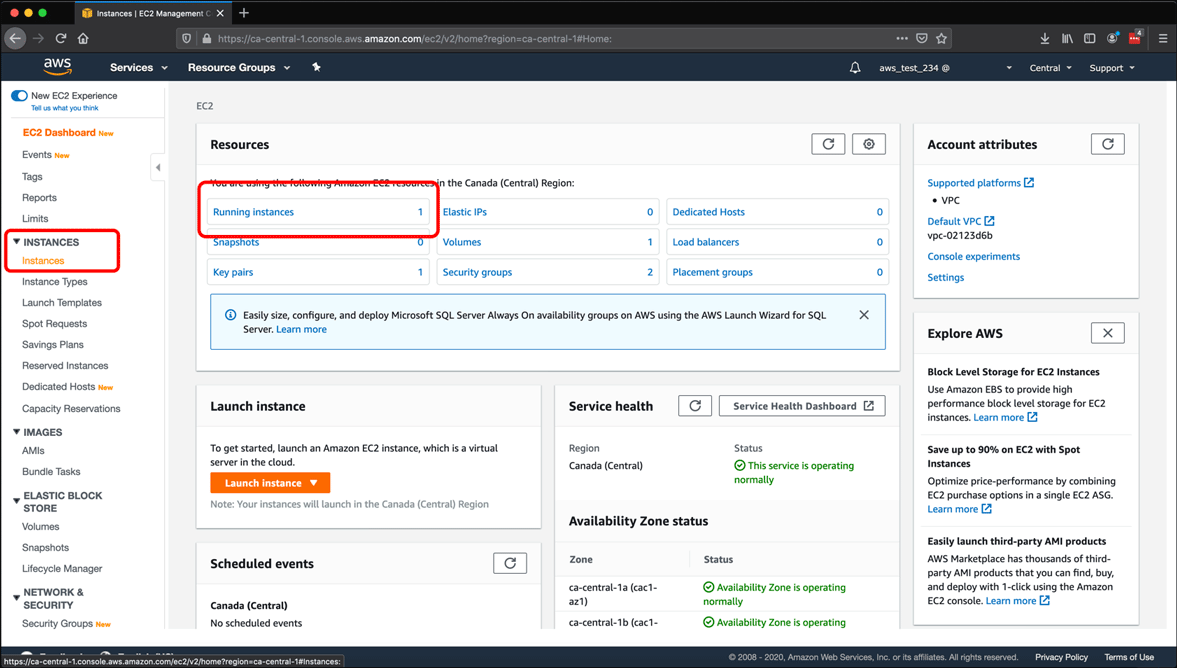
- From the AWS Management Console, type ec2 into the Find Services search box and select EC2 from the results.
- To see your instances, click Instances in the left sidebar under Instances or click Running Instances in the Resources pane.
- Your instances are listed in the middle of the screen. Select an instance. The details for that instance appear in the pane below. You can expand that pane to see more of the details by clicking the three dots at the top of the pane and dragging them up.
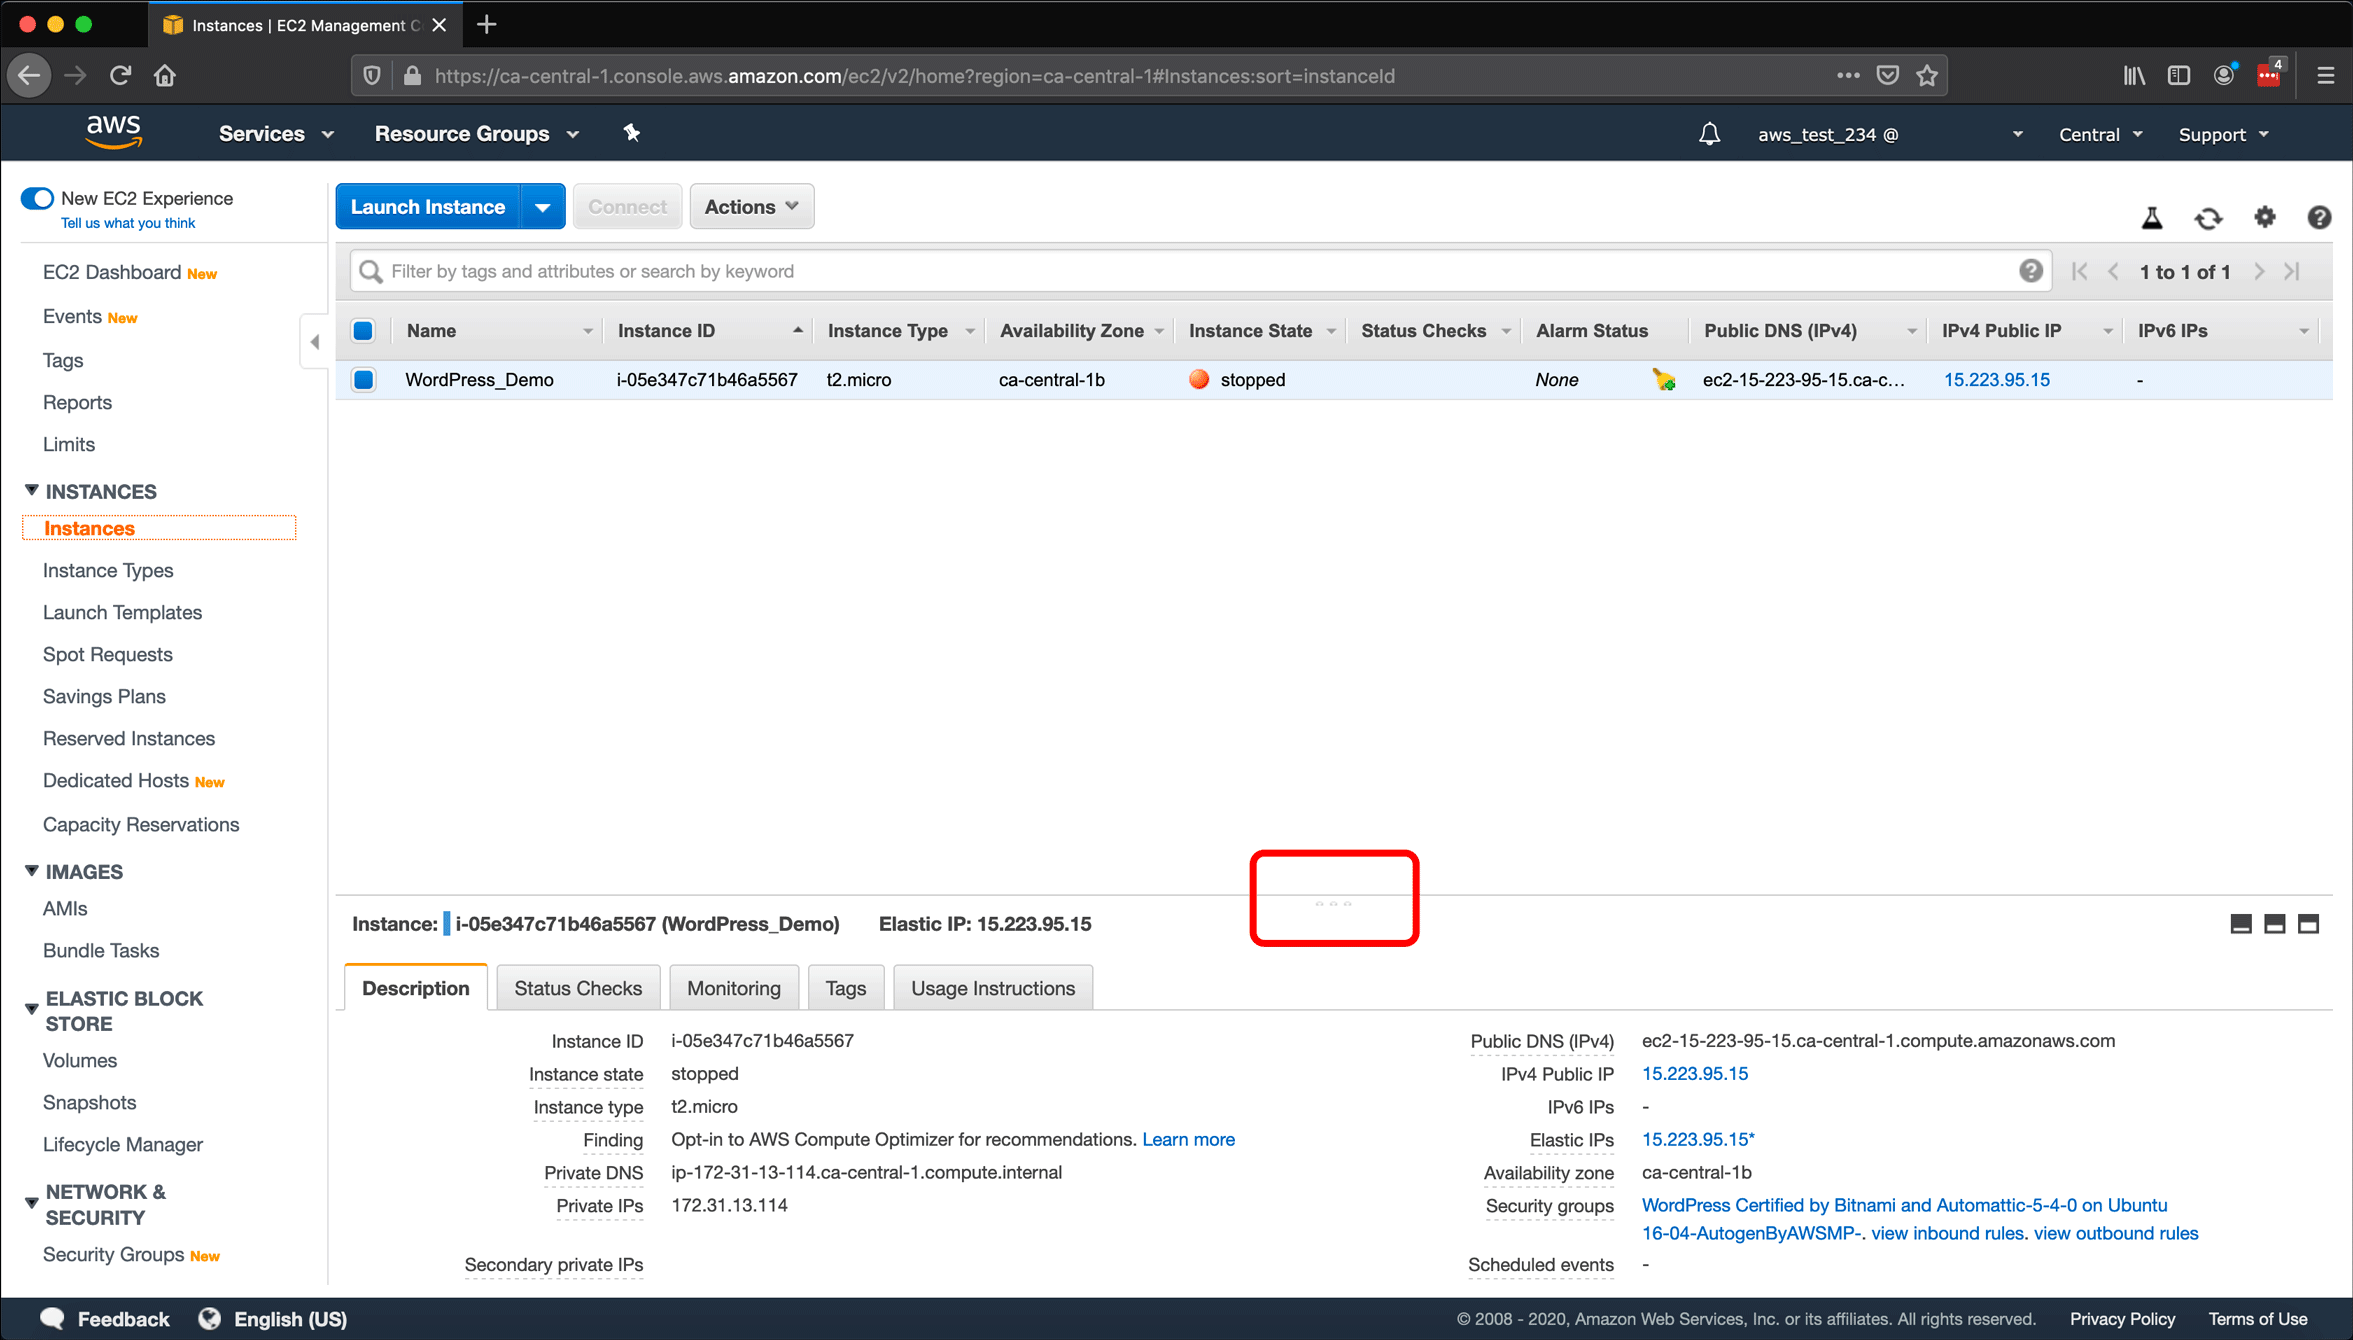
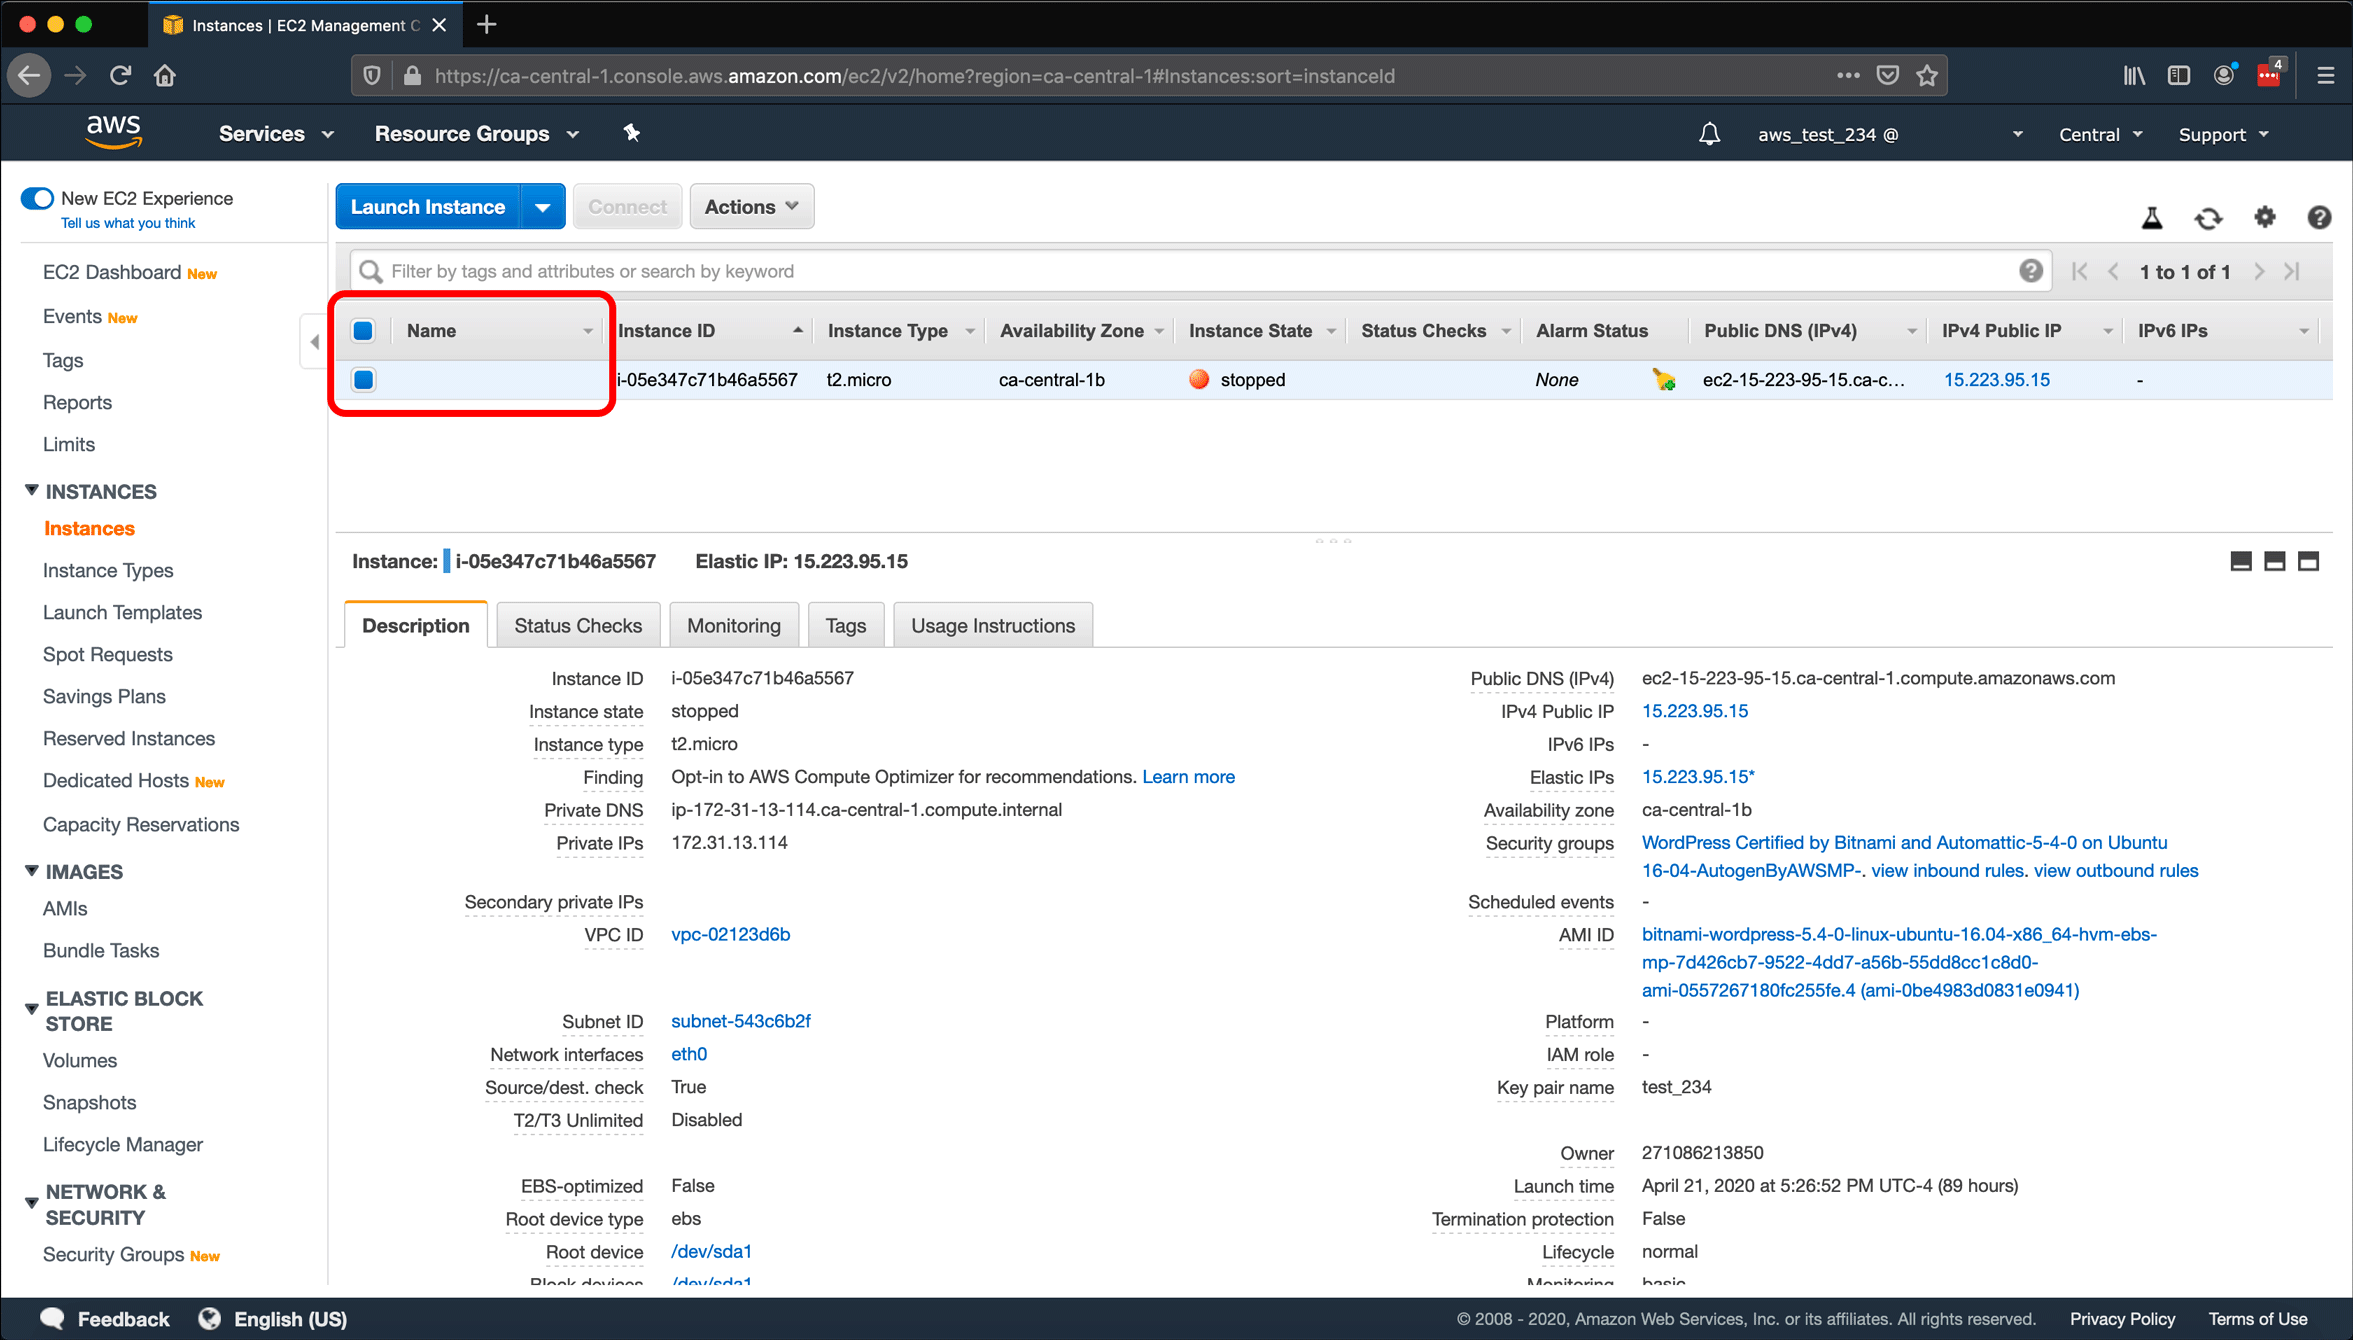
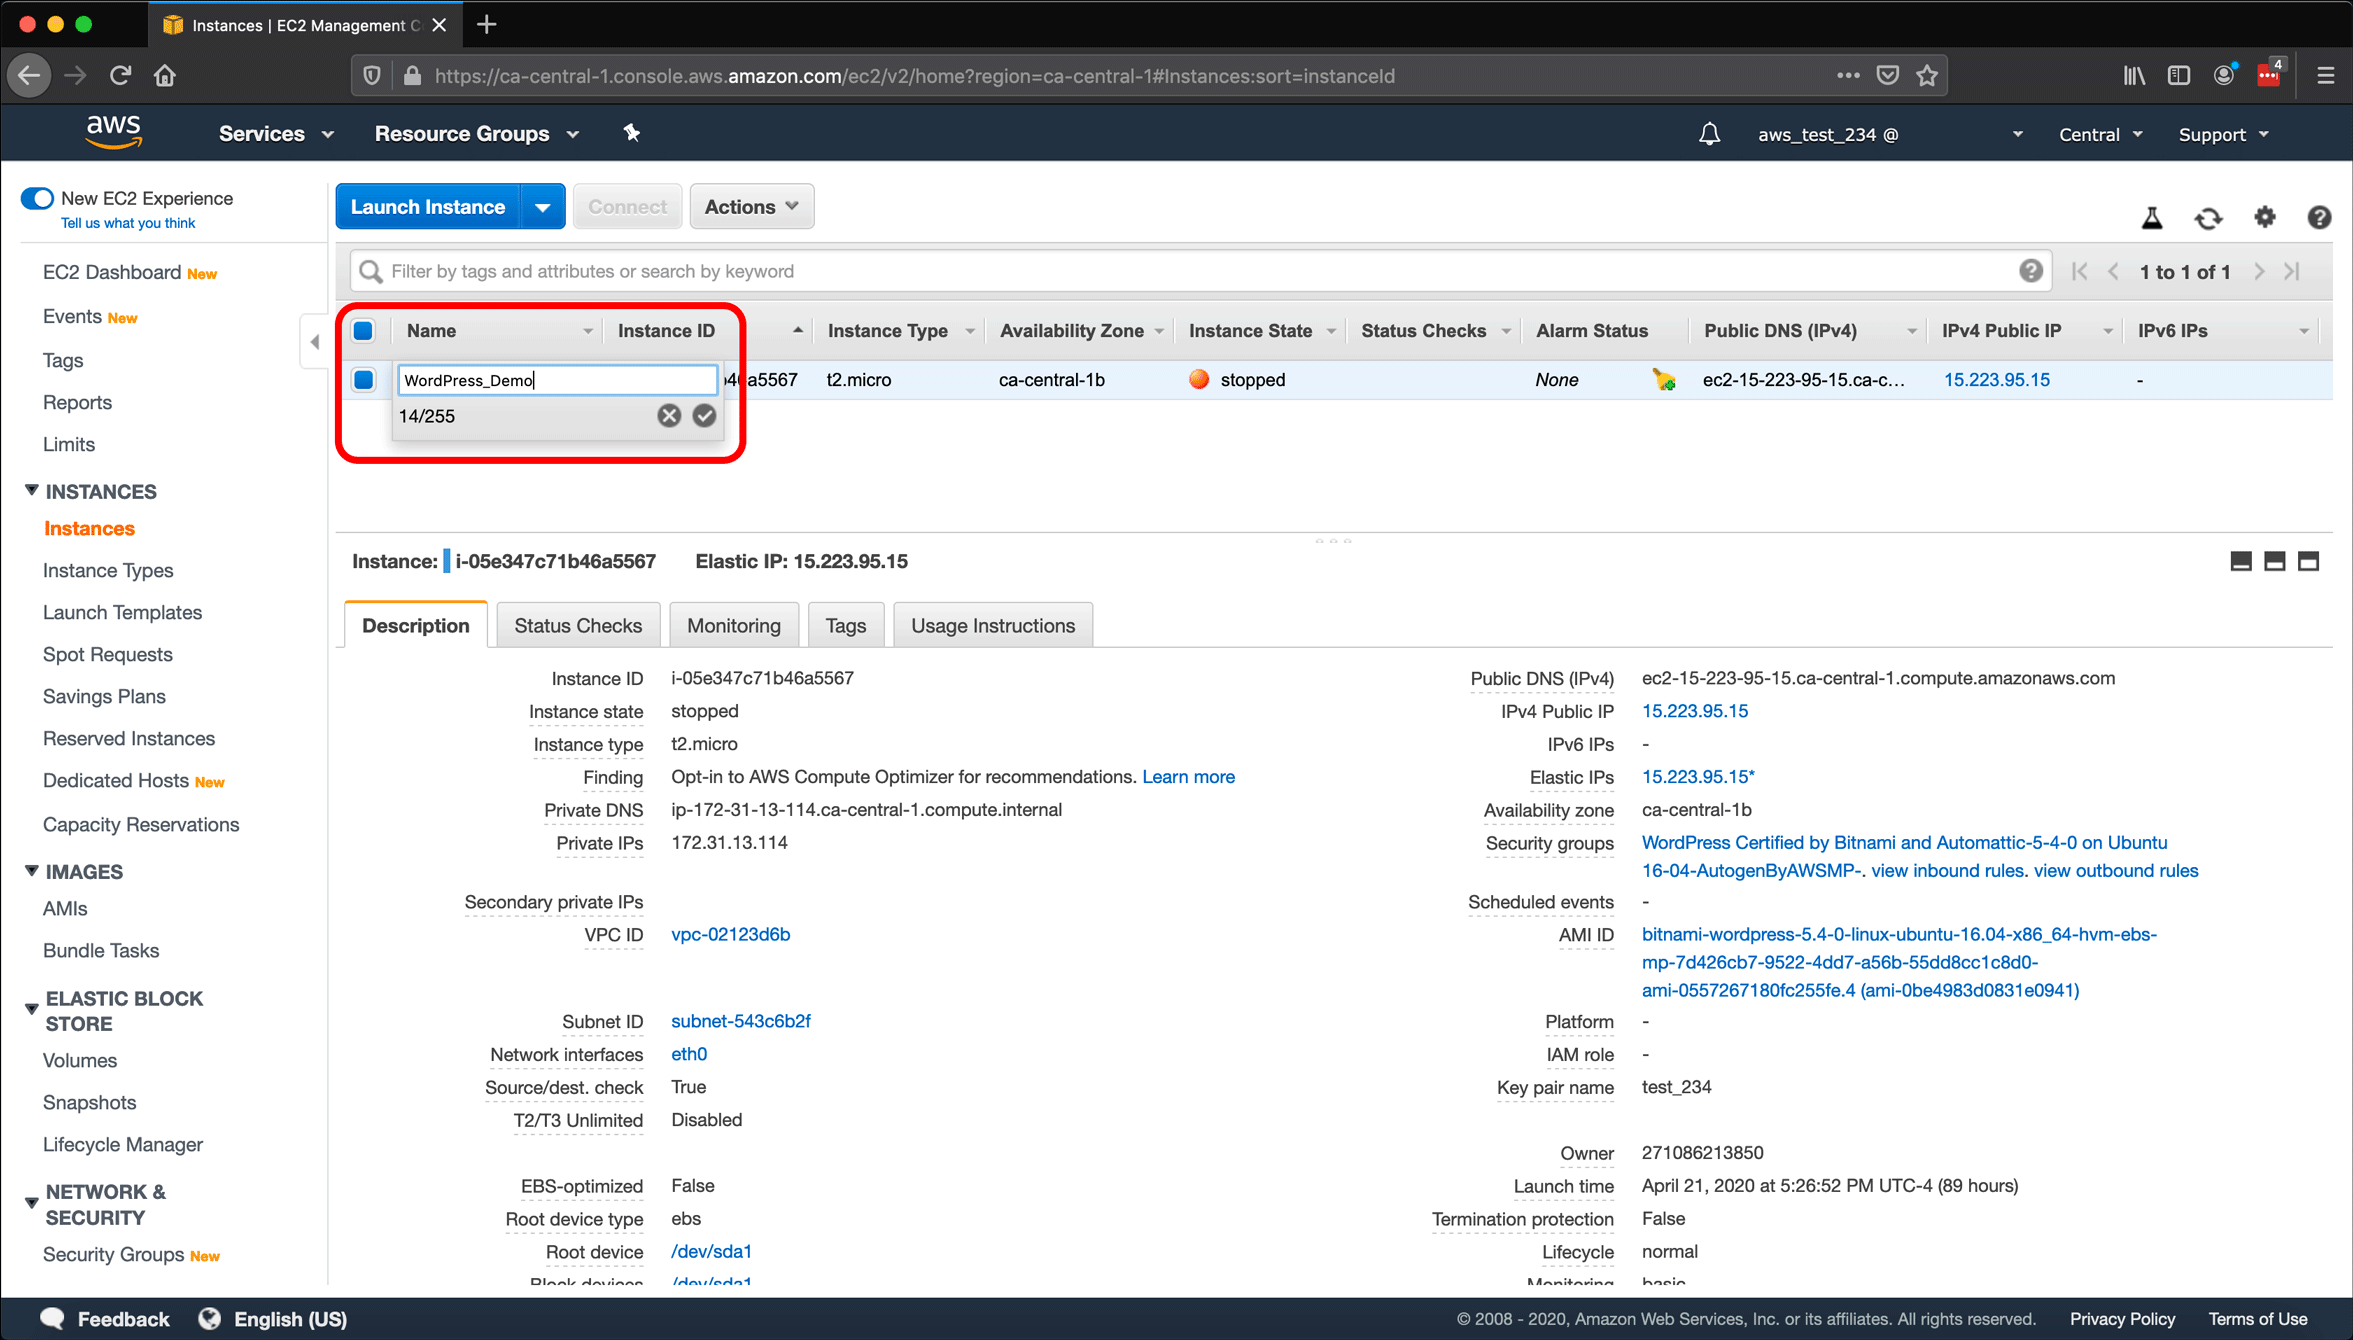
- When I created this instance, I included a Name as a tag; I find this useful to quickly identify what instance I am working with. But I will pretend I did not include that name and add it now. Hover over the Name column for the instance with your cursor.
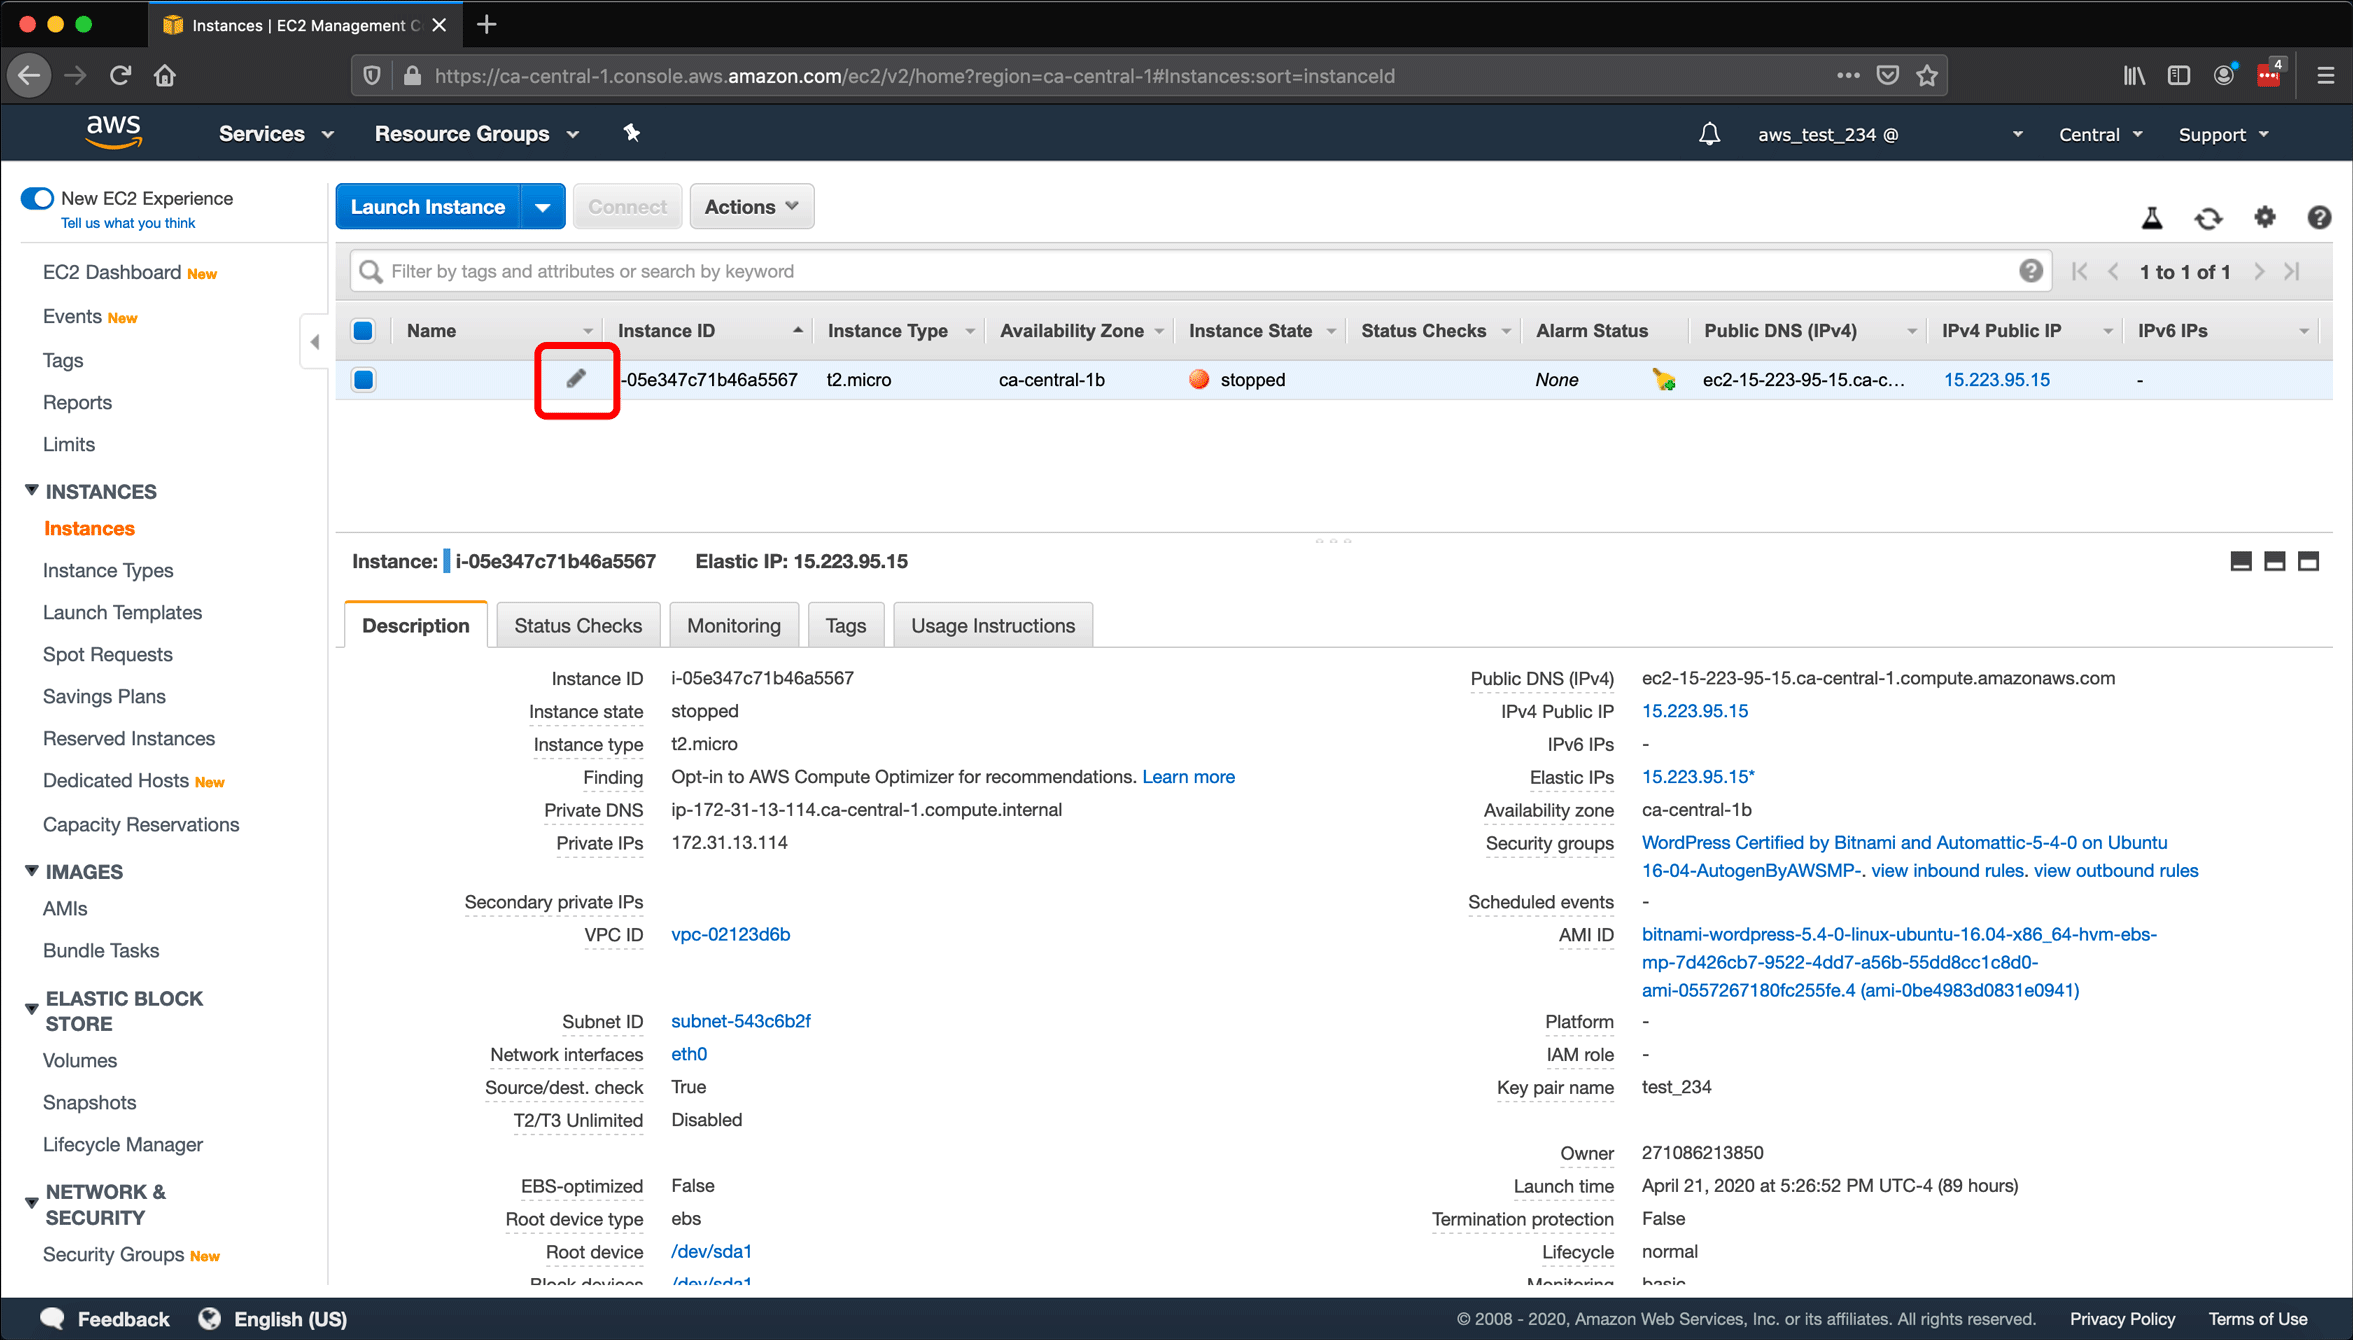
- Click the pencil icon that appears.
- Enter a Name for your instance and click the check icon to save it.
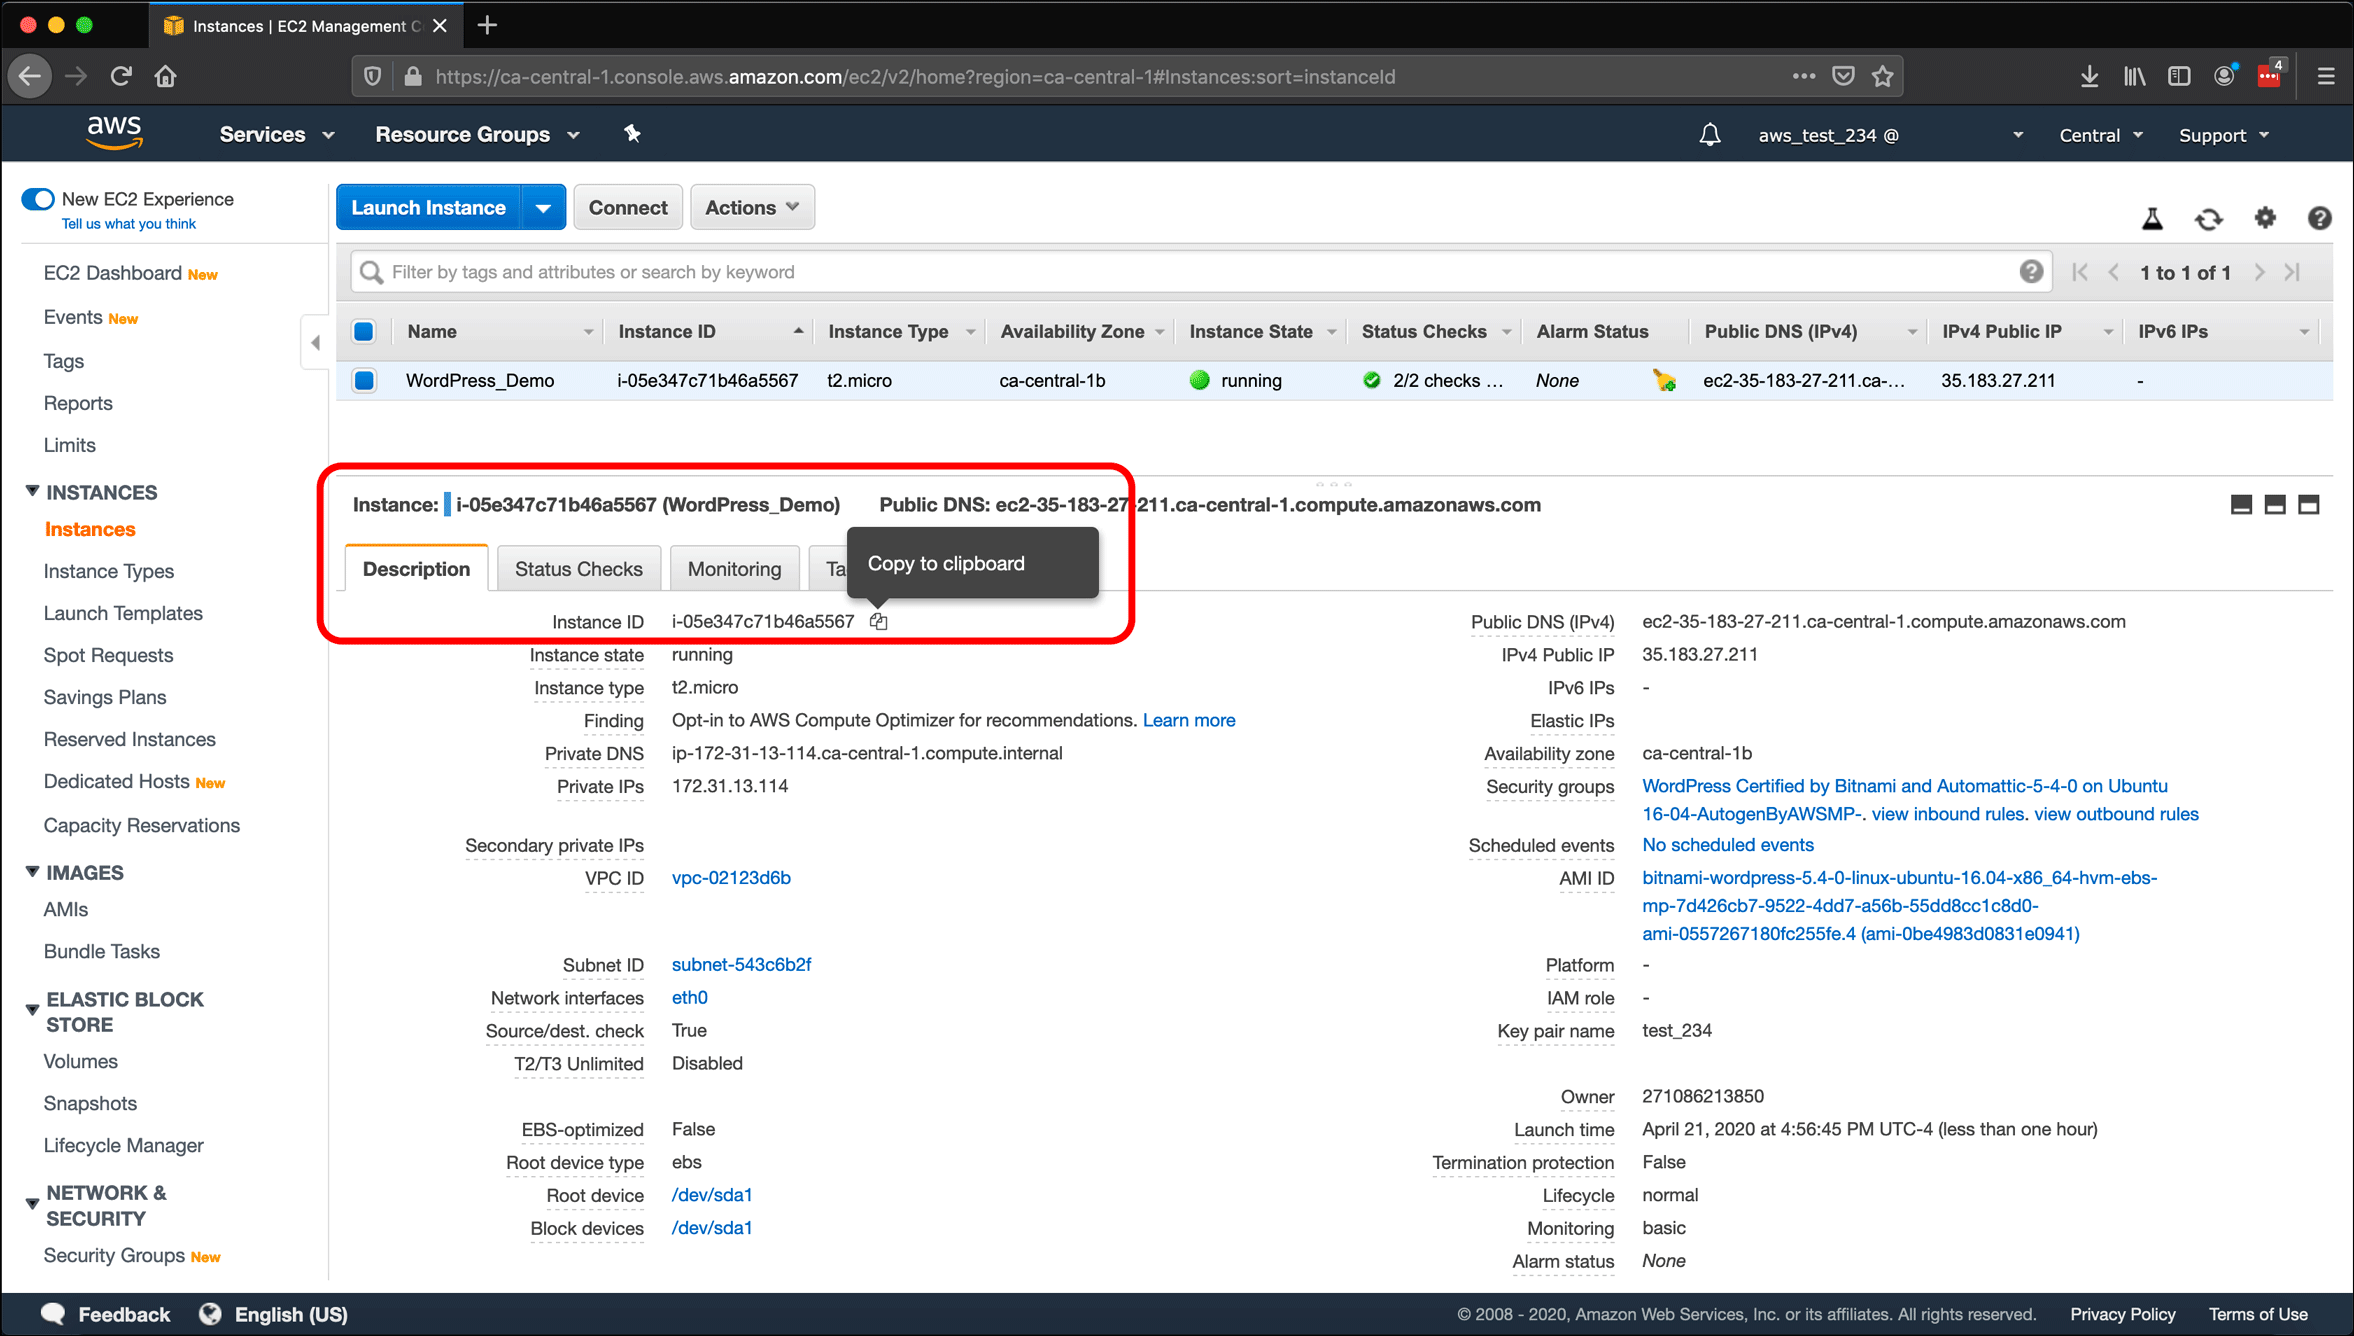
- Using Name as a tag helps you identify which instances you are working with, but AWS uses a unique identifier known as an Instance ID. The Instance ID is important for tracking which AWS resources are linked to one another. Under the Description tab, hover over Instance ID and copy the ID and save it somewhere so that you can easily refer to it. You will also notice that above the Description tab, your EC2 instance is identified with Instance: <Instance ID> (<The Name value you provided>).
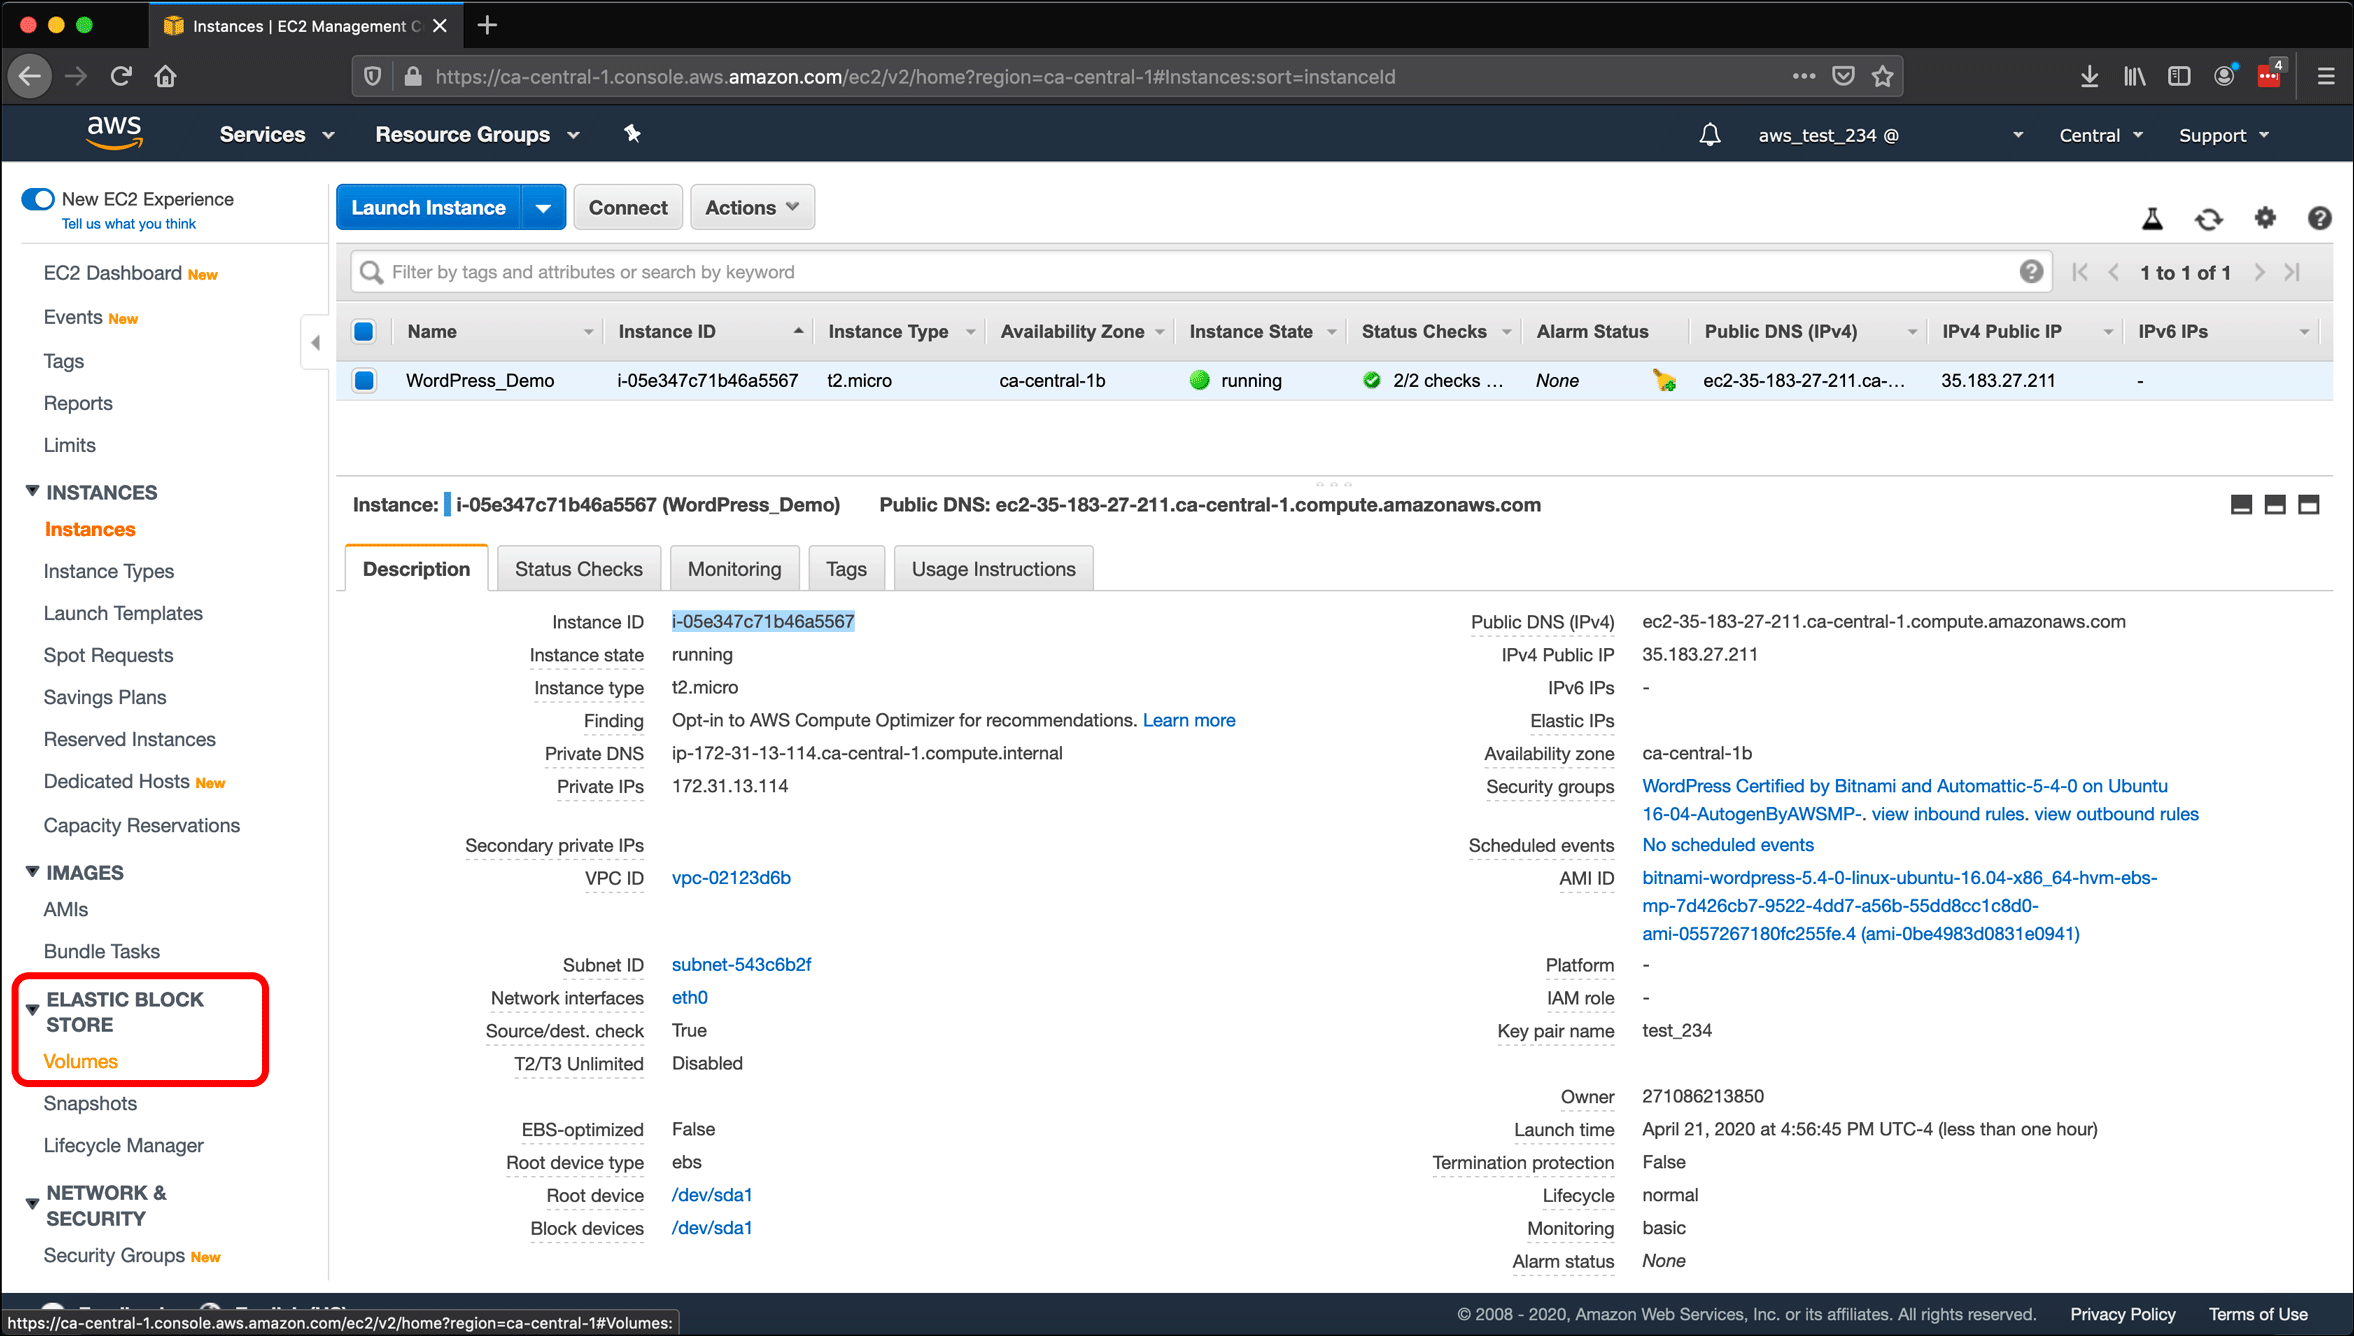
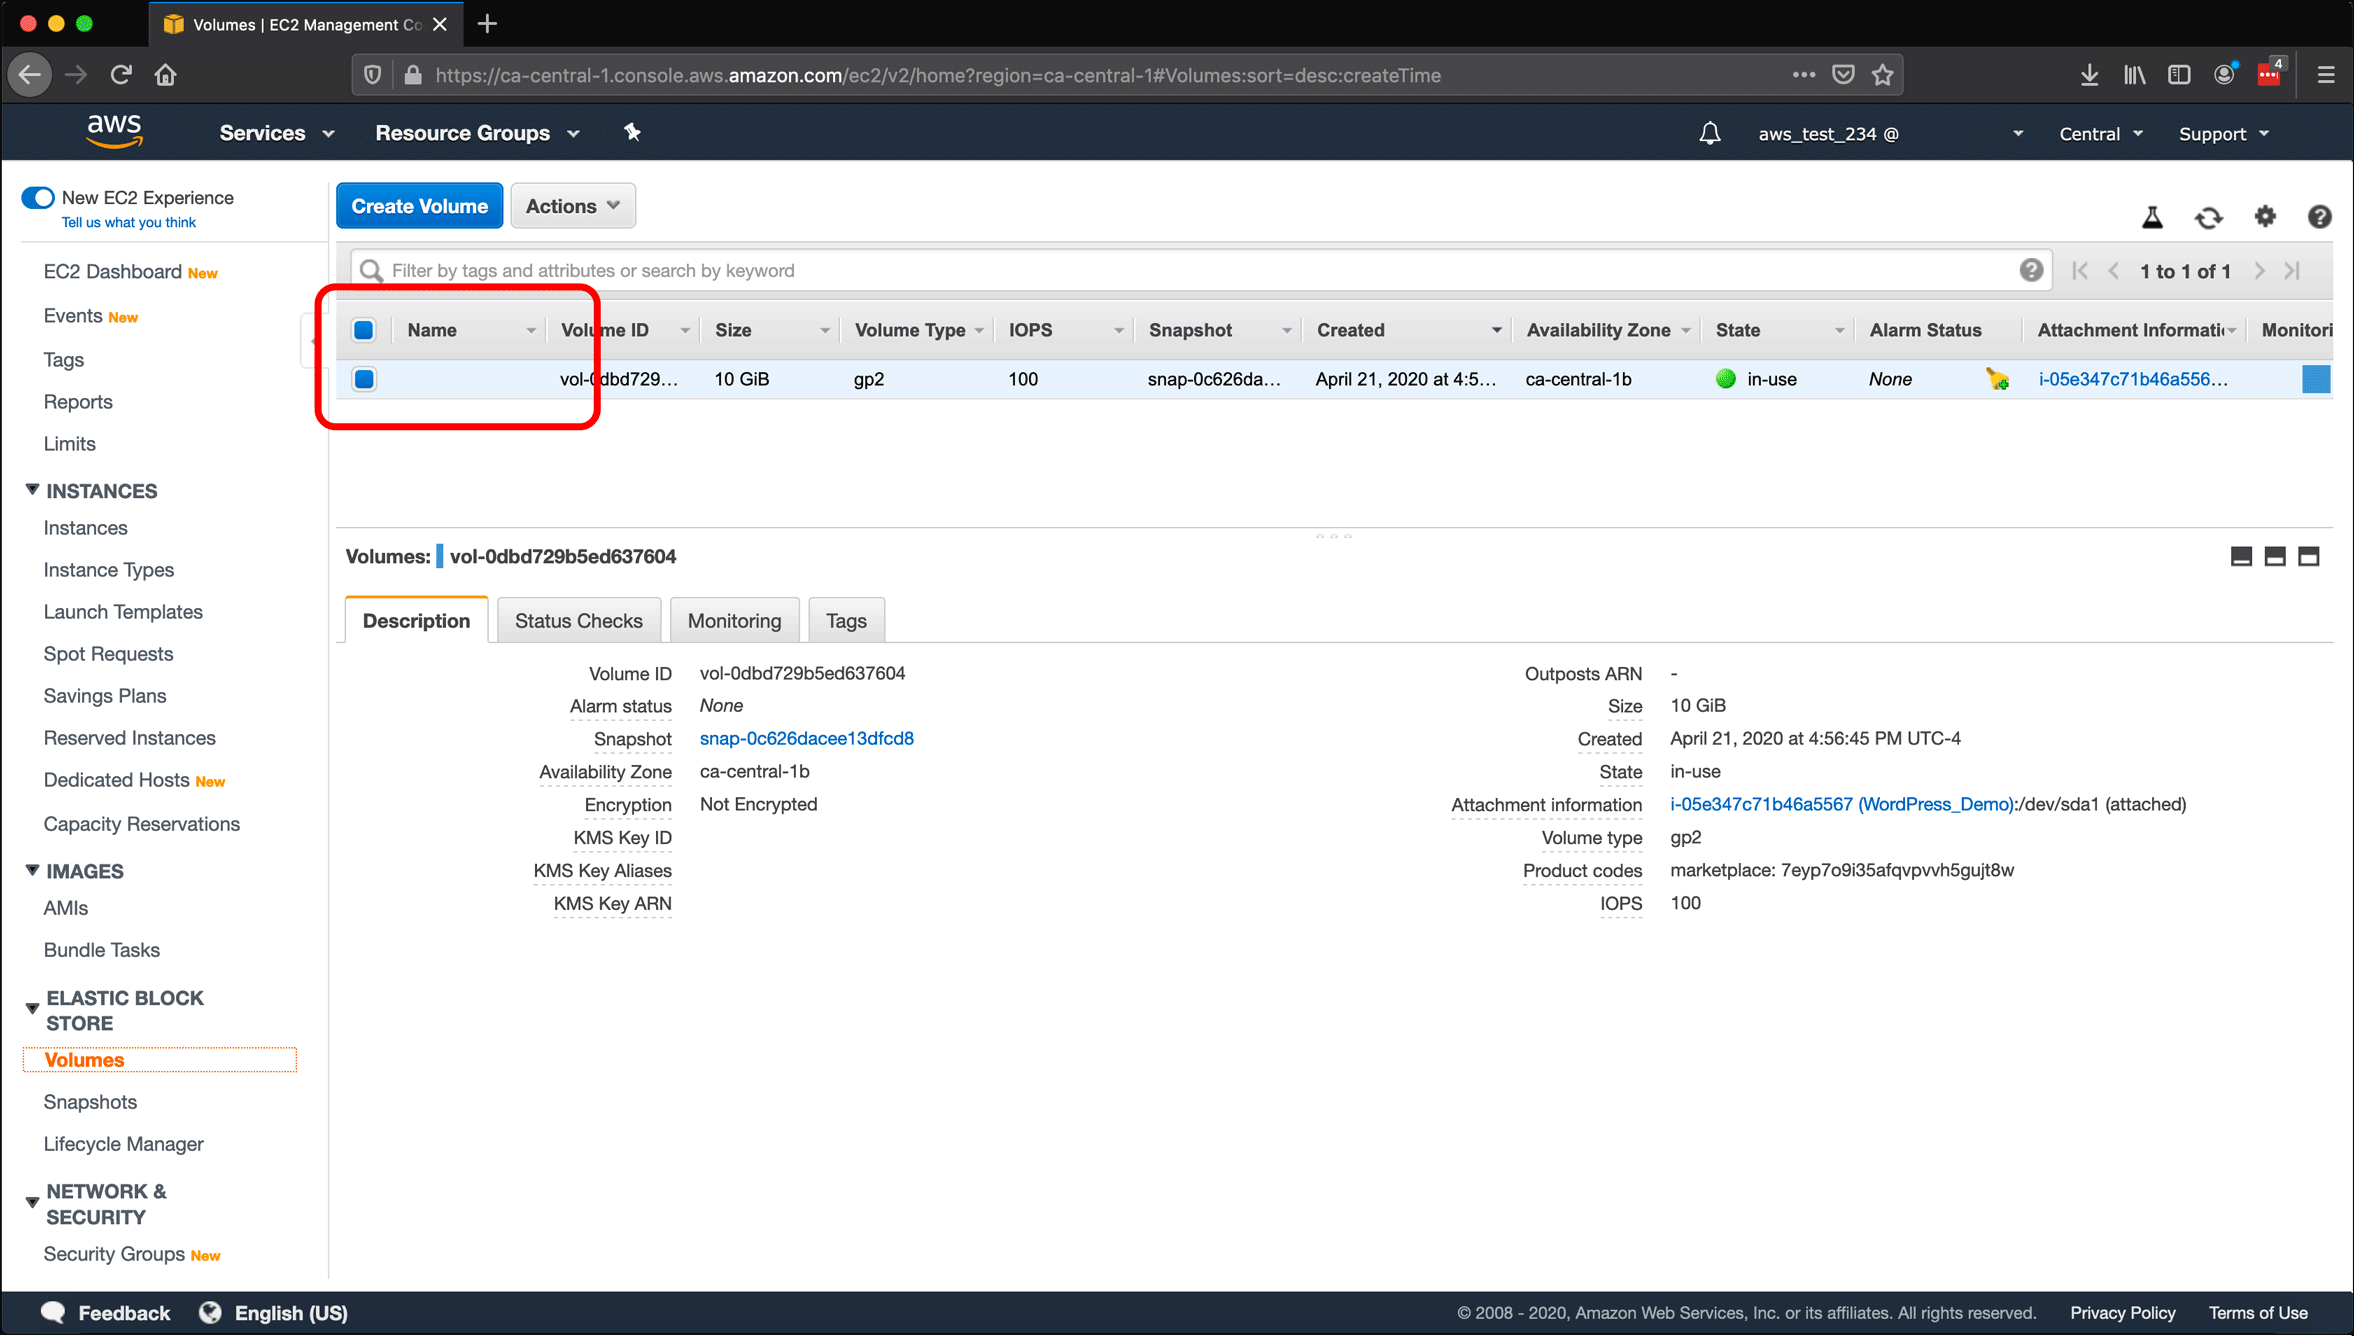
- When I created the instance from the WordPress image, it included a storage volume. To manage the volume, click Volumes under the Elastic Block Storage section of the menu in the left sidebar.
- Like the Instances screen, the Volumes screen displays a list of your volumes. When you select a volume, its properties display in a tabbed pane below the list. In this example there is only one volume. I have called out several properties with red boxes:
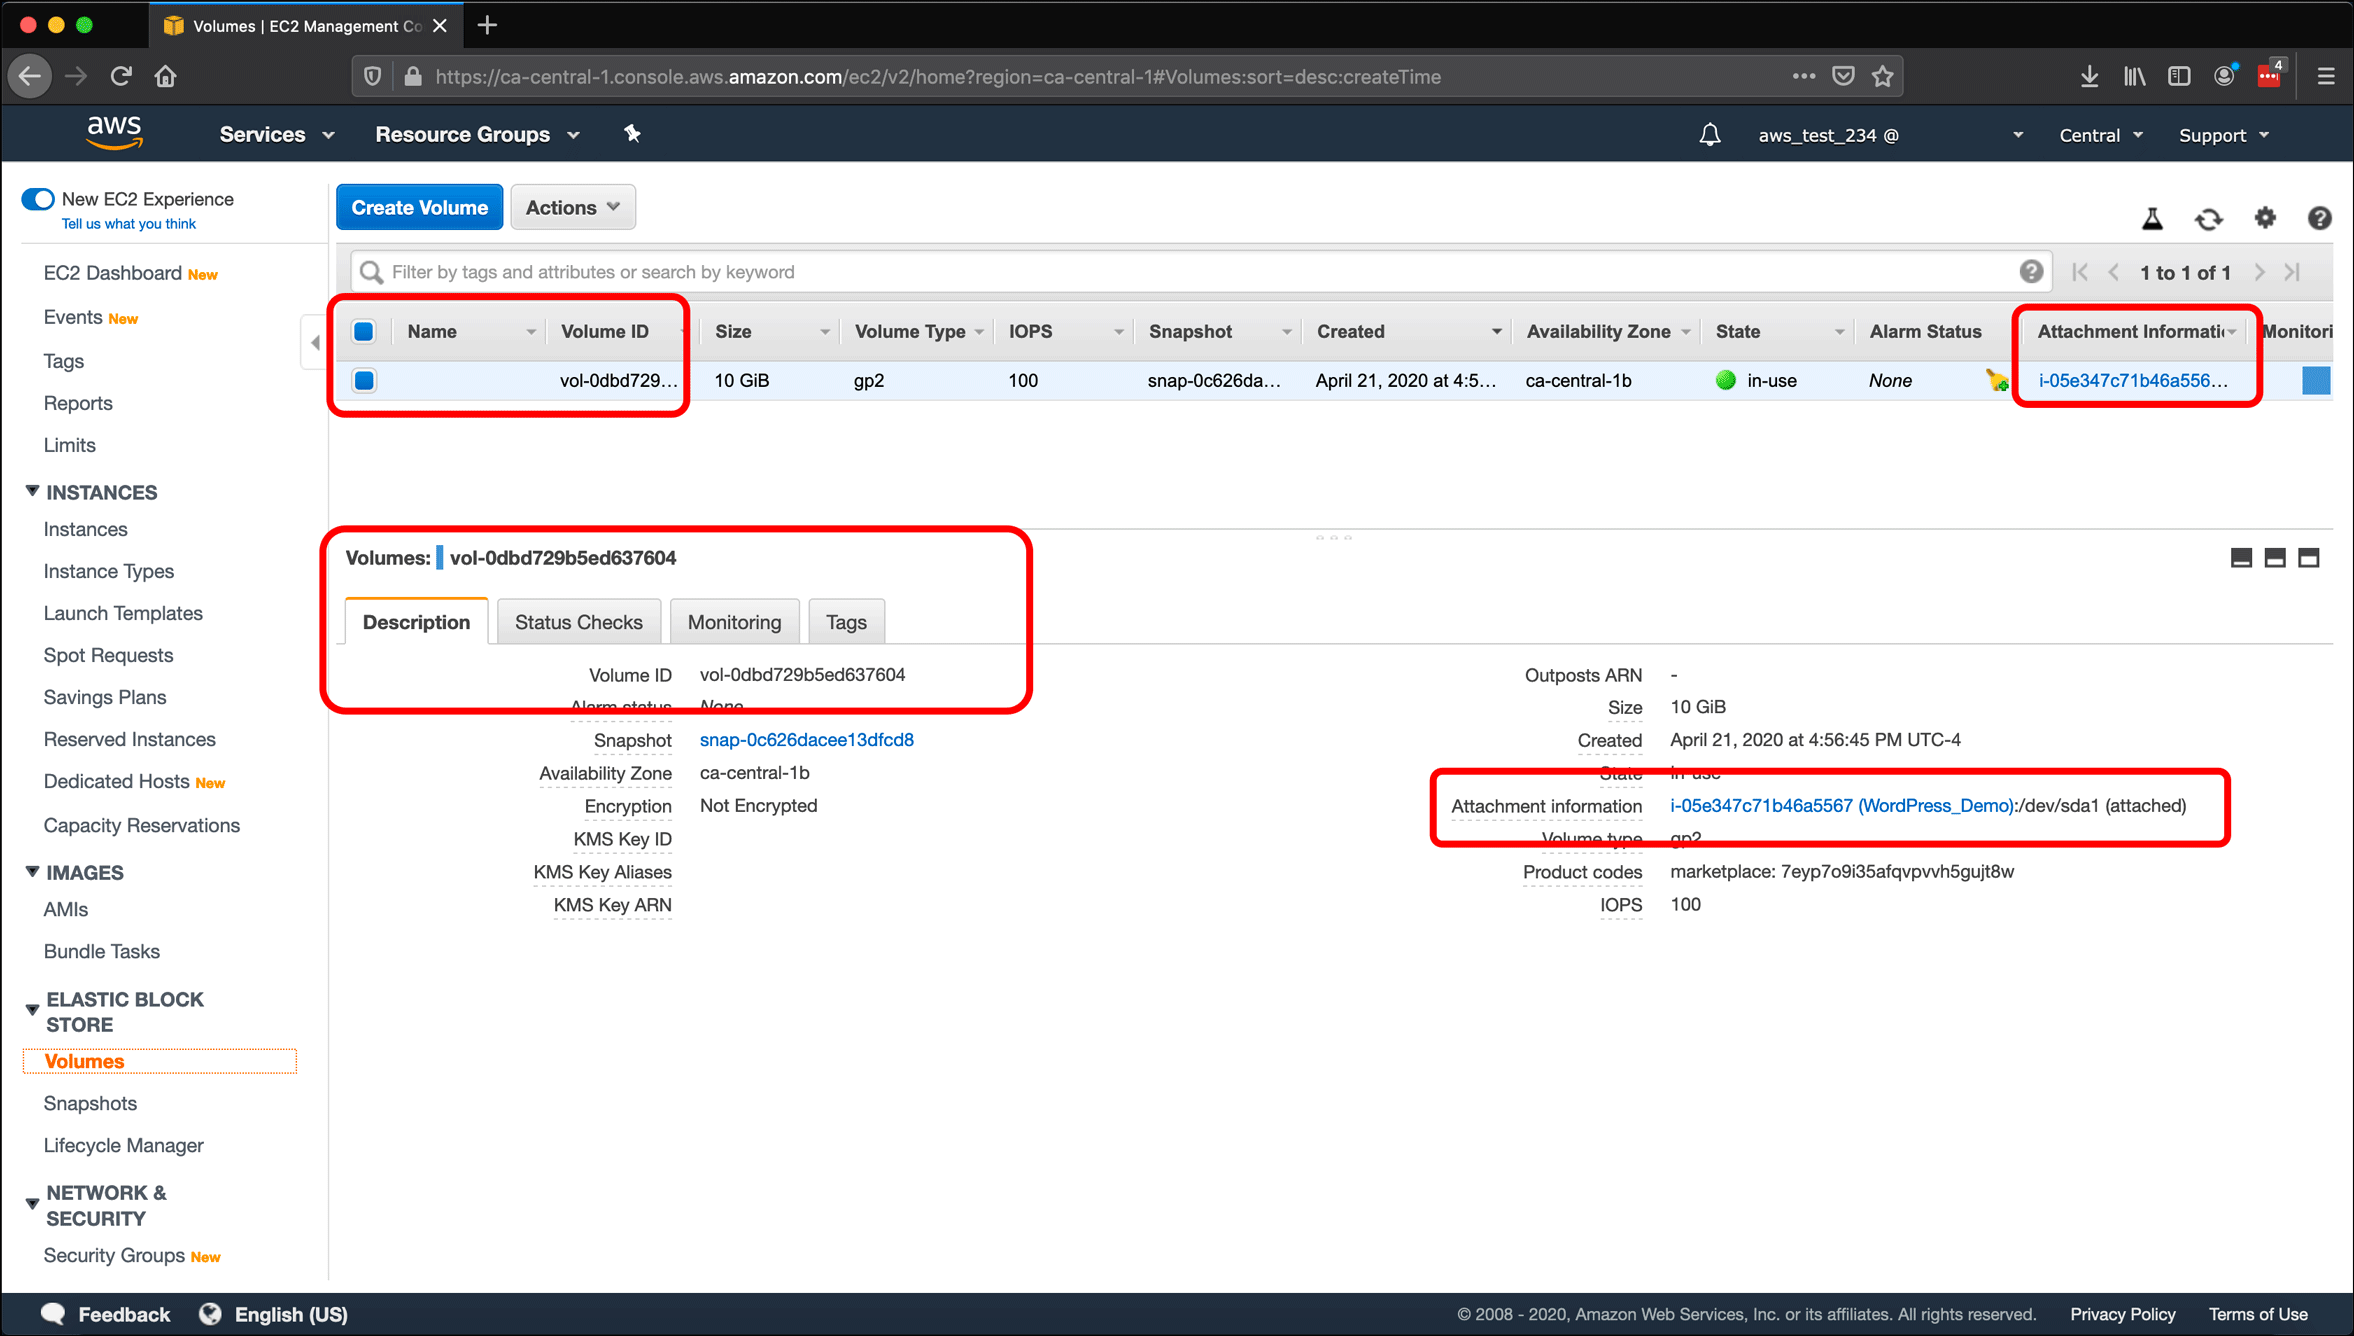
- This volume does not have a Name assigned to it.
- If you look under the Attachment Information column, you will see the Instance ID of the EC2 instance that this volume is attached to. This is the same value I copied in step 8. The Attachment Information value also appears under the Description tab.
- The Volume ID is the unique identifier AWS assigns to the volume, similar to the Instance ID. It appears immediately above the Description tab and is the first value below it.
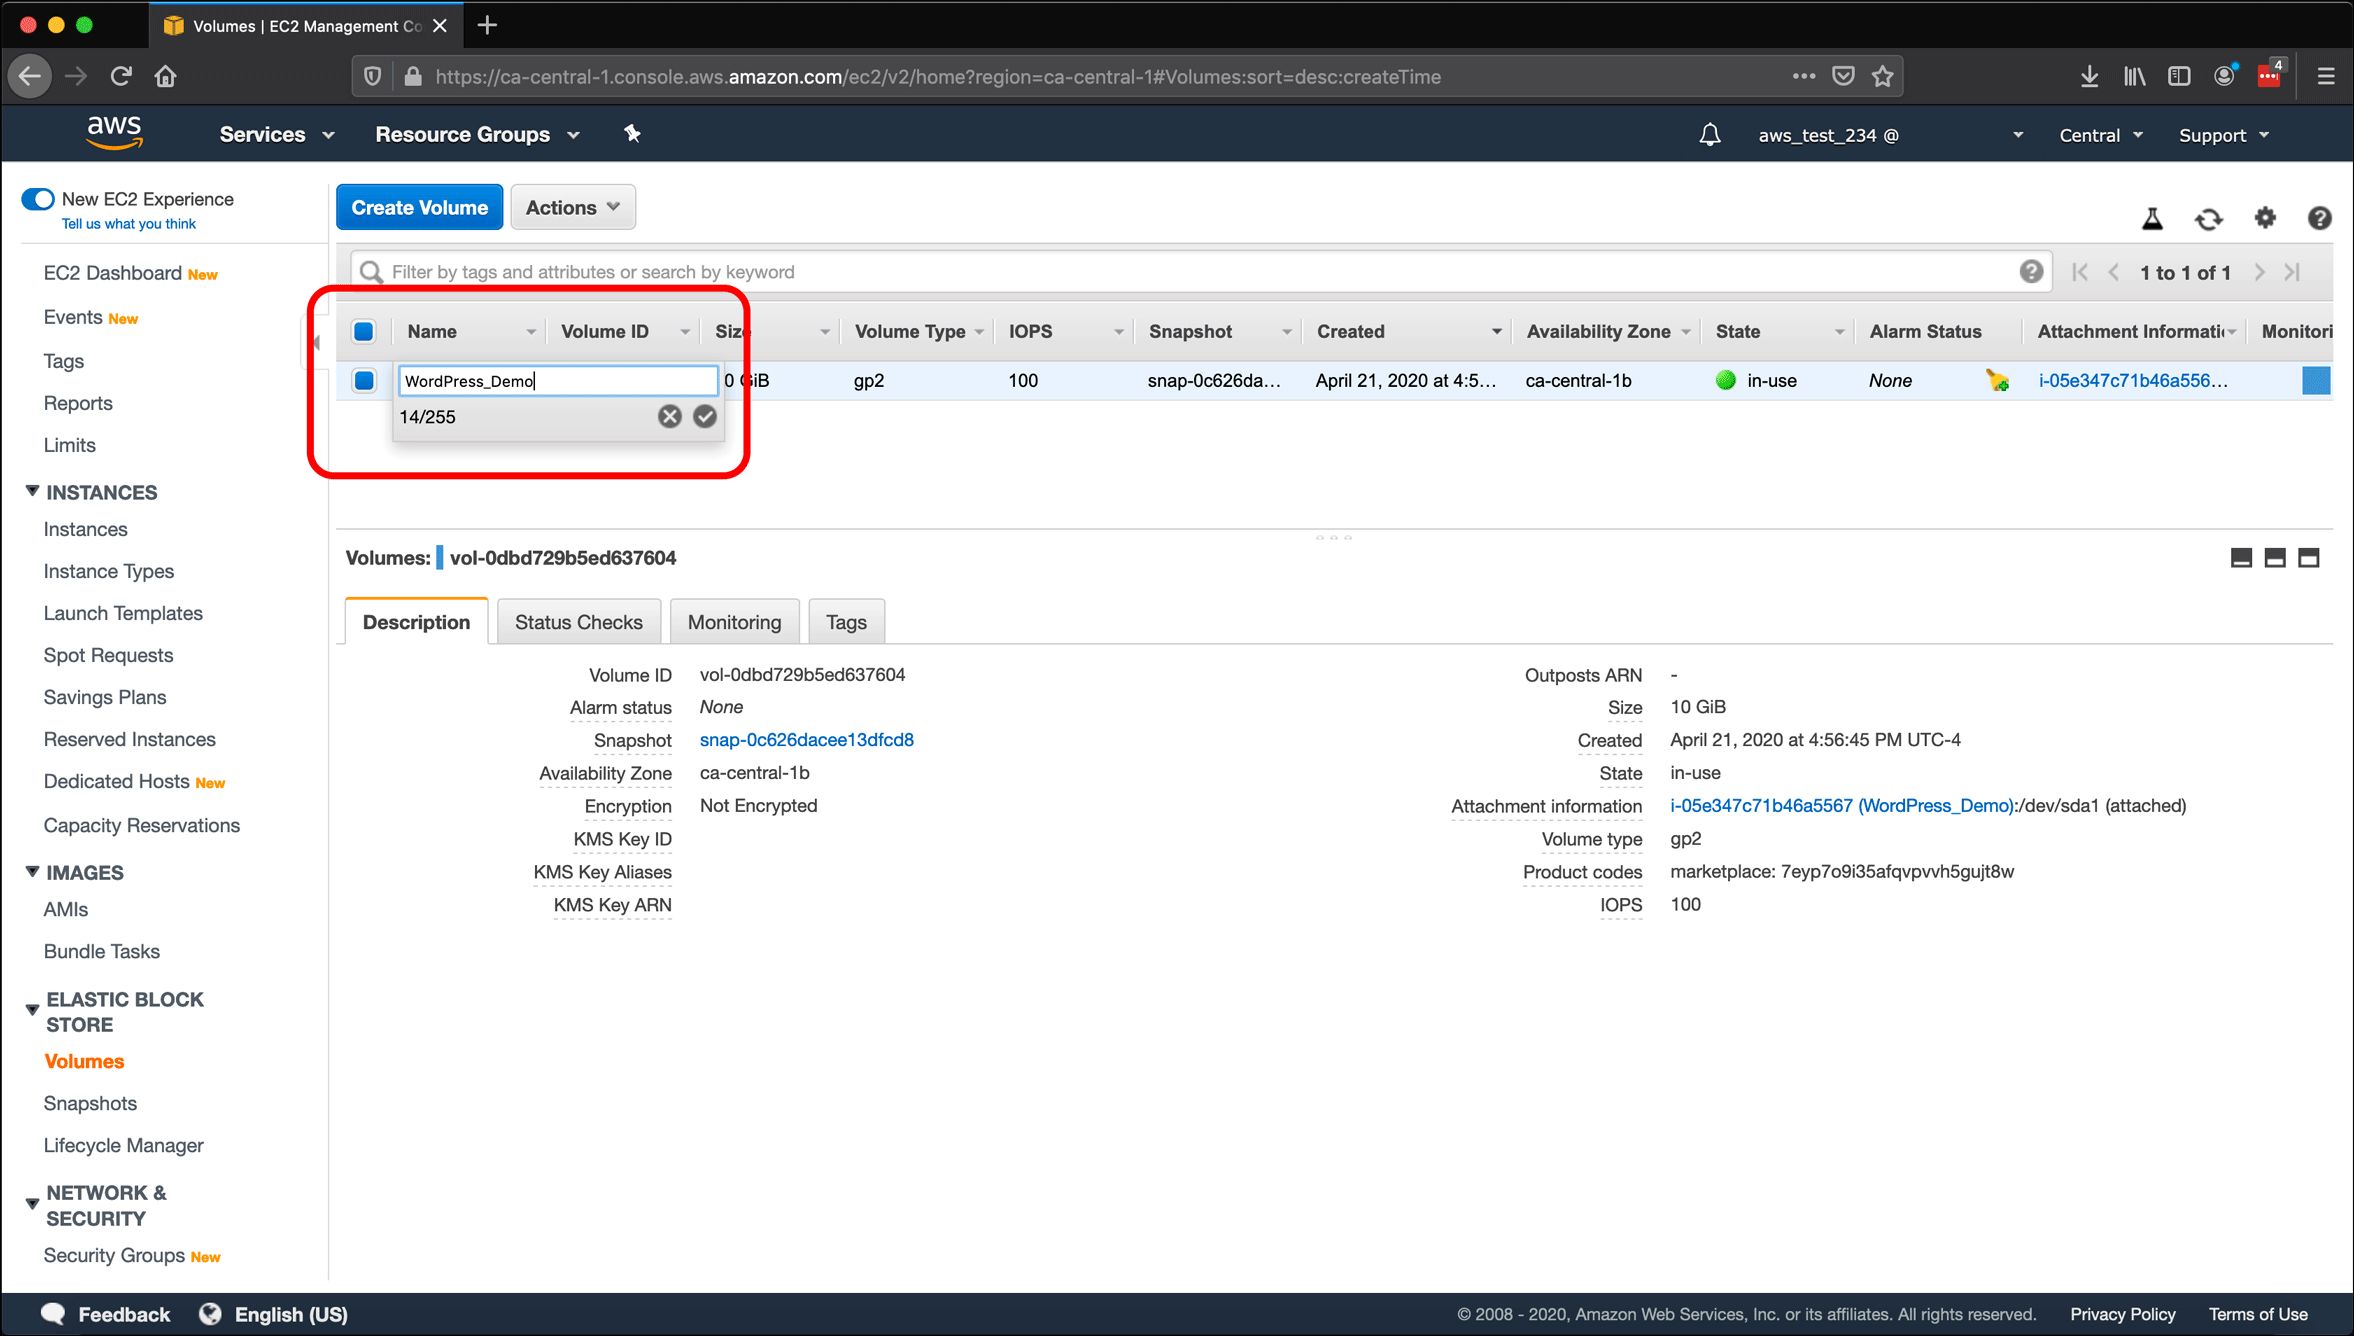
- Hover over the Name column with your cursor and click the pencil icon that appears.
- Enter a Name for your volume, and click the check icon to save it. (I used the same name I used for the instance.)
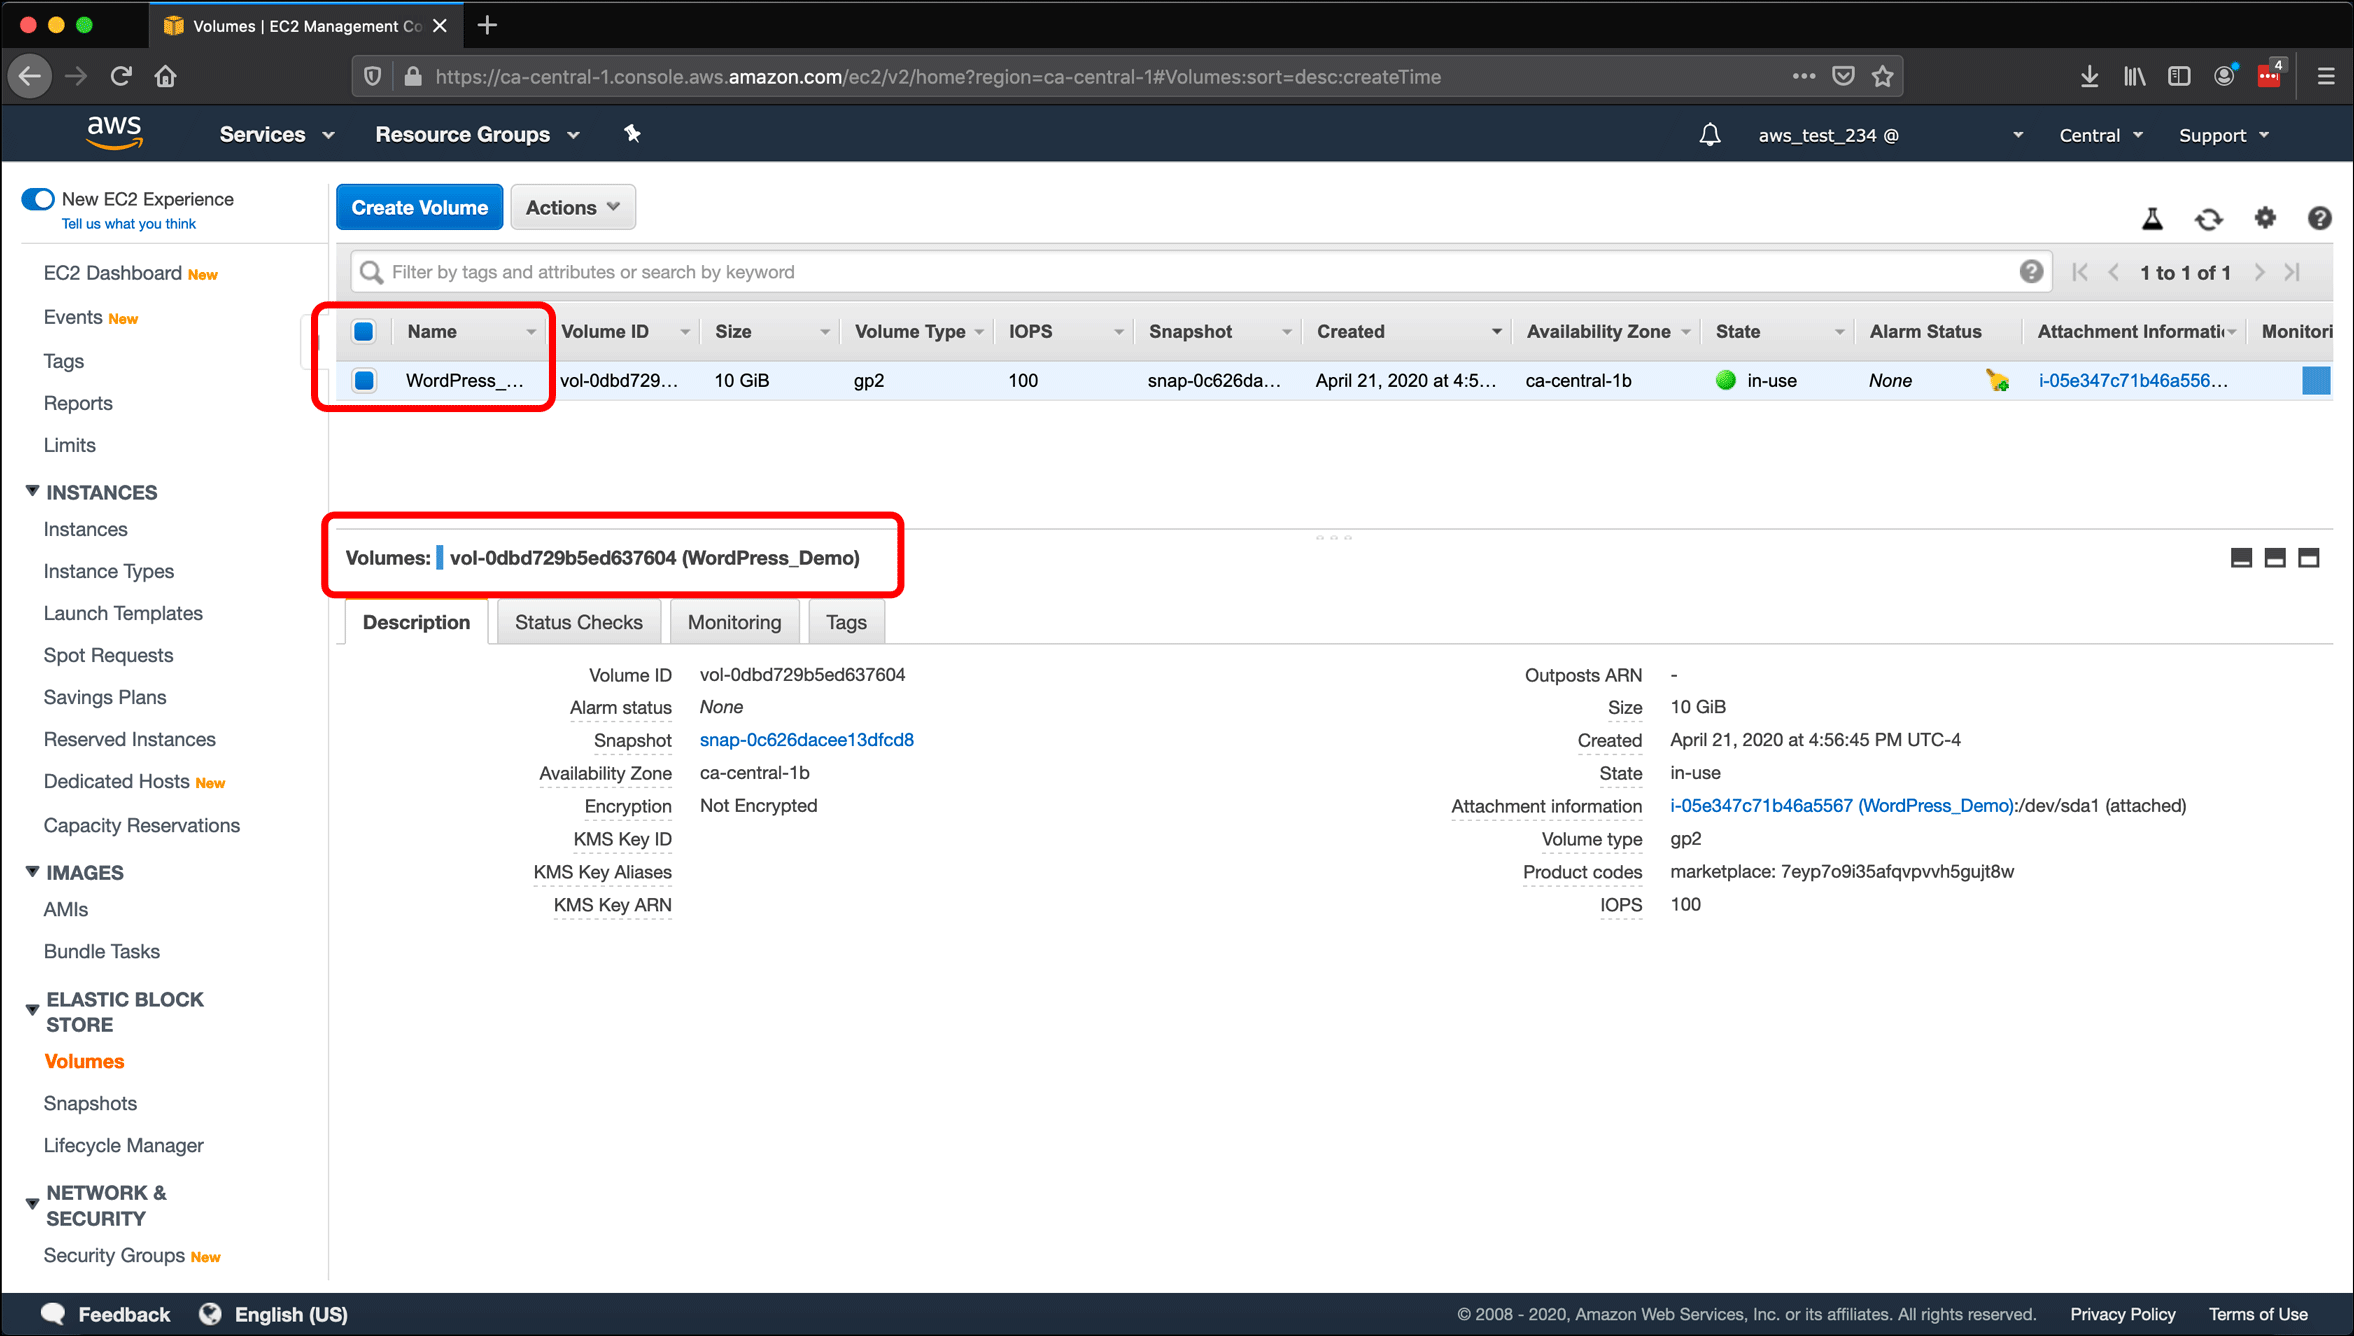
- The new Name for your volume appears in the Name column and above the Description tab, where the volume is identified with Volume: <Volume ID> (<The Name value you provided>).
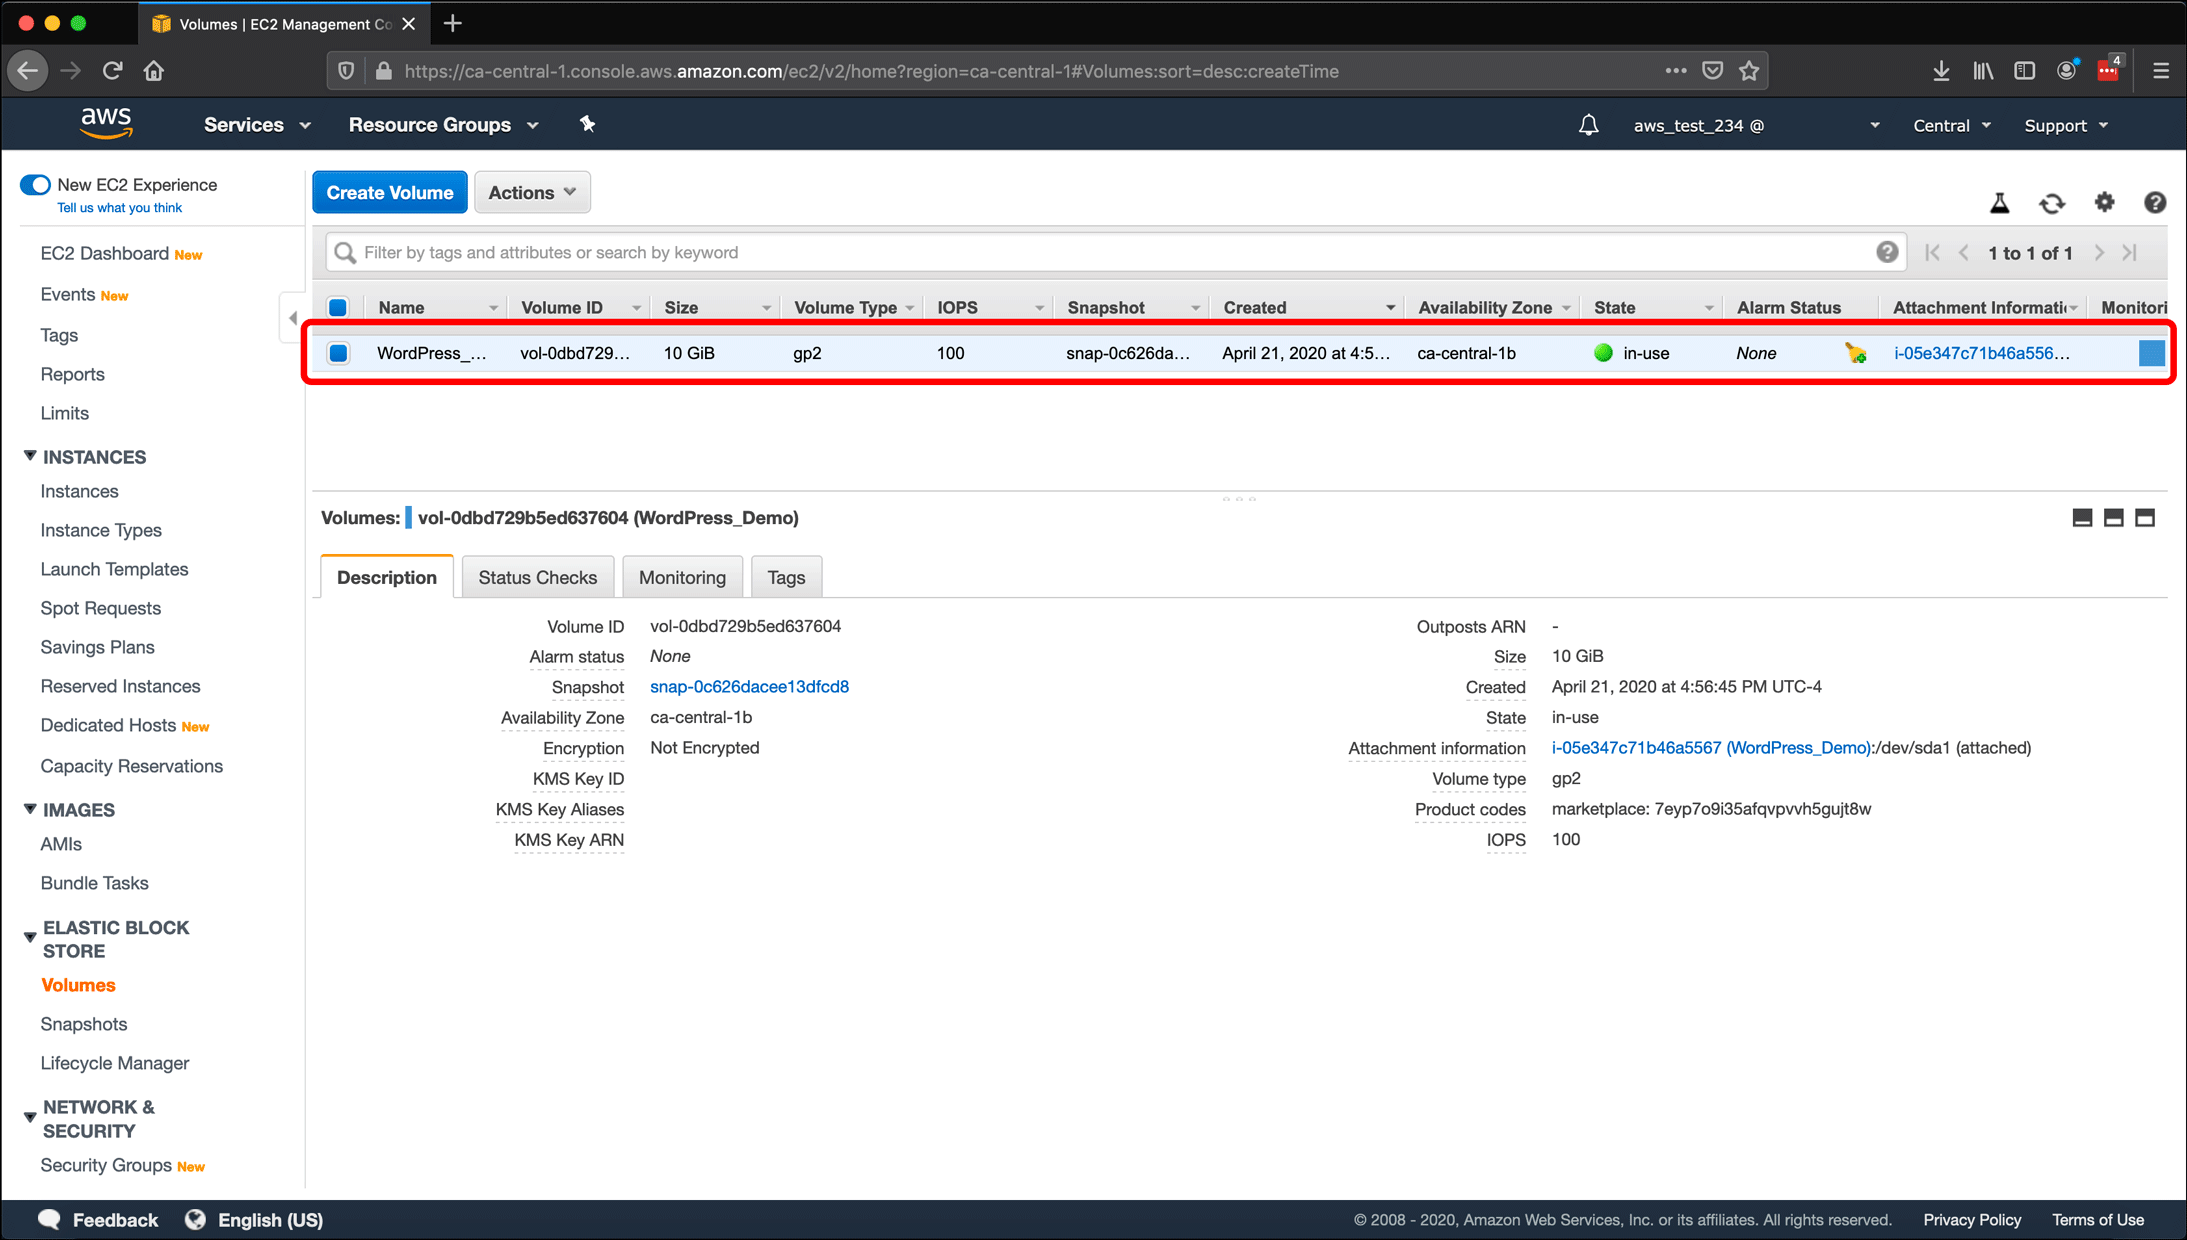
- I have explored the Volumes screen, used it to apply a name to a volume, and learned how to identify the connection between instances and their storage volumes. It looks easy since I only have one instance and one volume, but keeping track of resource IDs and tagging resources with your own naming conventions helps you keep track of all of your different AWS resources.
Create a Snapshot of an EC2 Volume
An important part of running your EC2 instances is keeping backups. AWS makes this easier for EC2 instances with “snapshots.” A snapshot is what it sounds like: a “picture,” or image, of a storage volume. Snapshots are an important tool for recovery when something goes wrong. Take a snapshot after creating your instance, and take them regularly going forward. Take a snapshot of the instance’s volume every time you are about to do something major to your instance, like installing a new WordPress site or making significant updates to an existing site, creating an SSL certificate for a site, or making significant changes to the instance’s settings. Then, when you have succeeded in whatever you wanted to do, take another snapshot. You can read more about snapshots in the AWS User Guide.
It is important to remember not to create snapshots while the instance is busy or while you are writing data to it. Take snapshots during downtime. You can stop (shut down) the instance and then take a snapshot of it in the stopped state, but always remember that ephemeral data not yet written to the volume will be lost when rebooting or stopping an instance.
The create a snapshot of a volume:
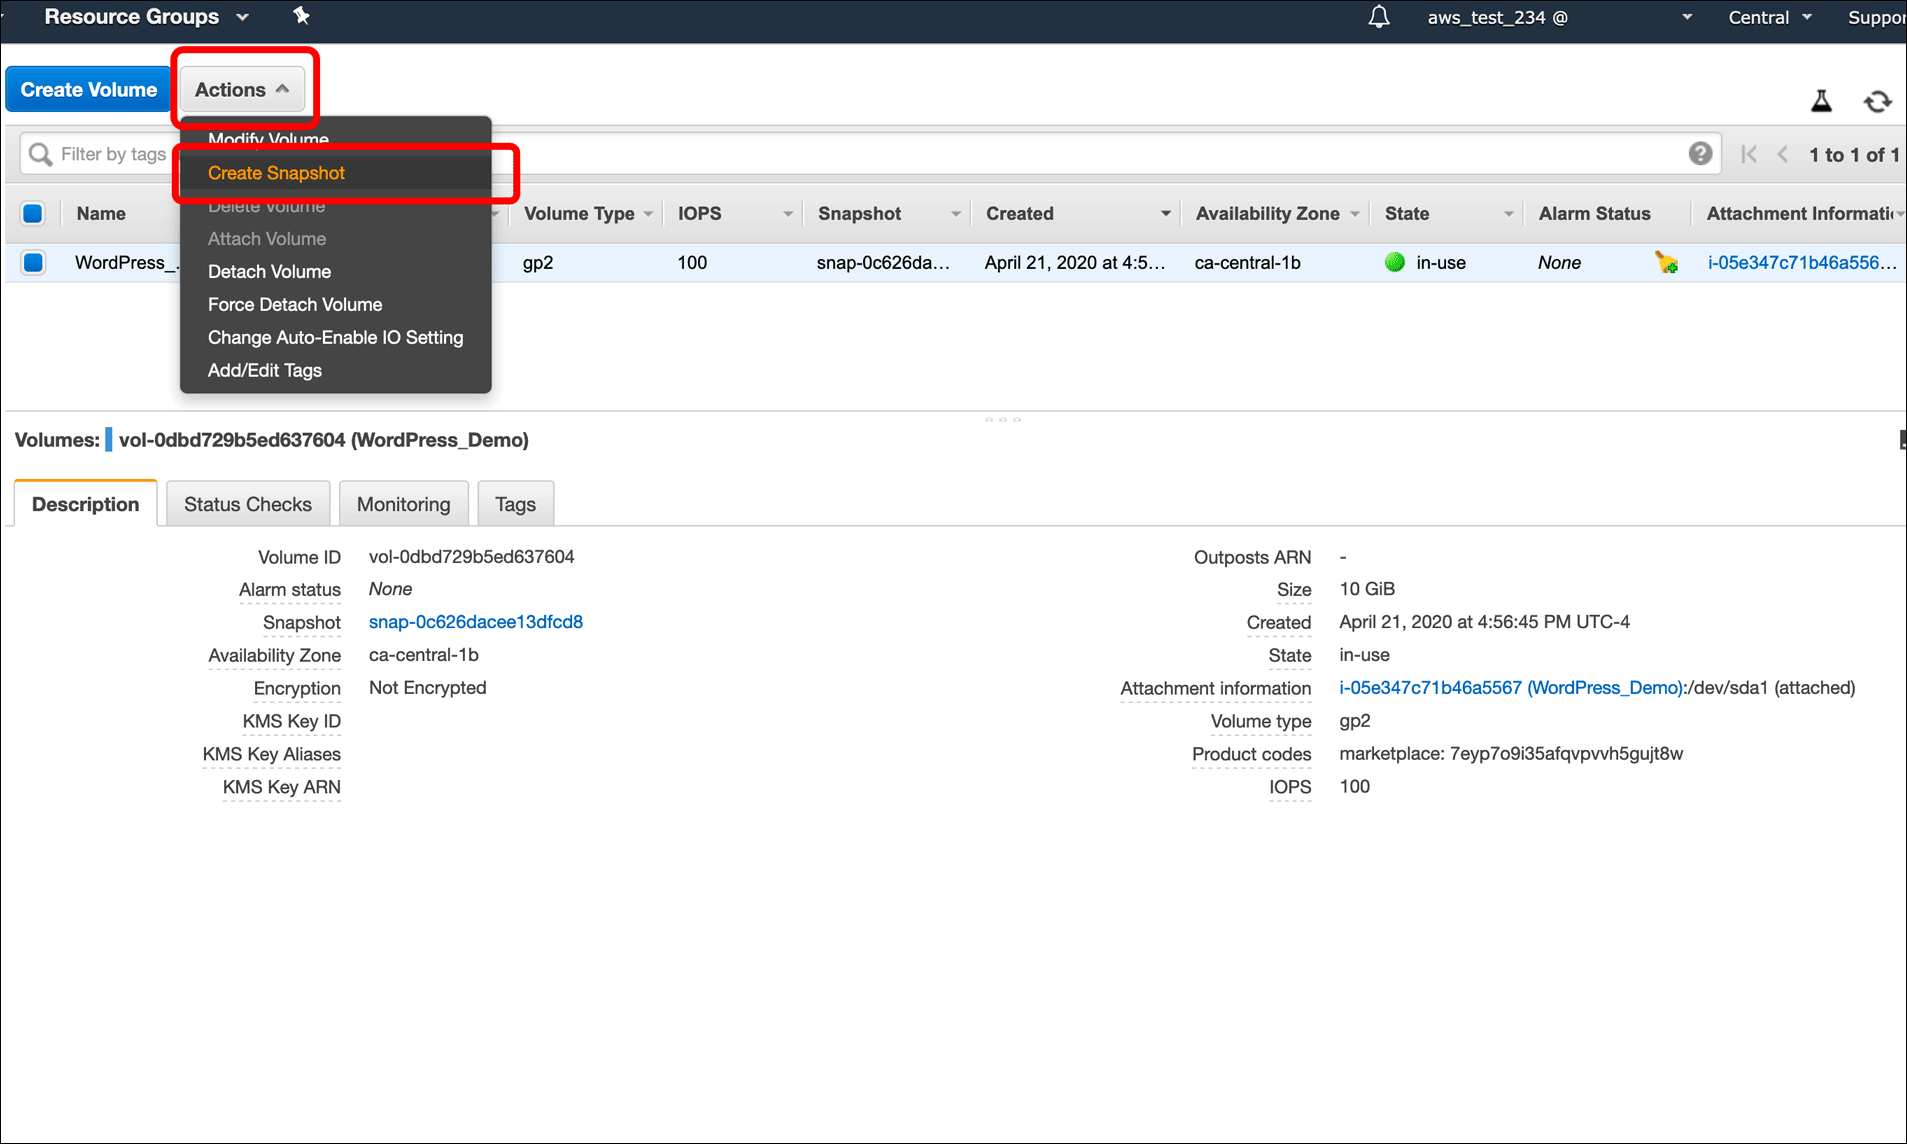
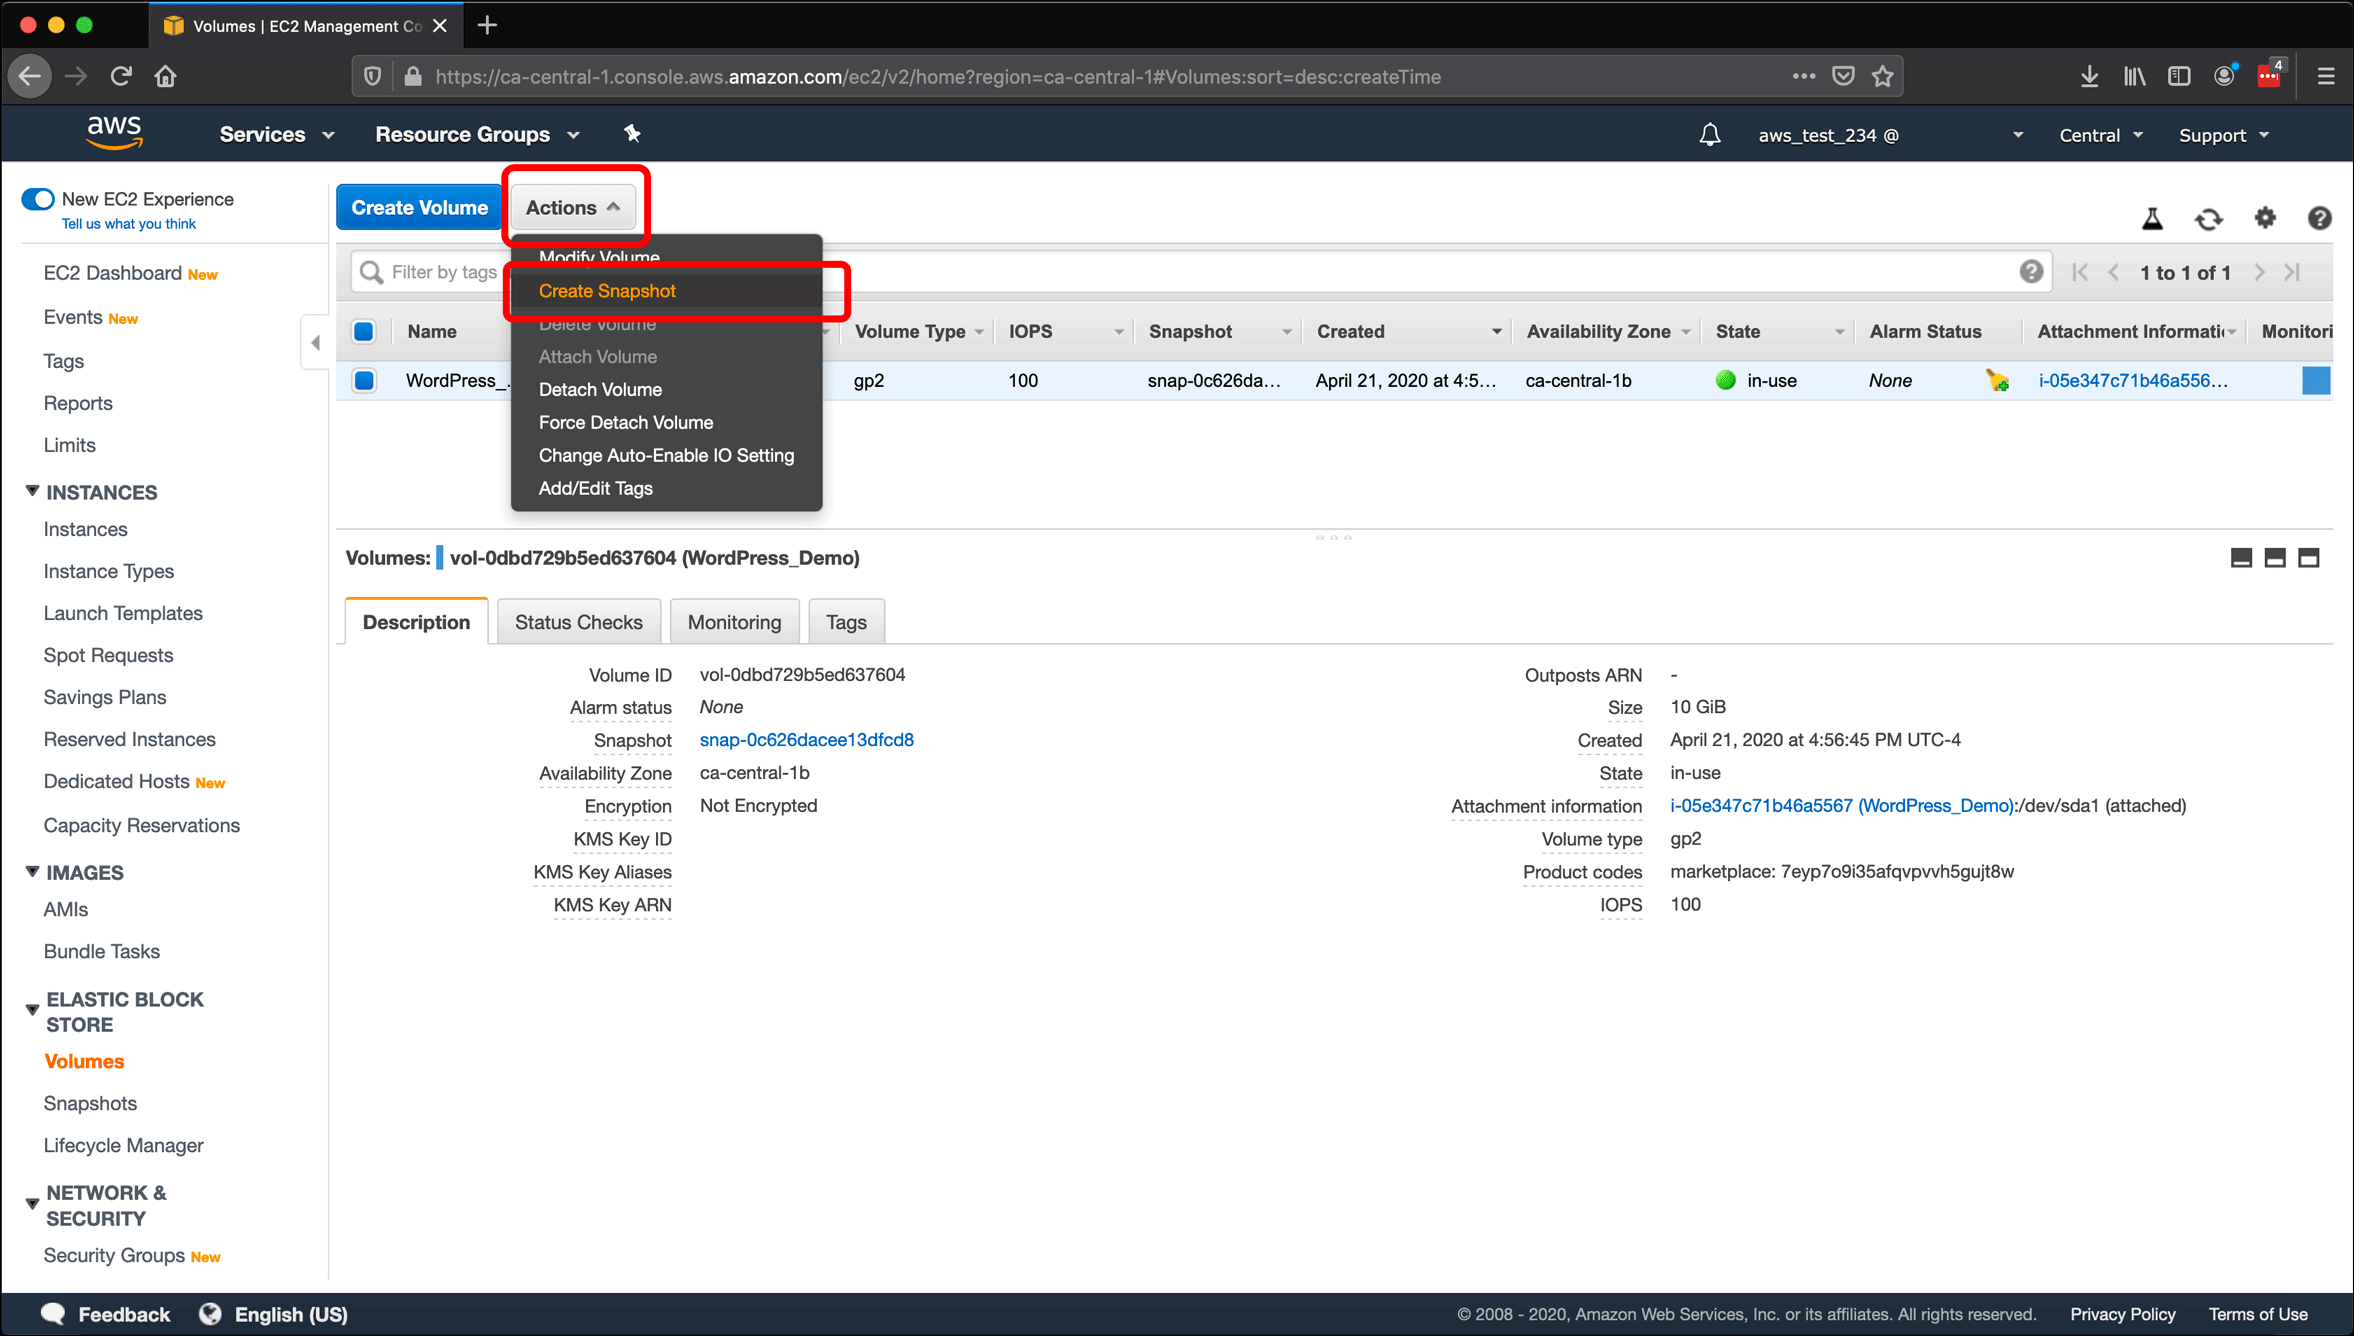
- From the Volumes screen, select the volume that you are creating a snapshot for, click the Actions button, then click the Create Snapshot option.
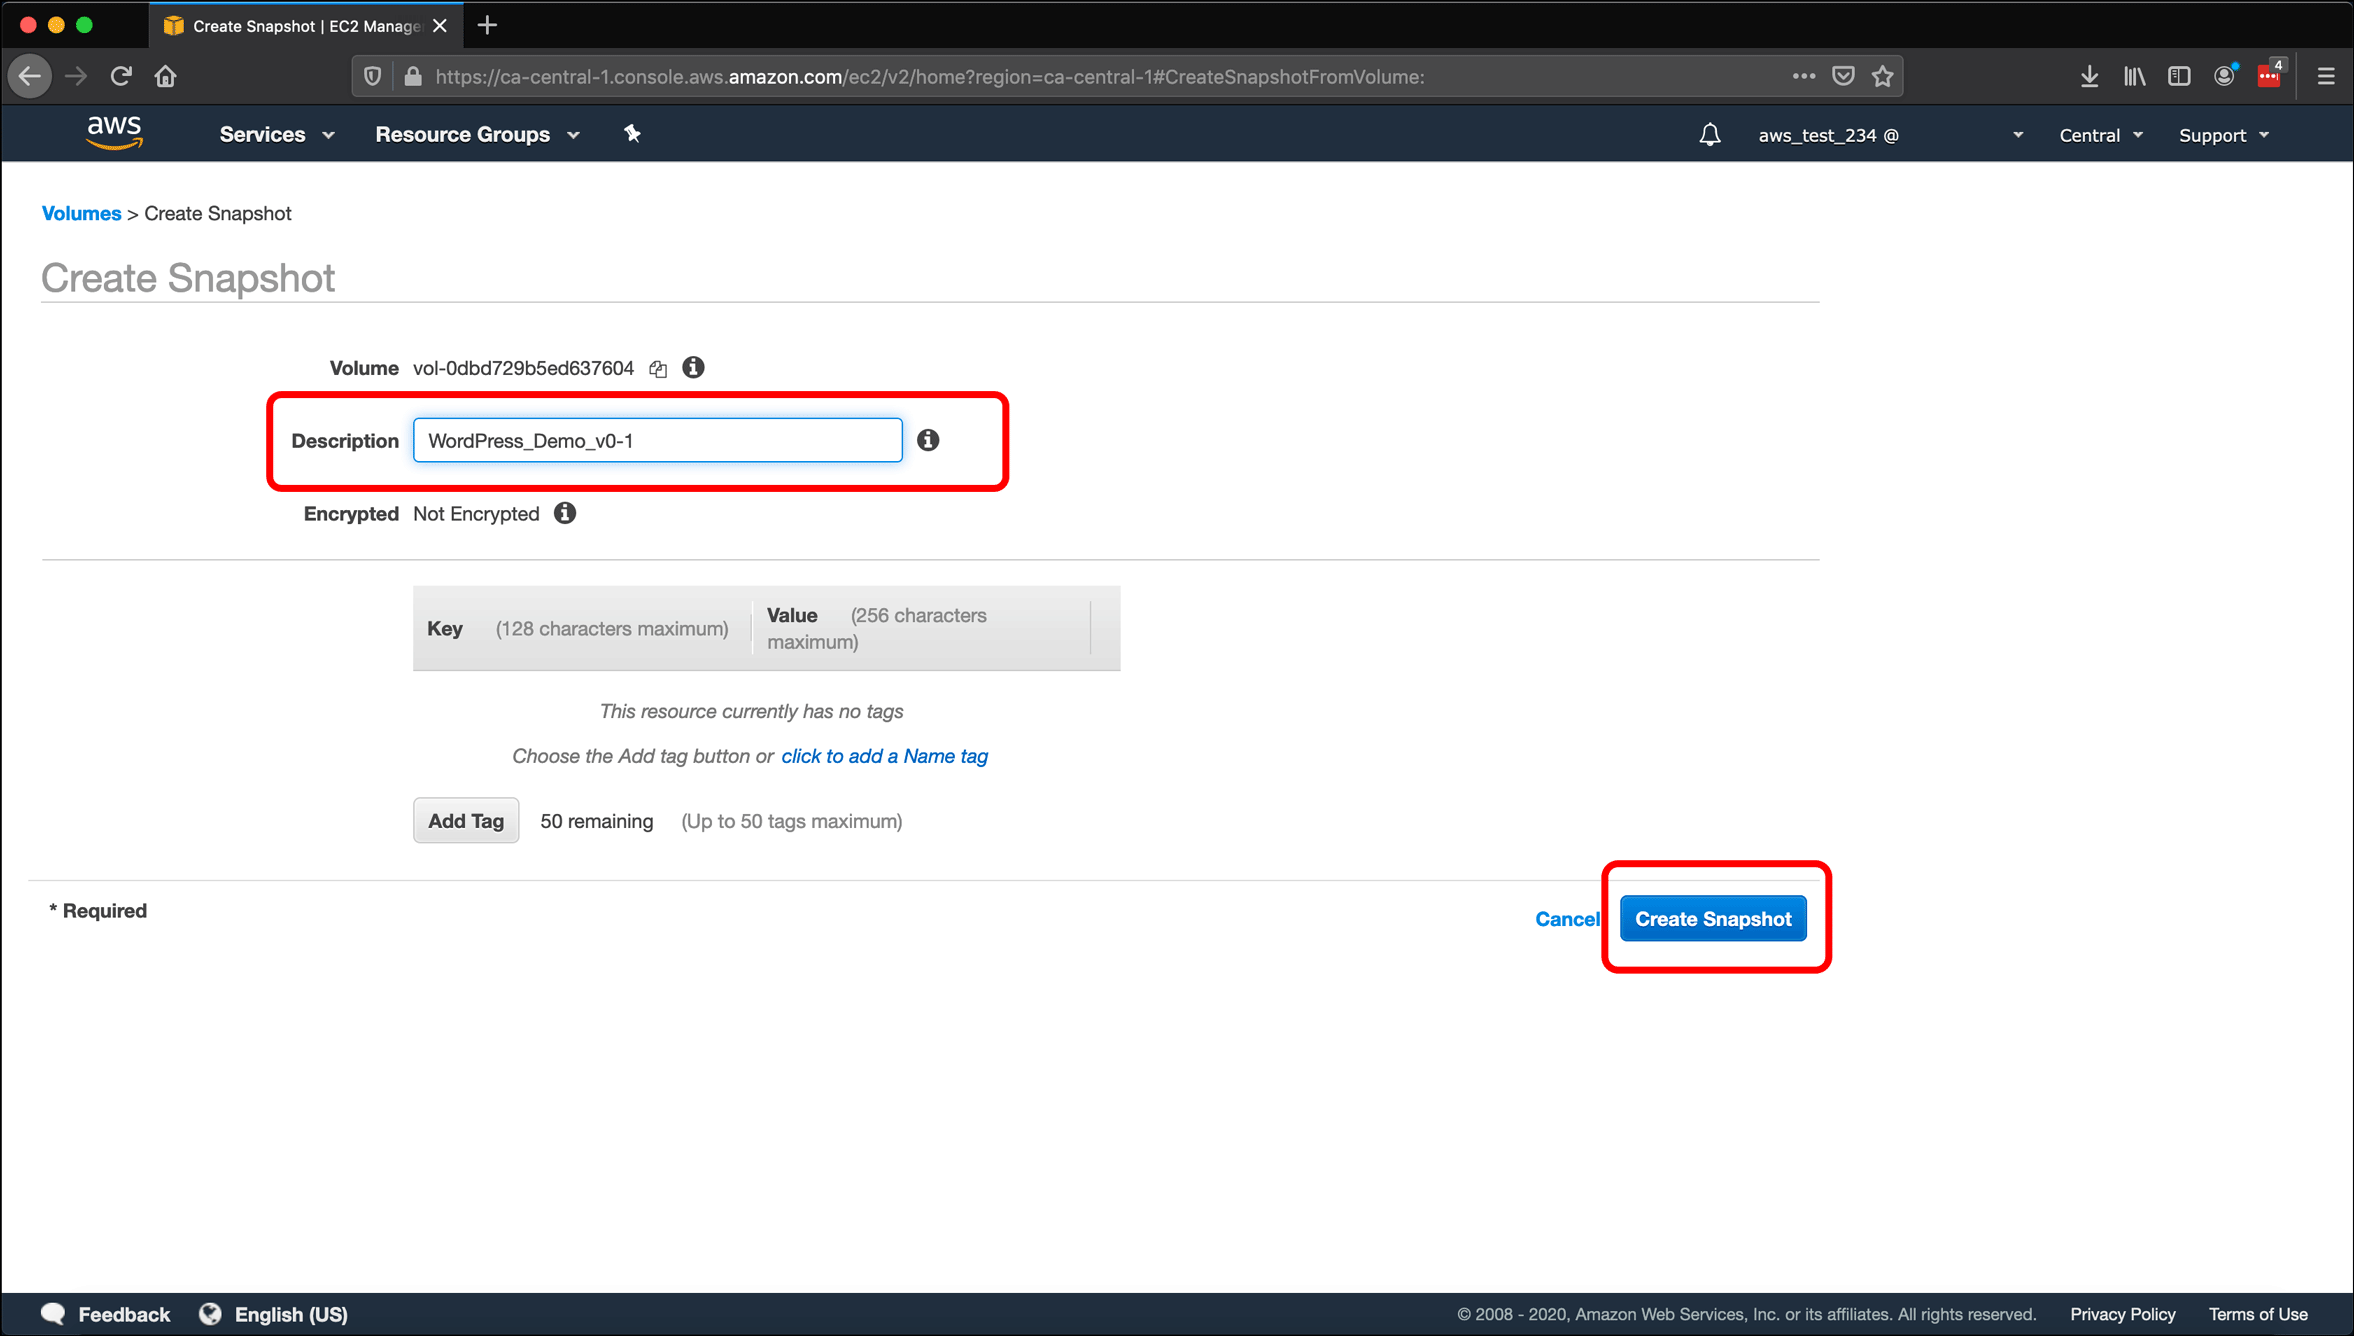
- On the Create Snapshot screen, enter some text in the Description field, such as the name of the volume and the date of the snapshot. You can also add tags to the snapshot. When you are done, click Create Snapshot.
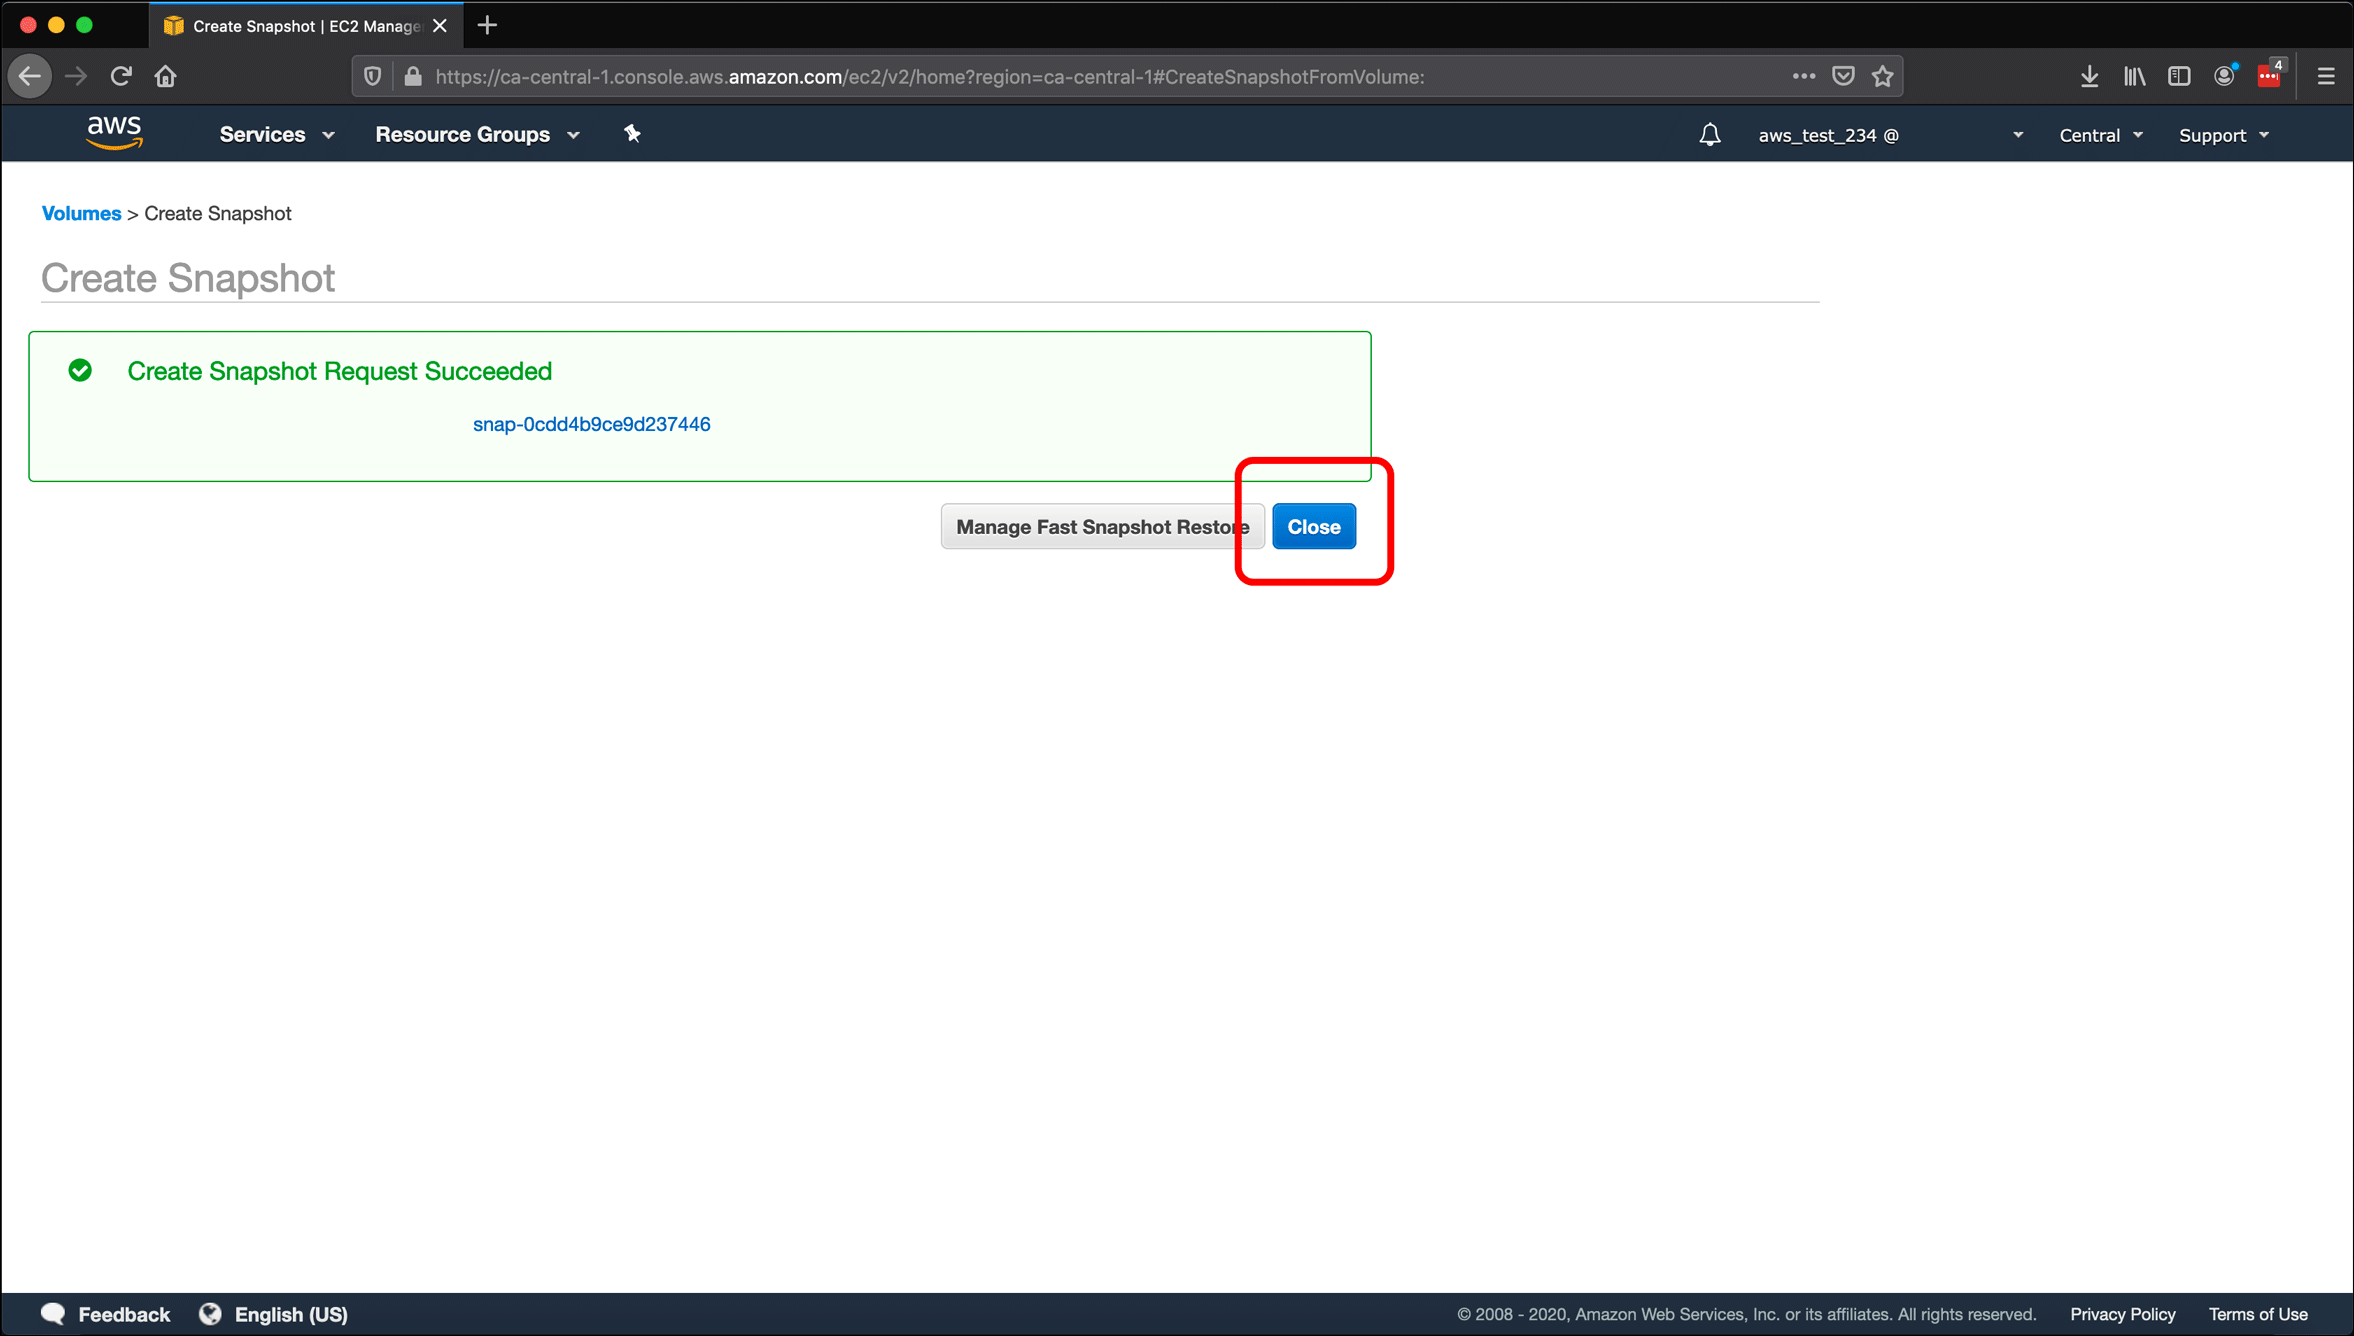
- A Create Snapshot Request Succeeded message will appear. Click Close to return to your list of volumes.
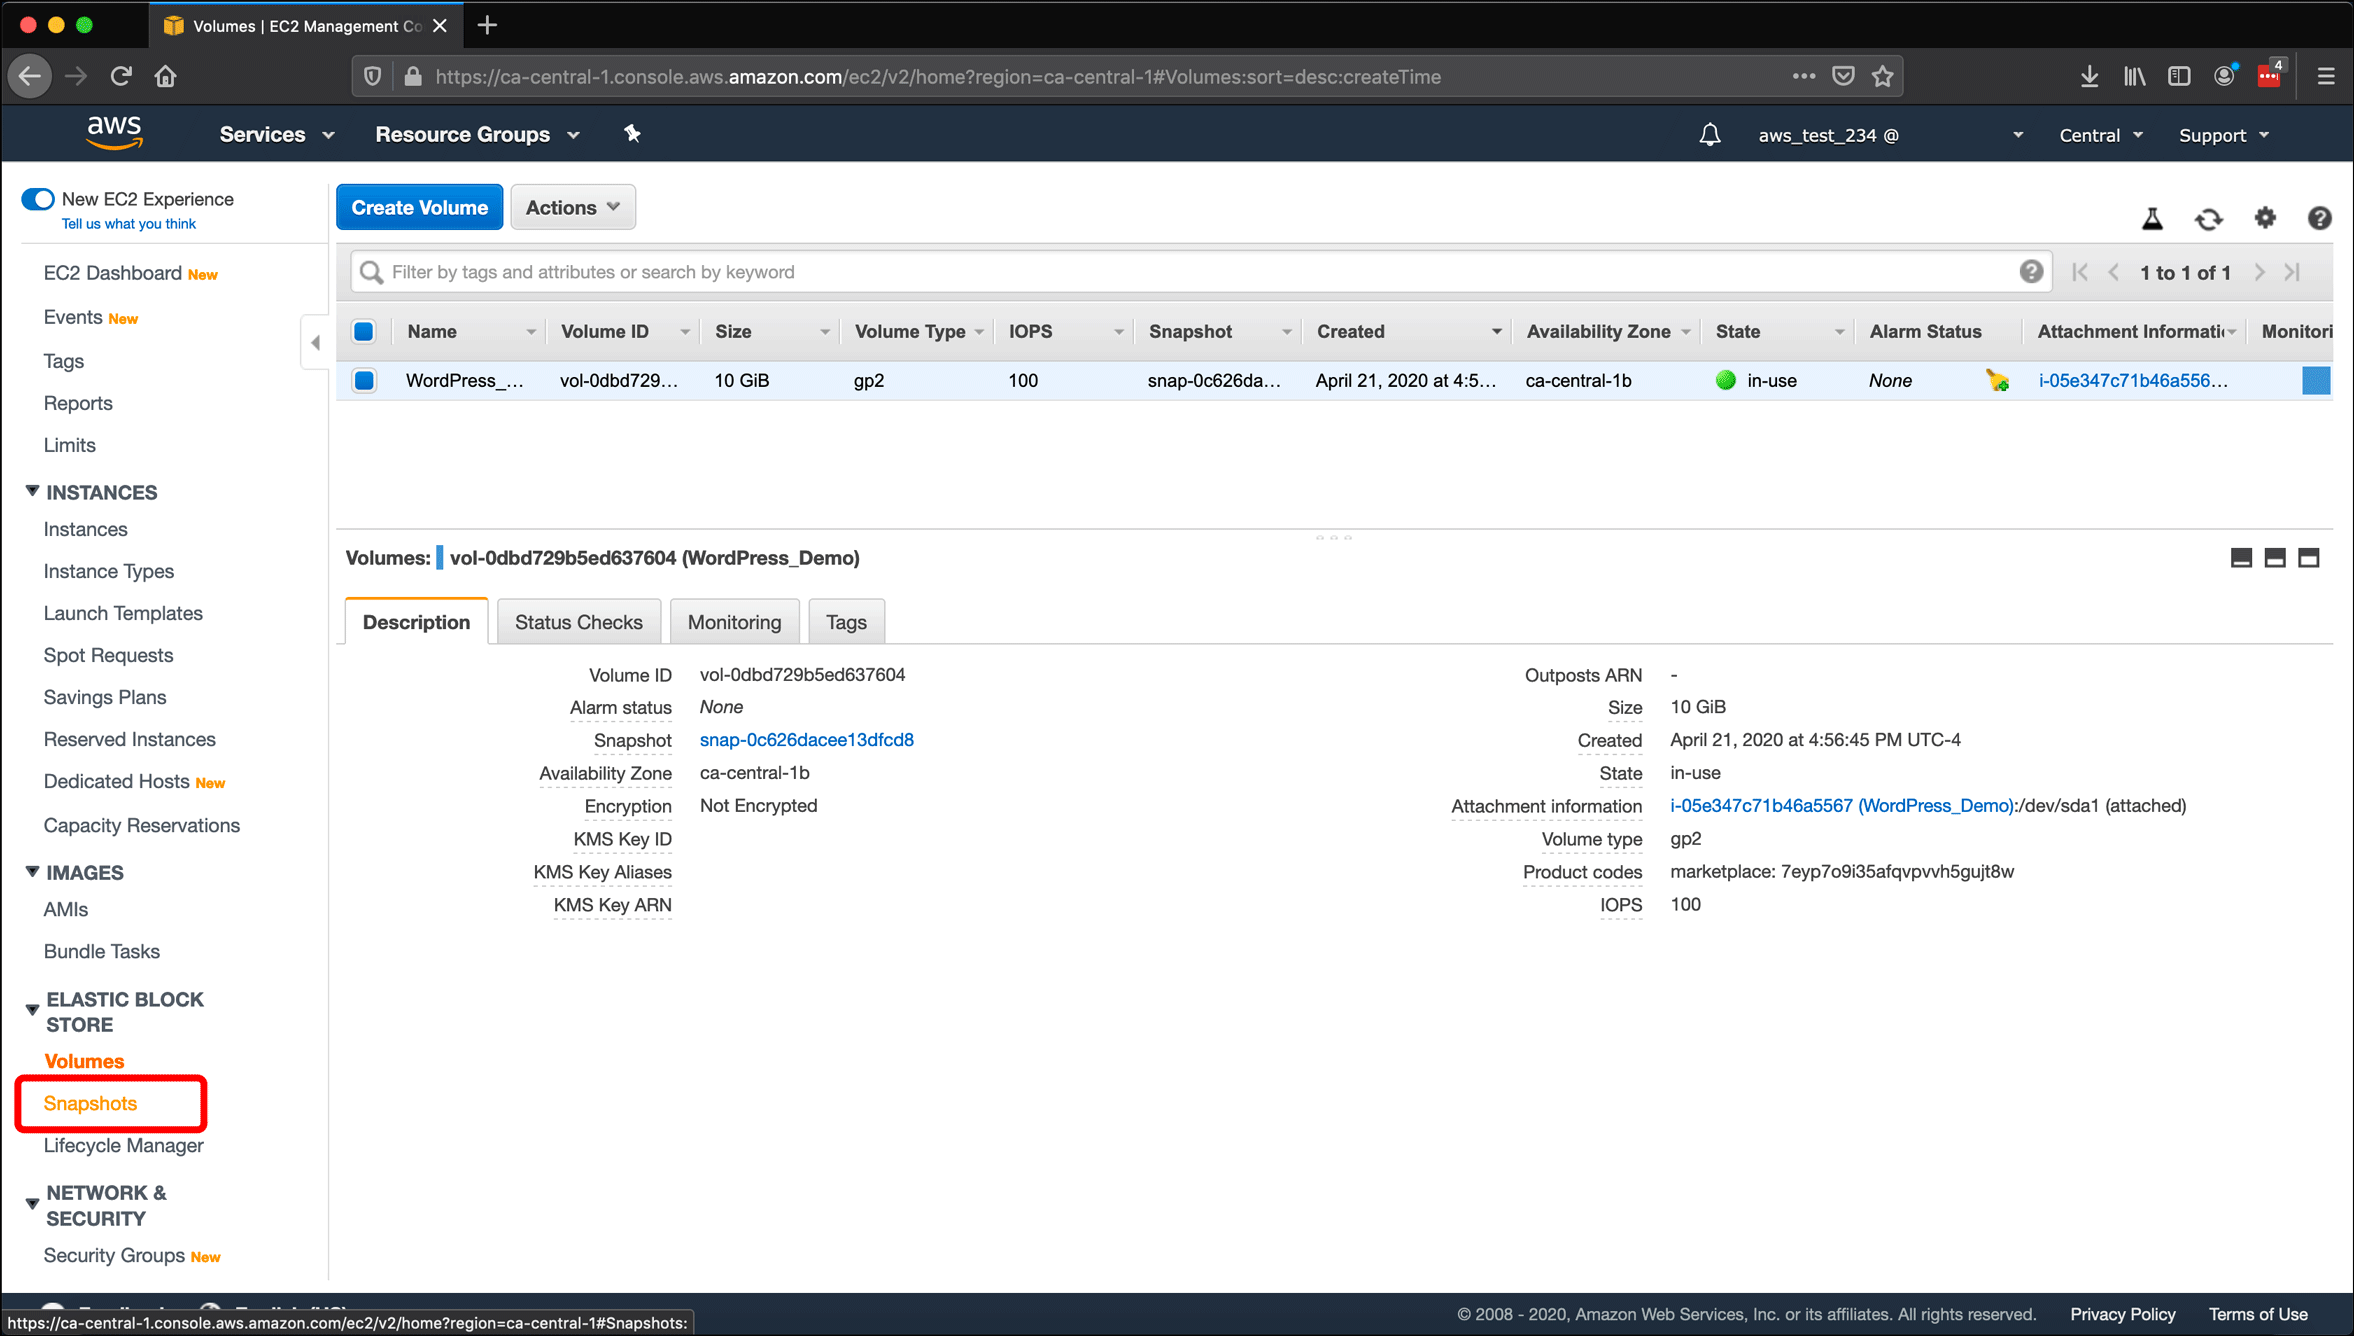
- Click Snapshots under Volumes in the Elastic Block Storage section of the left sidebar.
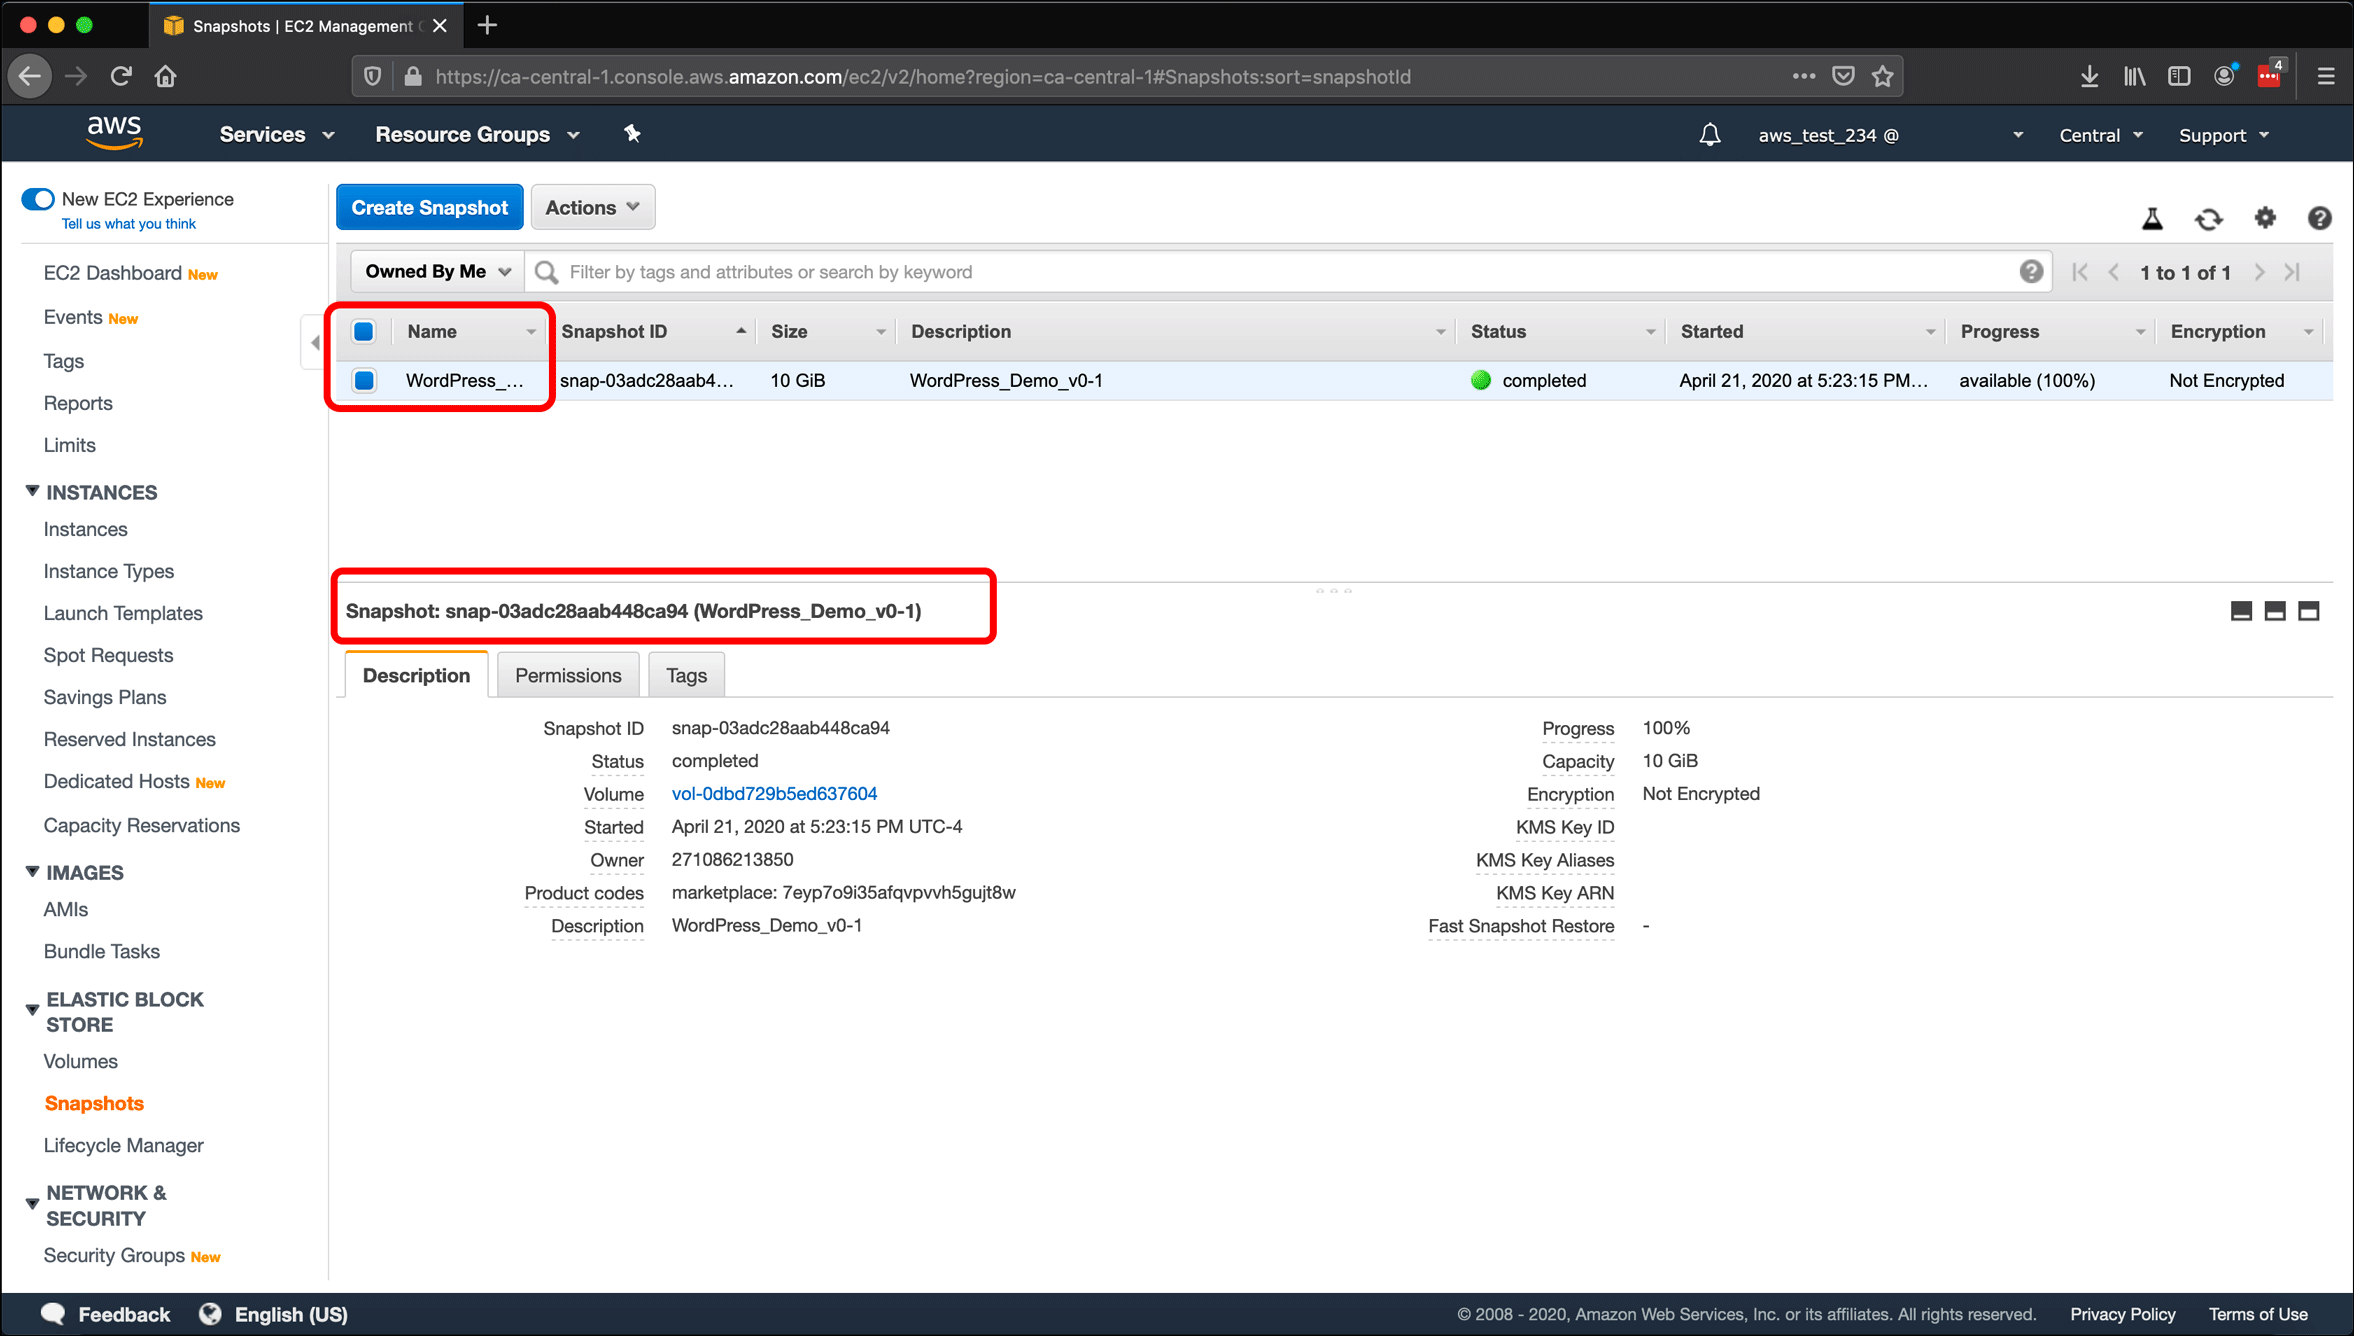
- The Snapshots screen lists all of your snapshots available in your current AWS region. In this example, I only have the snapshot that I just created. Depending on the size of the volume, it can take some time for the snapshot creation process to complete, so check the Status and Progress fields under the Description tab, as well as the Progress column of the snapshot list to make sure that the snapshot process has completed. My snapshot was created on a new volume without much data, so it finished quickly.
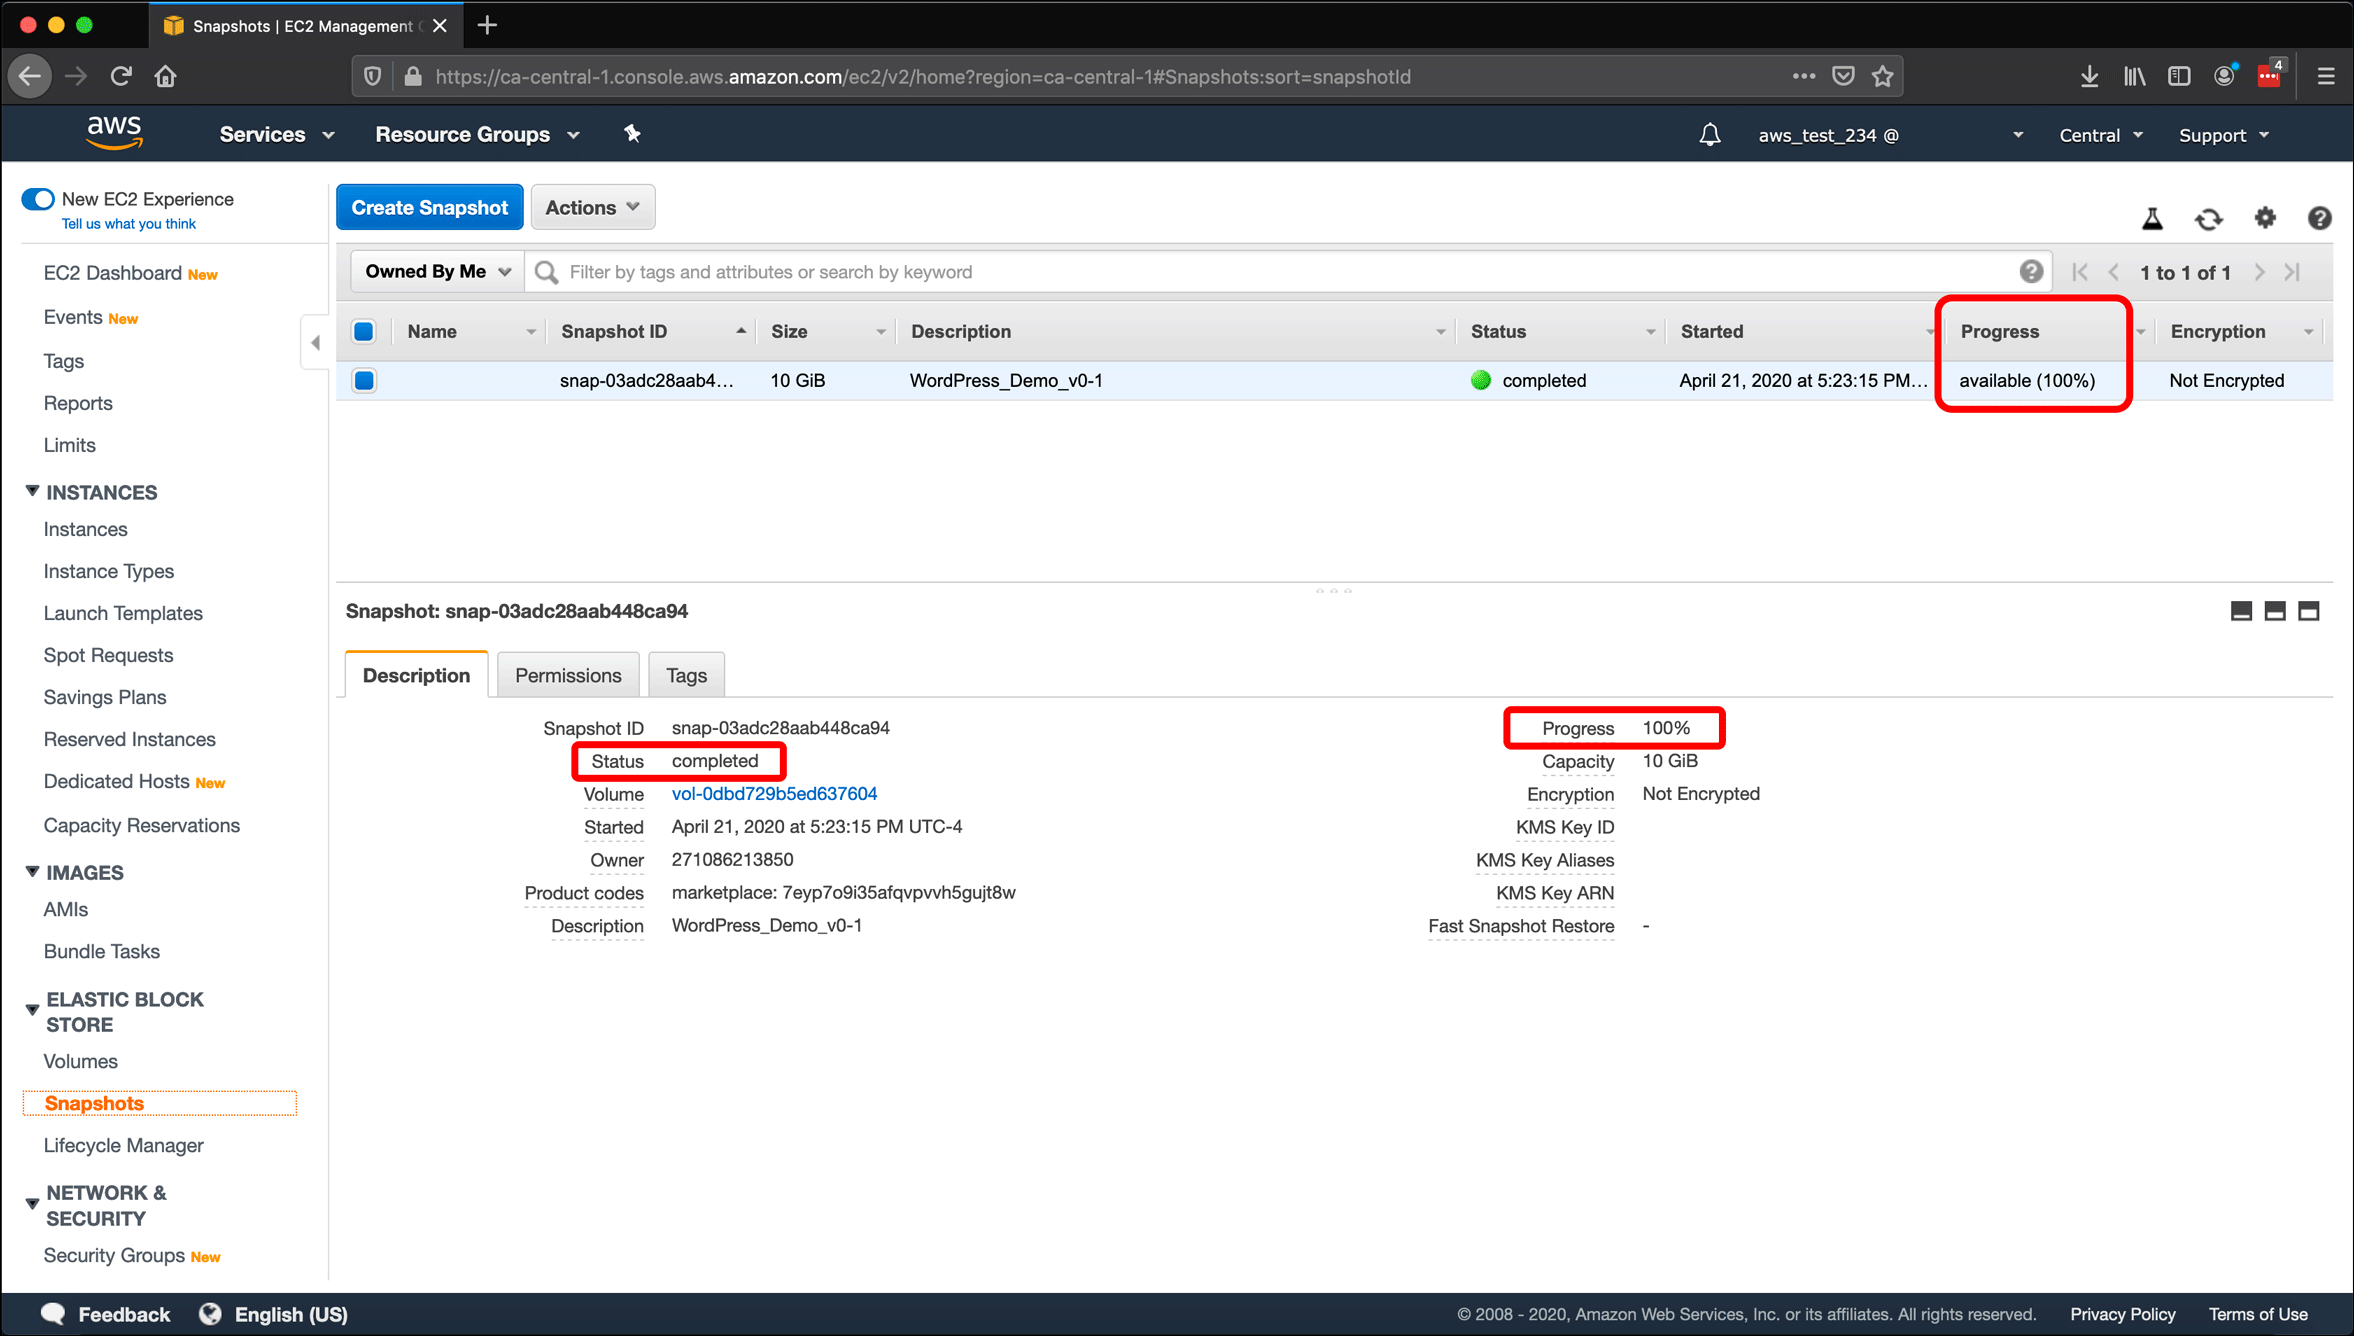
- The Snapshots screen looks a lot like the screens for instances and volumes. And like instances and volumes, AWS assigns a unique identifier: a Snapshot ID which appears in the list and under the Description tab.

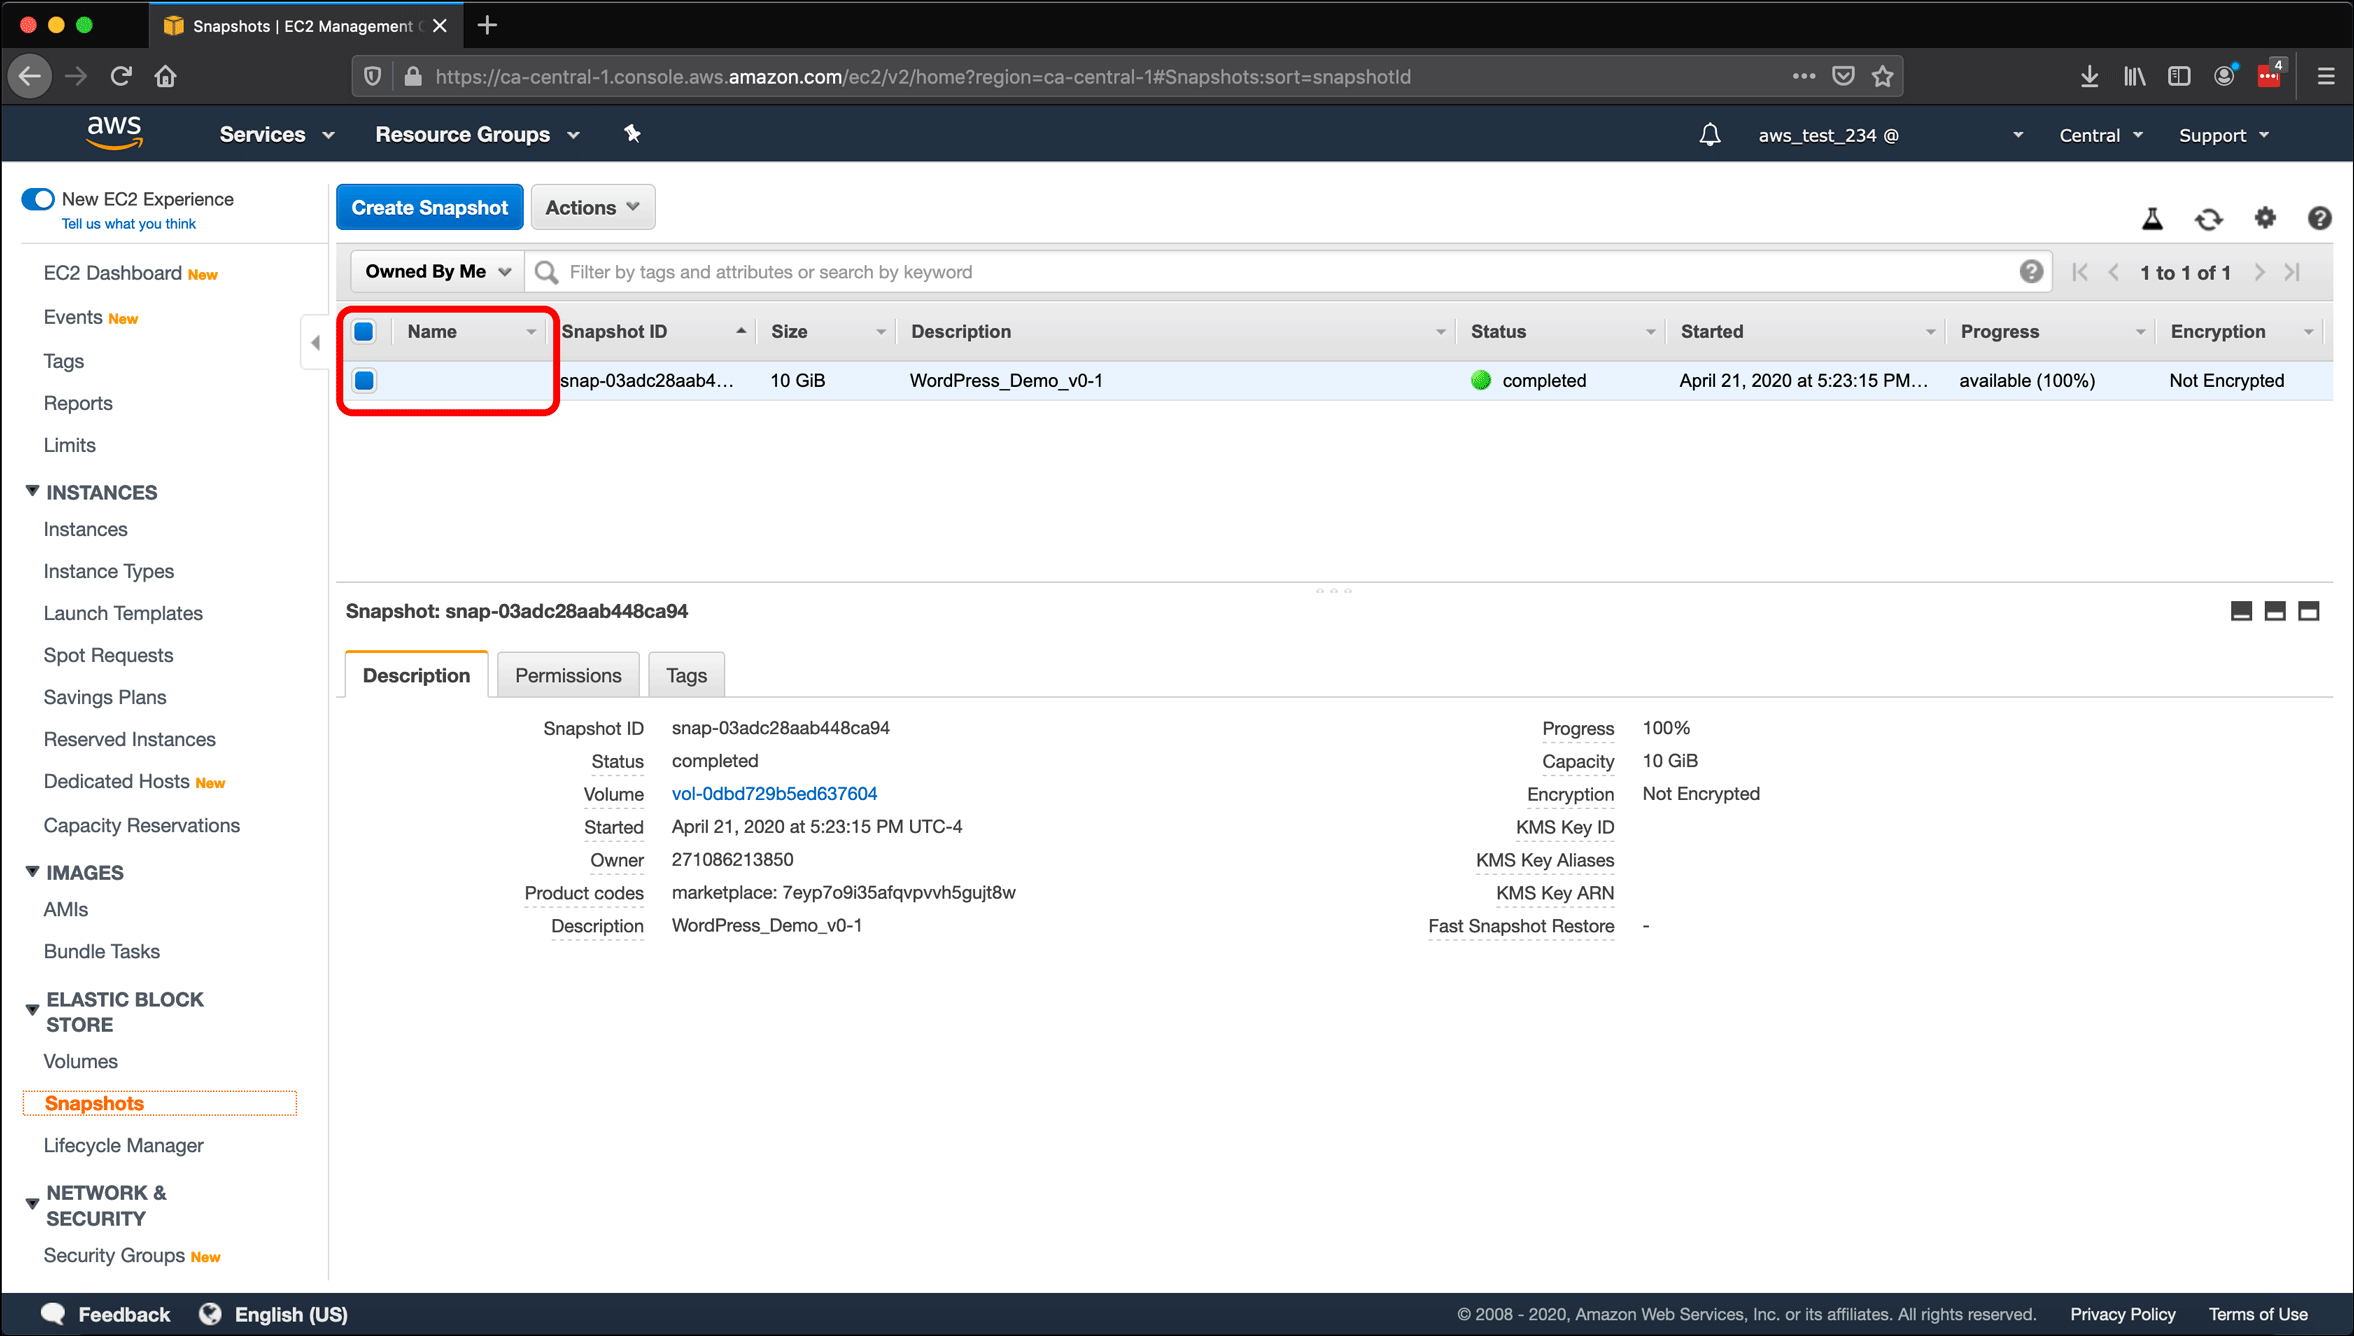
- There was no opportunity add a Name tag to the snapshot when creating it, so do that now. Hover over the Name column with your cursor and click the pencil icon that appears.
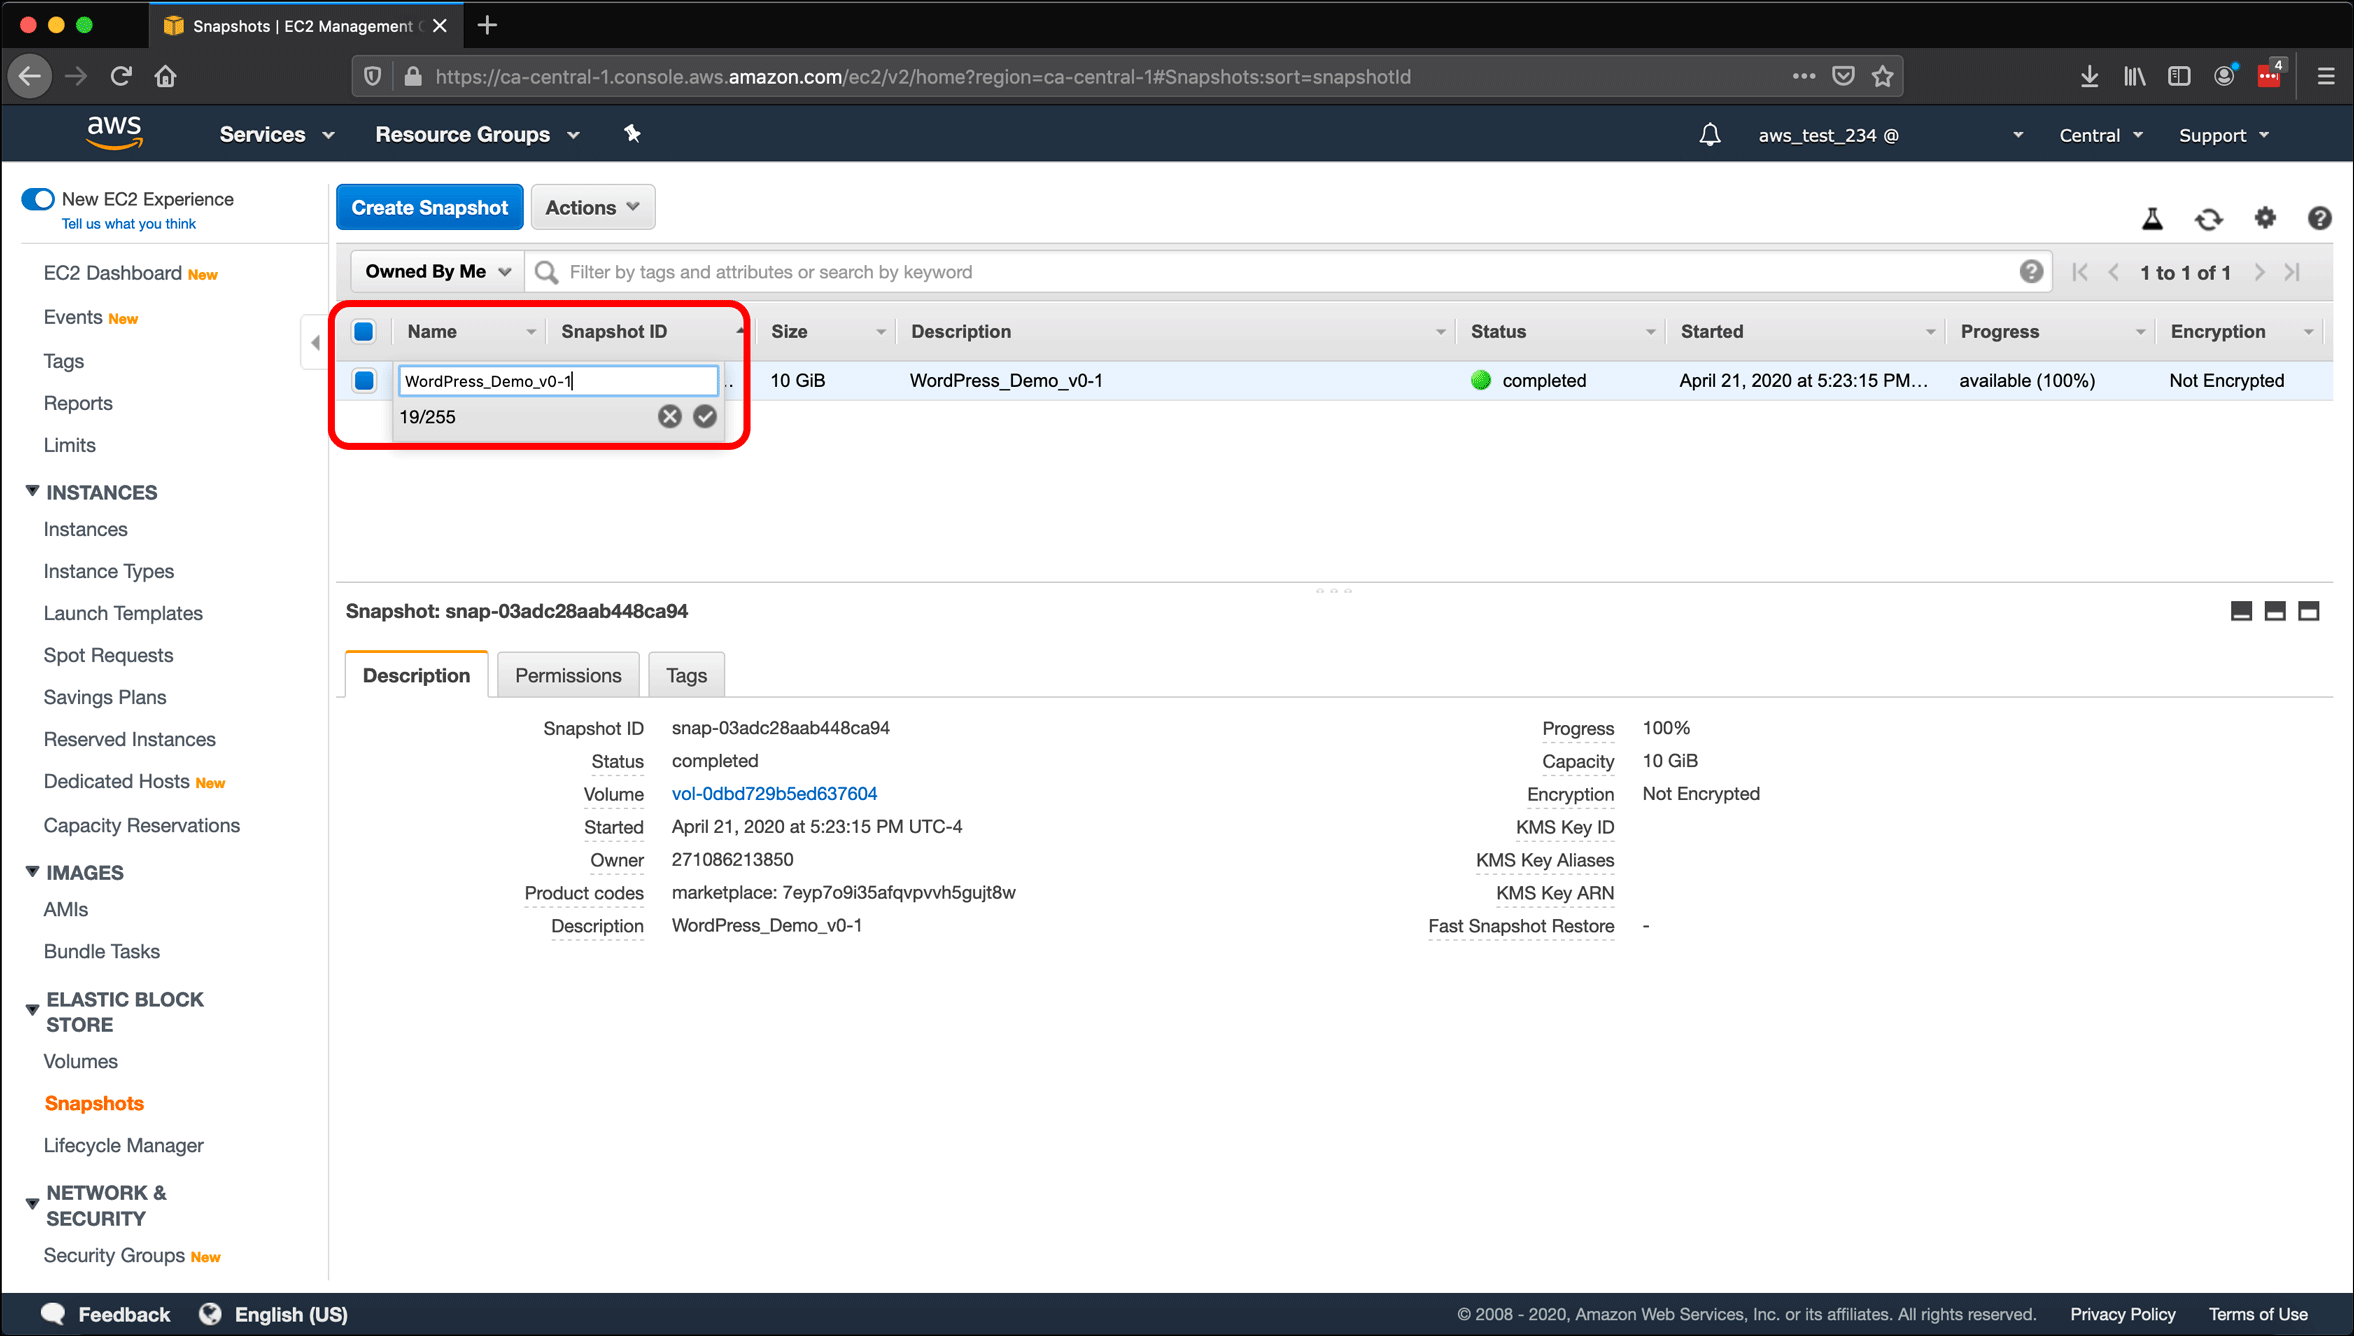
- Enter a Name for your snapshot, and click the check icon to save it. (I used the same value that I used in the Description field, which is the same as the name for the instance and volume, but I add a suffix that indicates a version.)
- The new Name for your snapshot appears in the Name column and above the Description tab, where the volume is identified with Snapshot: <Snapshot ID> (<The Name value you provided>).